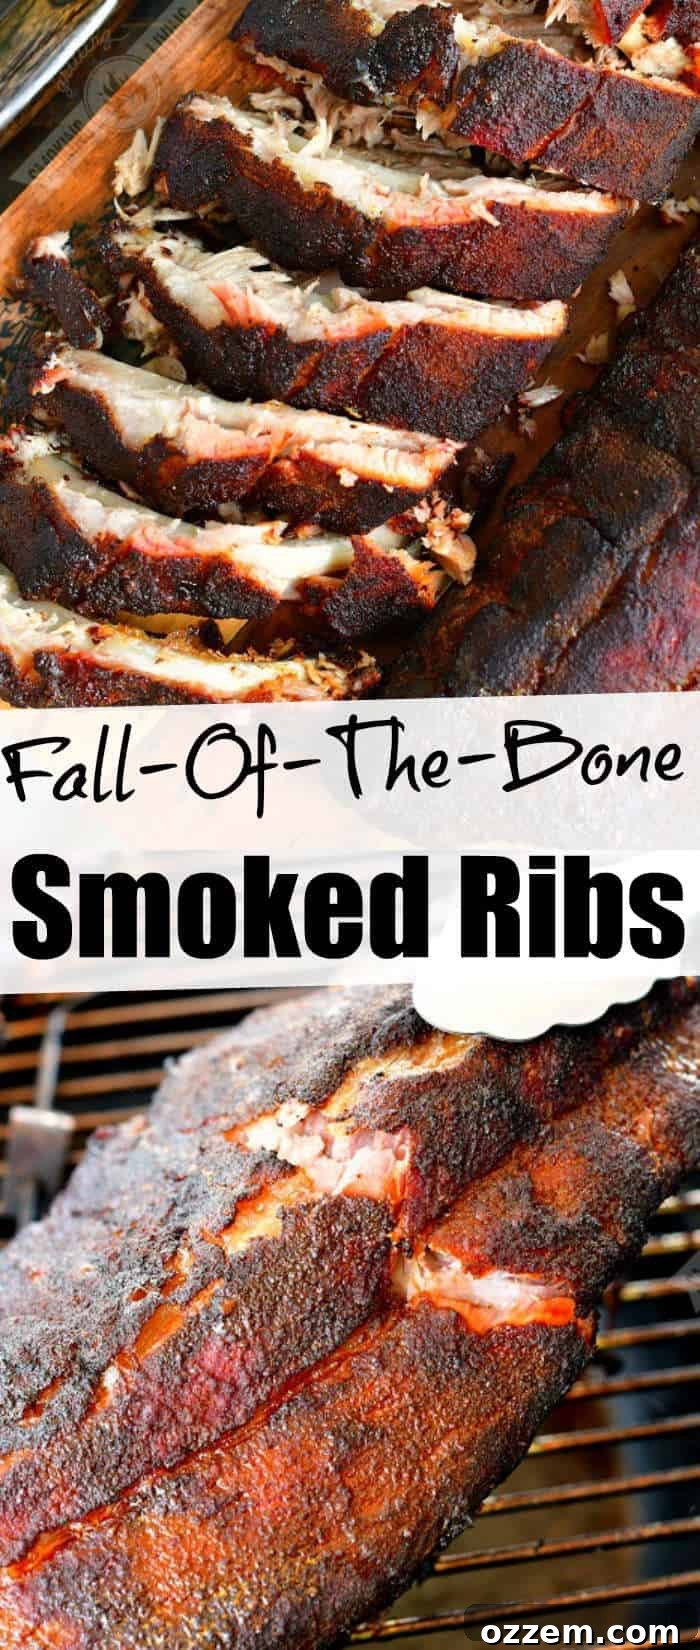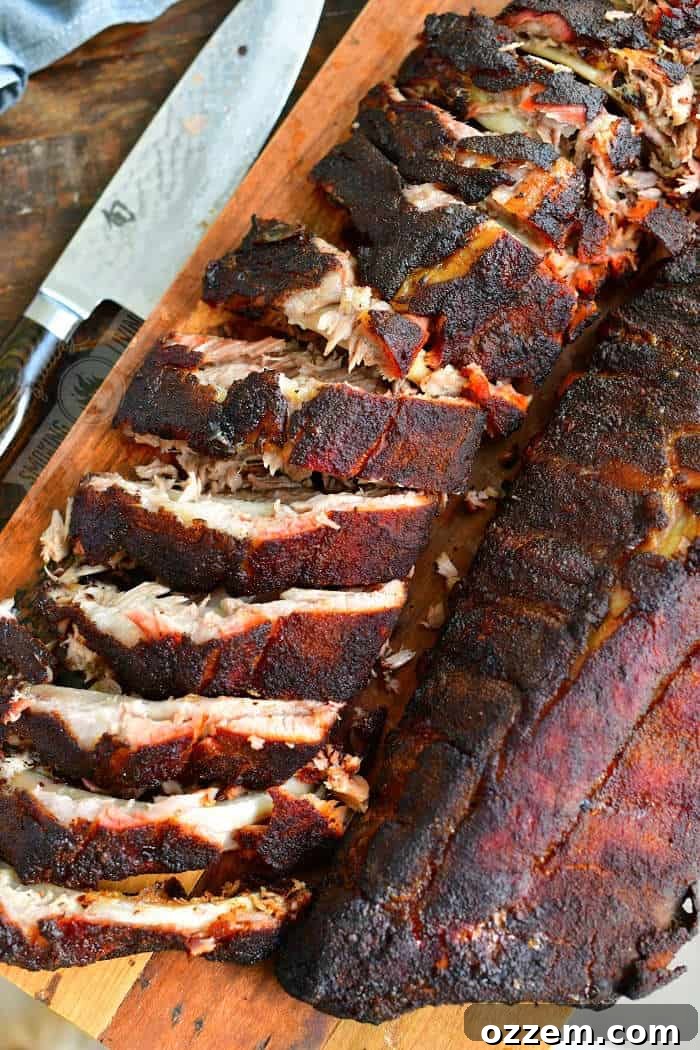
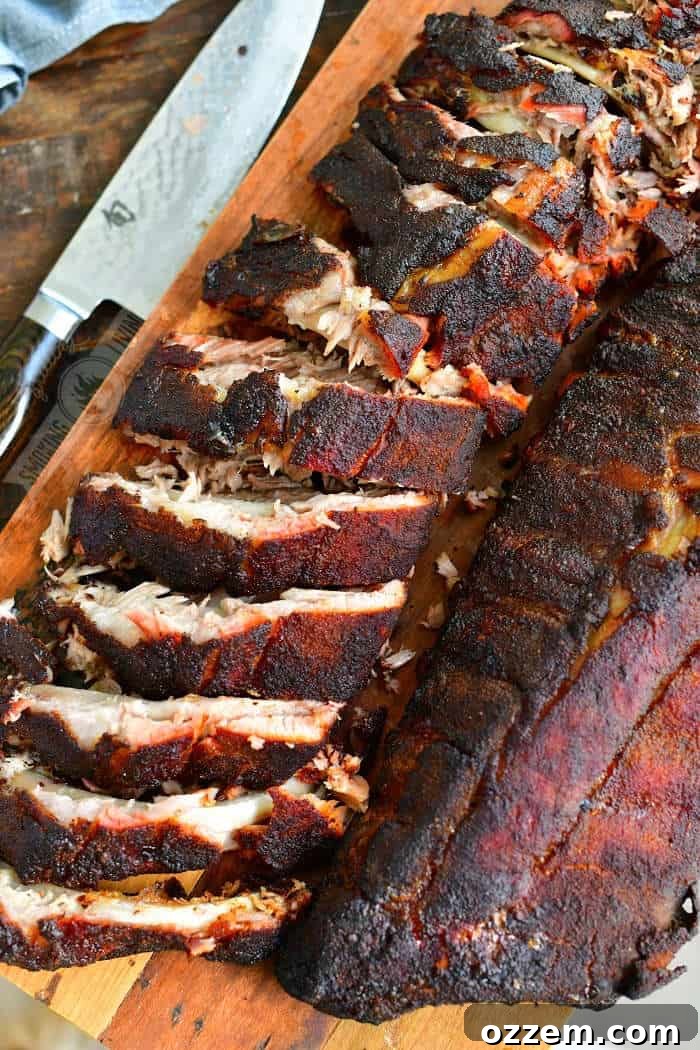
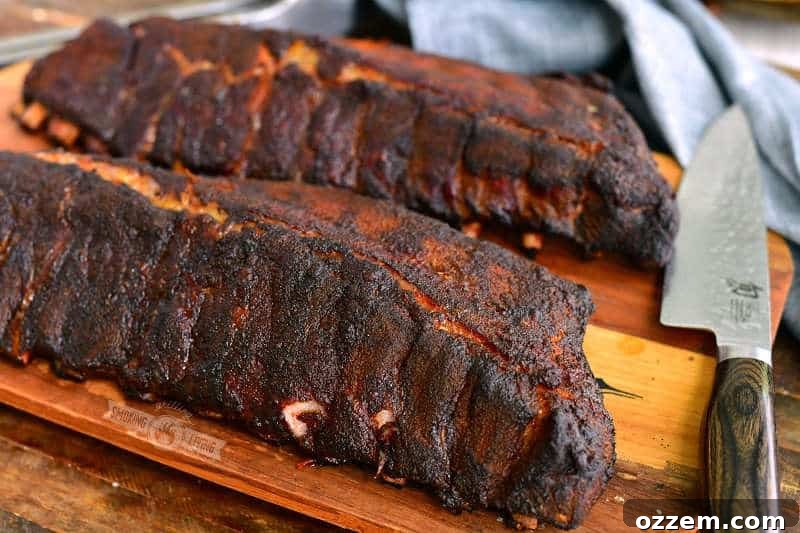
Welcome to the ultimate guide for smoking the most delicious baby back ribs imaginable! Imagine ribs so tender they practically fall off the bone, bursting with incredible flavor, and adorned with that perfect smoky bark. After years of perfecting our craft at smokehouse restaurants and countless backyard barbecues, we’ve honed the techniques for achieving barbecue bliss. Get ready to impress everyone with these succulent, flavor-infused smoked ribs, made even more special with our signature dry rub.
Master the Art of Smoked Baby Back Ribs: Achieve “Fall-Off-The-Bone” Perfection
There’s a universal joy that comes with serving a rack of ribs so exquisitely smoked that you hear exclamations of “Wow, these ribs are incredible, they just melt in your mouth!” This is the ultimate compliment for any pitmaster, whether you’re serving patrons at a bustling smokehouse or guests at your family’s barbecue. Everyone craves that deeply flavored, incredibly tender, and perfectly cooked rib.
To truly satisfy a crowd, you need to deliver ribs that are not just good, but unforgettable. This means juicy, succulent meat, a beautiful and savory bark, and that hallmark tenderness where the meat easily separates from the bone. Achieving this level of perfection requires a blend of quality ingredients, precise technique, and a lot of patience. We’ve spent years experimenting, learning from both our triumphs and our missteps, to master the art of smoked ribs. Now, we’re excited to share our perfected approach, ensuring your next rack of baby back ribs will be the talk of the town.
Key Smoker Notes for Flawless Ribs
Before diving into the detailed steps, let’s review some critical parameters for smoking exceptional ribs:
- Smoker Temperature: Aim for a consistent 225°F (107°C). If using a charcoal or wood smoker, strive to keep the temperature within a narrow range, ideally between 225°F and 250°F (107°C-121°C). Stability is key for even cooking and optimal smoke penetration.
- Best Wood Types for Smoking Pork: Fruit woods are generally excellent companions for pork, imparting a subtle sweetness. Consider apple, pecan, maple, or cherry for a delicious, mild smoke flavor. For those who prefer a more robust smoky profile, hickory or mesquite can be fantastic choices, but use them sparingly to avoid overpowering the delicate pork flavor.
- Estimated Smoking Time: The duration can vary based on the size and thickness of your rib racks, but typically expect your ribs to smoke for 6-8 hours. Patience is a virtue in barbecue!
- Determining Doneness: Forget the meat thermometer for ribs; the “bounce test” is your best friend. This technique, which we’ll detail below, helps assess the meat’s tenderness and how easily it yields, indicating true readiness.
Selecting the Perfect Rack of Ribs
The foundation of great smoked ribs begins at the butcher shop. Choosing the right rack is crucial for consistent results and an enjoyable eating experience.
- Even Thickness: Look for a rack of baby back ribs that has a relatively even amount of meat across its entire length. If one side is significantly thicker than the other, it will cook unevenly, leading to some parts being overcooked and dry while others are still tough.
- Good Marbling: While baby back ribs are leaner than spare ribs, a good rack will still show some fine streaks of fat (marbling) within the meat. This fat renders down during the long smoking process, contributing to moisture and flavor.
- Consistent Size (for multiple racks): If you’re smoking several racks at once, try to select them all roughly the same size and weight. This ensures they cook at a similar rate, allowing you to pull them all off the smoker at their peak of perfection.
- Freshness: Always choose ribs that look fresh, with a vibrant pink color, and no off-putting odors.
Preparing Your Ribs for the Smoker
Proper preparation is a vital step often overlooked, but it makes all the difference in the final product. Investing a little time here will pay dividends in tenderness and flavor.
The Crucial Step: Removing the Membrane
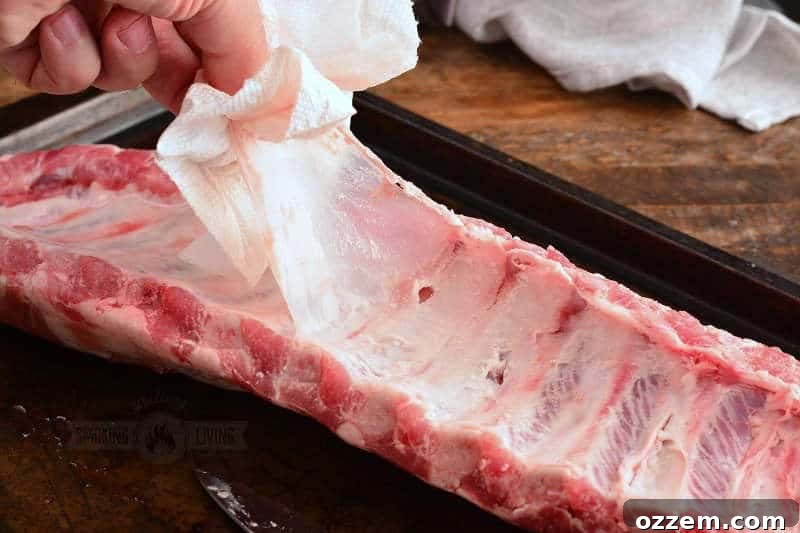
Some butchers might remove the tough, silvery membrane from the back of the ribs before selling them, but more often than not, this task falls to you. It’s imperative not to skip this step. Leaving the membrane on will result in a chewy, unpleasant texture, making it difficult for smoke and seasonings to penetrate the meat effectively.
Here’s how to remove it:
- Locate the Membrane: Turn the ribs over so the bone side is facing up. You’ll see a thin, pearly white layer covering the bones along the entire rack.
- Start Loosening: Using a small, sharp knife (a butter knife can even work), carefully slide it under the membrane at one end of the rack. Aim to get just under the membrane, separating it from the bone without cutting into the meat. The easiest spot is usually right over a bone.
- Get a Grip: Once you have a small section lifted, grab it firmly with a paper towel. The paper towel provides excellent grip, preventing your fingers from slipping on the slick membrane.
- Pull it Off: Gently but firmly pull the membrane completely off the rack in one continuous motion. Most of the time, it will come off smoothly and easily. If it tears, simply repeat the process from where it broke off.
Trimming for Optimal Results
After membrane removal, a quick trim can enhance your ribs further.
- Excess Fat: Look for any large, thick pockets of fat on either side of the ribs. While some fat is good for flavor, too much won’t render properly and can become greasy. Trim these down to about 1/4 inch thickness.
- Loose Flaps: Remove any thin, dangling pieces of meat or fat. These can burn during the long smoke, creating bitter flavors.
- Squaring Up: You can slightly “square up” the ends of the rack if they are very uneven, but this is largely for presentation.
Seasoning with Our Signature Dry Rub
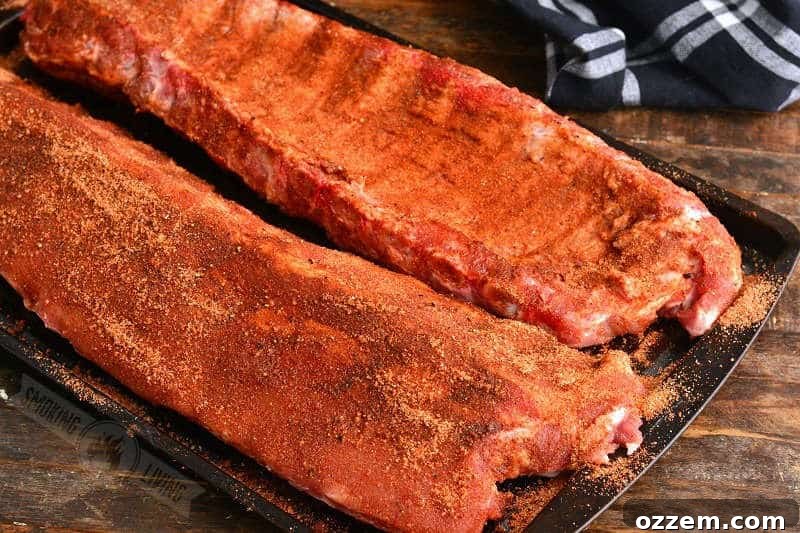
Our signature dry rub is the heart of these ribs’ flavor profile. For the most profound flavor penetration, we highly recommend seasoning your ribs the night before you plan to smoke them. This allows the rub to work its magic, drawing out moisture and creating a flavorful crust.
To prepare ahead:
- Mix the Rub: In a bowl, combine all the ingredients for your chosen dry rub.
- Apply Generously: Pat the ribs dry with paper towels. Then, generously sprinkle the dry rub over both sides of the rib rack, ensuring an even, opaque layer that completely covers the meat. Don’t be shy; the rub creates that incredible bark!
- Pat It In: Gently pat the seasoning into the meat with your hands to help it adhere.
- Refrigerate Overnight: Place the seasoned ribs on a sheet tray, cover tightly with plastic wrap to prevent them from drying out, and refrigerate overnight (8-12 hours).
If you forget or don’t have time for overnight seasoning, don’t worry! Seasoning the ribs at least an hour before they go into the smoker will still yield fantastic results. This gives the rub enough time to start dissolving and adhering to the meat while you prepare your smoker.
For more details on our signature dry rub, including the full recipe, check out our sister site. (The recipe is also provided in the recipe card below.)
How to Achieve Perfectly Smoked Ribs
Now for the main event: the smoking process. This is where patience and consistent temperature control transform good ribs into legendary ones.
Setting Up Your Smoker for Optimal Results
- Preheat: Set up your smoker and preheat it to a steady 225°F (107°C).
- Water Pan is Key: We highly recommend including a water pan or a combination water/drip pan in your smoker. This adds moisture to the cooking environment, which helps keep the ribs from drying out, and also aids in temperature regulation, making your smoker more stable.
- Accurate Temperature Monitoring: Do not rely on the thermometer built into your smoker’s lid. These are notoriously inaccurate, often off by 20 degrees or more. Always use a high-quality digital oven thermometer with a probe placed directly on the grill grate, next to your ribs. This provides a precise reading of the temperature where your food is actually cooking. (This is the thermometer we use for consistent results.)
Choosing the Right Smoking Wood
The type of wood you use will greatly influence the final flavor of your smoked ribs. Experiment to find your favorite!
- Fruit Woods (Apple, Cherry, Pecan, Maple): These woods provide a milder, sweeter smoke flavor that complements pork beautifully without being overpowering. Ideal for those who prefer a more delicate smoky note.
- Hardwoods (Hickory, Mesquite, Oak): For a bolder, more traditional BBQ flavor, hardwoods are excellent. Hickory offers a strong, bacon-like aroma, while mesquite provides an intense, earthy flavor. Oak is a versatile choice, offering a medium-strong smoke profile. If using these stronger woods, start with a smaller amount and add more as desired.
The Low and Slow Smoking Process
Once your smoker is at a stable 225°F and producing clean, blue smoke (not thick white smoke), it’s time to add the ribs.
- Place Ribs: Carefully place the seasoned rib racks directly on the smoker grate, ensuring there is some space between them for airflow. Close the lid promptly to maintain temperature.
- Smoke Duration: Smoke the ribs for 5-7 hours. The exact time will depend on the thickness of the ribs, the consistency of your smoker’s temperature, and whether you stack them. Larger, meatier racks may take a bit longer. If you use a rib holder and stack more than two racks, expect to add an extra 1-2 hours to the cooking time to ensure they all cook thoroughly.
The Ultimate “Bounce Test” for Doneness
Because ribs have relatively little meat compared to bone, a digital meat thermometer isn’t the most reliable way to gauge doneness. Our tried-and-true method is the “bounce test”:
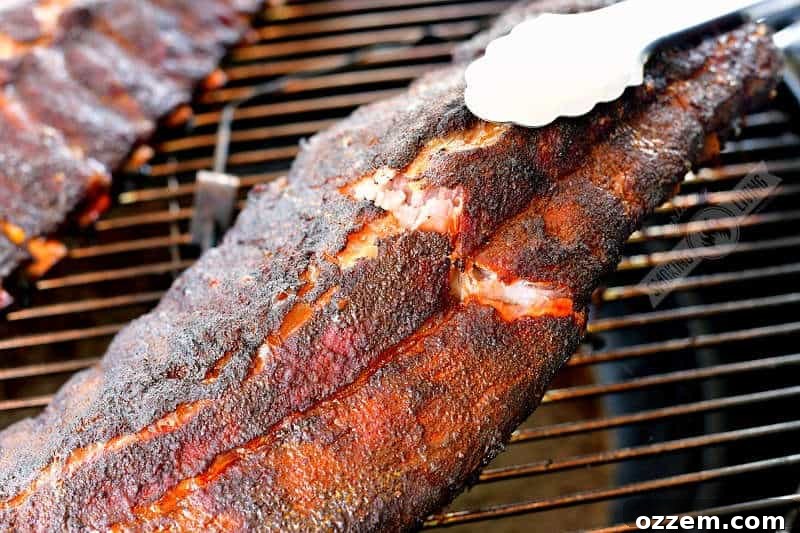
- Lift Gently: Using long metal tongs, carefully lift the rib rack off the grate. Hold it only about one-third to half of the way up the rack.
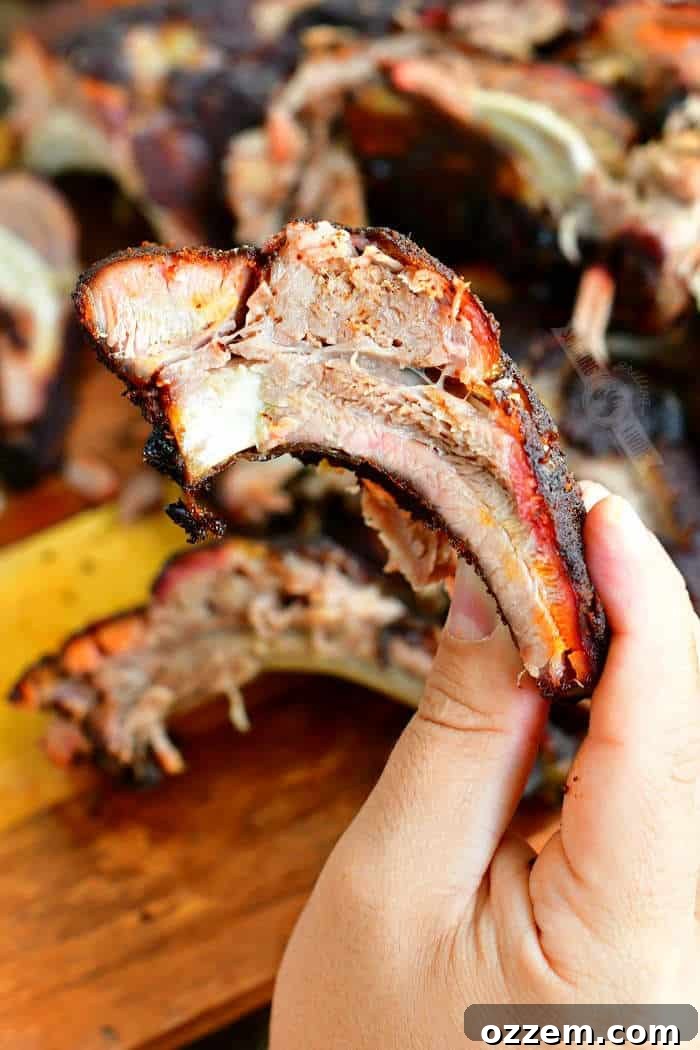
- Observe the Bend: Gently bounce the rack a couple of times. Observe how easily the meat cracks and bends at the point where you’re holding it. (Refer to the picture below for a visual reference.)
- What to Look For:
- Ready Ribs: If the meat cracks easily and immediately, creating a noticeable break or bend, your ribs are perfectly done and ready to come off the smoker.
- Needs More Time: If the meat feels rigid or rubbery when bounced, and doesn’t crack easily, it needs at least another hour of smoking.
After a few smoking sessions, this “feel” will become intuitive, making it easier to tell when your ribs have reached that ideal, tender texture.
Spritzing for Enhanced Moisture and Bark
To further enhance moisture and develop a beautiful bark, consider spritzing your ribs during the smoking process. This technique involves lightly spraying the ribs with a liquid, typically every 45-60 minutes after the first 2-3 hours of smoking.
- What to Use: Popular spritzing liquids include apple cider vinegar, apple juice, beer, or a mixture of water and Worcestershire sauce.
- Benefits: Spritzing keeps the surface of the ribs moist, preventing them from drying out, and helps in the formation of a rich, flavorful bark.
- Application: Use a clean spray bottle. Open the smoker lid quickly, spritz both sides of the ribs evenly, and close the lid immediately to minimize heat loss.
To Sauce or Not to Sauce: A BBQ Dilemma
The addition of BBQ sauce is a deeply personal preference in the world of smoked meats. There are two main schools of thought:
- Pure Dry Rub Enthusiasts: Many purists prefer to enjoy their smoked ribs solely with the dry rub, appreciating the development of a flavorful bark and the unmasked taste of the smoked pork. They often feel that sauce can overwhelm the nuanced smoke and rub flavors.
- BBQ Sauce Lovers: Others adore the tangy, sweet, or spicy kick that a good BBQ sauce adds. It can complement the richness of the pork and introduce another layer of complexity.
Our recommendation? Try both ways and see what you like best! If you decide to add sauce, the timing is crucial. Glaze your ribs with your favorite BBQ sauce during the last hour of smoking. Apply a thin, even layer, close the lid, and allow the sauce to caramelize and set. Remember to open the smoker lid as little as possible to retain heat, especially when using wood or charcoal smokers.
Why We Don’t Wrap Our Ribs (The Unwrapped Advantage)
You might have heard of the “Texas Crutch,” which involves wrapping ribs in foil partway through the smoking process to tenderize them faster. While this method has its advocates, through extensive testing, we’ve consistently found that unwrapped ribs yield a superior texture.
- Enhanced Bark Development: Wrapping ribs in foil essentially steams them. While this can tenderize quickly, it often sacrifices the prized crispy, flavorful bark that develops from continuous exposure to smoke and heat. Unwrapped ribs allow for the unimpeded formation of that rich, dark crust.
- Better Texture: Our side-by-side comparisons revealed that unwrapped ribs have a slightly firmer, more desirable texture. Wrapped ribs, if cooked too long in the foil, can sometimes turn mushy or fall apart excessively, losing that satisfying bite.
- Fuller Smoke Flavor: Keeping the ribs unwrapped maximizes their exposure to the smoke, allowing for deeper flavor penetration and a more pronounced smoky profile throughout the meat.
- Dry Rub Preservation: Wrapping can also cause some of the dry rub to wash off or become softened, diminishing its impact. Unwrapped ribs allow the rub to adhere and develop fully into the bark.
While the difference might seem minor to some, for true barbecue aficionados, the nuanced improvement in texture and bark on unwrapped ribs is significant. This is why we stick to the unwrapped method for our best smoked ribs.
The Art of Resting and Slicing Smoked Ribs
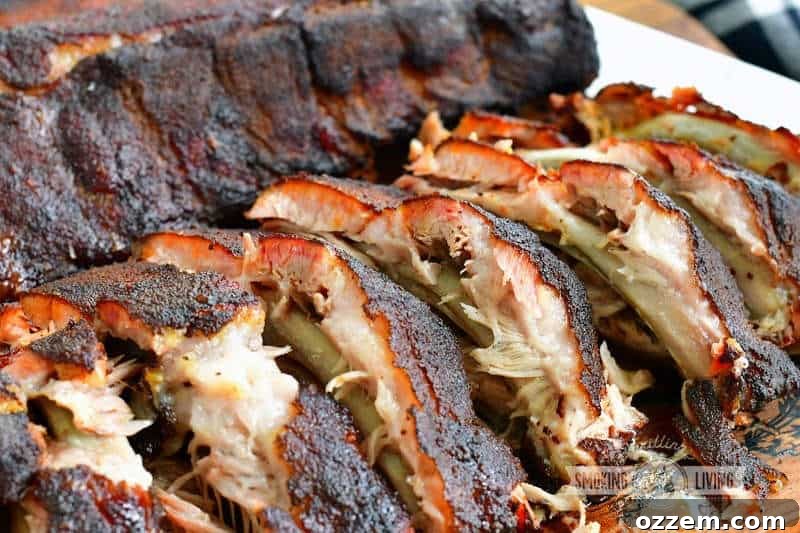
Just like any other large cut of smoked meat, ribs benefit greatly from a resting period after coming off the smoker. This allows the juices within the meat to redistribute, resulting in a more tender and moist final product.
- Resting: Once your ribs pass the bounce test, remove them from the smoker. You can loosely tent them with foil, but avoid wrapping tightly if you want to preserve the bark. Let them rest on a cutting board for at least 15-20 minutes. This is a crucial step for maximum juiciness.
- Slicing: After resting, place the rack bone-side up on your cutting board. Using a sharp knife, slice between the bones to separate individual ribs. Serve immediately and watch them disappear!
Reheating Leftover Smoked Ribs
It’s a fact of life that reheated ribs won’t quite match the fresh-off-the-smoker taste, but with the right method, you can still enjoy delicious leftovers.
The oven is your best bet for reheating ribs, as it allows for gentle, even heating without drying them out.
- Preheat Oven: Set your oven to a low temperature, around 250°F (120°C).
- Prepare Ribs: Wrap your leftover ribs (or even a whole rack) tightly in aluminum foil. This helps trap moisture.
- Low and Slow Reheat: Place the foil-wrapped ribs in a baking pan and reheat in the preheated oven. The goal is to warm them through slowly to preserve their moisture and tenderness.
- Check for Warmth: Reheat until the ribs are hot throughout. Depending on the quantity and size of the ribs, this could take anywhere from 20 to 45 minutes. Avoid overheating, as this will dry them out.
Expand Your Smoking Skills: More Delicious Recipes
Loved smoking these ribs? Dive into more amazing smoked recipes from our collection and take your barbecue game to the next level!
- Whole Smoked Chicken
- Smoked Chicken Drumsticks
- Smoked Pork Shoulder
- Smoked Sausage
If you’ve tried any of our recipes and shared them on Instagram, please tag us @grillingsmokingliving and use #grillingsmokingliving so we can see your amazing creations!
Connect with Grilling Smoking Living!
Be sure to click below and follow us on social media so you never miss a recipe.
PIN THIS RECIPE
Smoked Ribs
Print Recipe
Pin Recipe
Ingredients
- 2 racks of baby back ribs
Dry Rub:
- 4 tbsp dark brown sugar (or brown sugar)
- 4 tbsp smoked paprika (or regular paprika)
- 2 tbsp coarse salt
- 1 tbsp freshly cracked black pepper
- 2 tsp garlic powder
- 2 tsp onion powder
- 1 tsp cumin
- 1 tsp ground coriander
- 1/2-1 tsp cayenne pepper
Instructions
Taking Off The Membrane:
-
Turn the ribs over onto its back and you will see a thin white covering on the bones all along the rack. Starting at one end, use a small knife to slide right under the membrane and gently pull up, but don’t cut it. The easiest spot to get under the membrane is right on the bone and not on the meat.
-
Grab the membrane with a paper towel. (Paper towel will give you a nice grip so you can hold onto it as you pull.) Gently but firmly pull the membrane off the entire rib.
Seasoning:
-
You can clean and season the ribs the night before or about an hour before smoking. If you will season the night before, make sure to place them on a metal rimmed tray and cover with plastic wrap air-tight. (Keep in refrigerator if holding them overnight.)
(It’s good to prepare the ribs the night before if you need to get them on the smoker bright and early the next day. Just take them out of the refrigerator before preparing the smoker.)
-
Mix all ingredients for the rub together in a bowl. Pat ribs on all sides with a paper towel.
-
Generously sprinkle the rub in an even layer over both sides of the rib so the meat is not showing. Gently pat and even out the seasoning with your hands. Let ribs sit while preparing the smoker.
Smoking The Ribs:
-
Set up your smoker and preheat it to 225°. I highly recommend including a water pan or water/drip pan to the smoker. Use a digital oven thermometer to track the temperature on the grill grate. Don’t rely on the thermometer built into the lid of the smoker, they are always at least 20 degrees off.
-
(If using wood or charcoal smoker, maintain the temperature right around 225° but don’t let it get below 225° or over 250°)
-
When the smoker temperature is at 225°, place ribs on the grate and close the lid.
-
Smoke ribs for 5-7 hours, depending on their size. (Large, meaty racks could take a little longer and if you stack more than 2 racks in a rib holder, expect to add at least 1 more hour.)
How To Tell When Ribs Are Ready:
-
Use long metal tongues to gently lift the rib rack off the grate but hold it only about 1/3 -1/2 of the way up the rack. Give it a gentle bounce to see how easily the meat cracks. (See picture in the post.)
If it cracks easily and right away, the ribs are ready. If the meat is having a bit of a hard time cracking and feels rubbery when bouncing, the ribs need at least another hour.
If You Want To Add Sauce:
-
If you plan to add the sauce, glaze ribs with BBQ sauce an hour before they are ready. Remember to keep the lid of the smoker open as little as possible so you don’t let the heat out. This is especially important for wood and charcoal smokers.
Video
Notes
Nutrition