
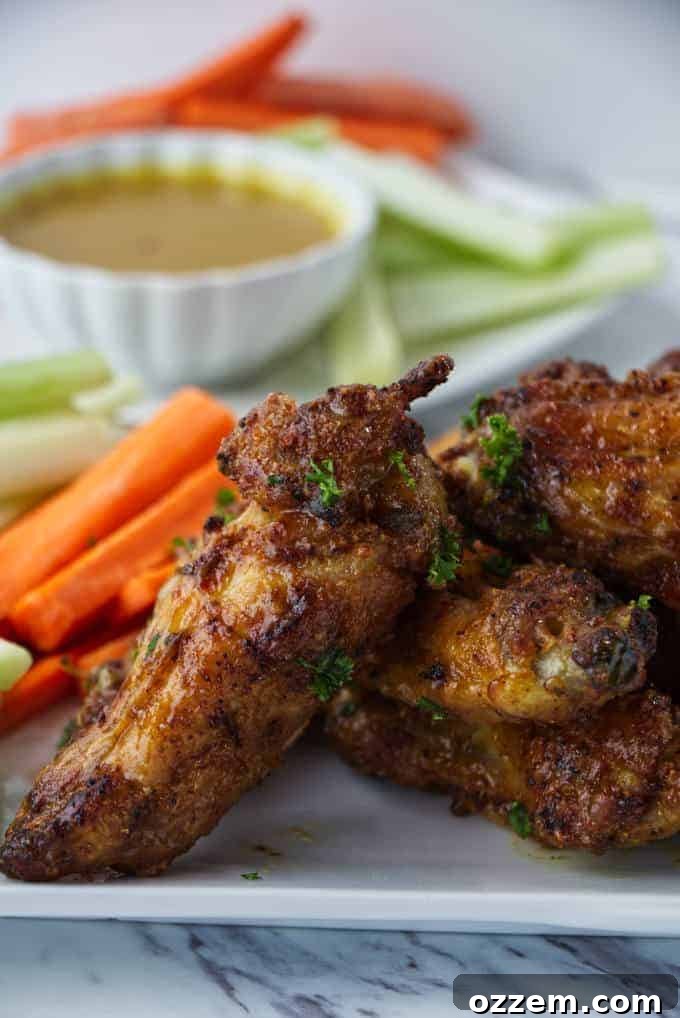
Welcome to the ultimate guide for crafting the most tantalizing and crispy chicken wings you’ve ever tasted, all thanks to the magic of your air fryer. Forget waiting for Wing Wednesday; these incredible honey mustard chicken wings are a revelation any day of the week, perfectly balancing a hint of spice with a delightful sweetness. The air fryer isn’t just a kitchen gadget; it’s your secret weapon for achieving consistently crispy, juicy wings without the hassle or the risk of overcooking. Say goodbye to soggy wings and hello to restaurant-quality crunch right from your countertop. Even when culinary inspiration is low, this simple method ensures a delicious meal with minimal effort. Get ready to unlock the secrets to achieving that coveted, extra-crispy skin that everyone craves!
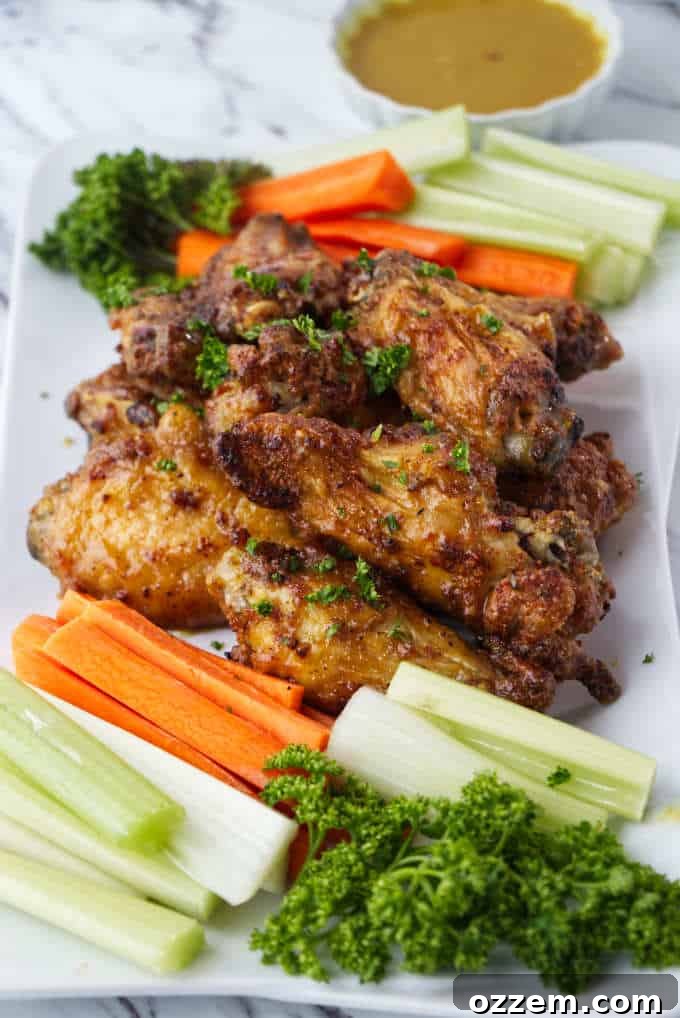
Perfectly Cooked Chicken Wings: Air Fryer Time and Temperature Guide
Achieving perfectly cooked chicken wings in an air fryer is remarkably quick and straightforward. For fresh, defrosted chicken wings, the process is efficient, yielding tender meat and wonderfully crispy skin. Begin by arranging your chicken wings in a single layer within the air fryer basket, ensuring ample space between each piece for optimal air circulation. Overcrowding the basket is a common mistake that leads to steamed, rather than crispy, wings. Set your air fryer to a high temperature of 400°F (200°C) – this intense heat is key to rendering fat and crisping the skin quickly.
Cook the wings for an initial 10 minutes. This first phase helps to kickstart the cooking process and begin to develop that desirable crispy exterior. After 10 minutes, carefully open the air fryer basket. Give the wings a good shake to redistribute them, or use tongs to individually flip each wing. This ensures even exposure to the circulating hot air, promoting uniform crisping on all sides. Return the basket to the air fryer and continue cooking for another 10 to 15 minutes, or until the wings reach your desired level of crispness and are cooked through. The internal temperature of chicken should reach 165°F (74°C) to be safe for consumption. You’ll notice the skin turn a beautiful golden brown and become delightfully crunchy. Always check for doneness by observing the color and texture, or by using a meat thermometer for absolute certainty.
The Secret to Unbelievably Crispy Chicken Skin
If you’re chasing that elusive, shatteringly crispy chicken skin, then baking powder is about to become your new best friend. It’s not a secret sauce, but rather a powerful, culinary powder that transforms ordinary chicken wings into extraordinary ones. Before introducing your chicken to the heat of the air fryer, a crucial step involves coating it thoroughly with a blend of your favorite spices and a generous amount of baking powder. But how does this seemingly simple ingredient work its magic?
The science behind baking powder’s crisping power lies in its alkaline properties. When baking powder (specifically aluminum-free baking powder) is applied to chicken skin, it raises the pH level on the surface. This alkaline environment helps to break down the peptide bonds in the chicken’s proteins more efficiently. As the chicken cooks, these broken-down proteins react more readily with the heat, accelerating the Maillard reaction – the chemical process responsible for browning and developing complex flavors and, most importantly, extreme crispiness. Furthermore, baking powder creates tiny air bubbles on the skin’s surface, which expand during cooking, resulting in a lighter, airier, and ultimately crisper texture than you might achieve with just spices alone. You won’t just achieve crispy skin; you’ll achieve an unprecedented level of golden-brown perfection.
For those truly dedicated to the art of crispy chicken, there’s an advanced technique that elevates the crunch factor even further: dry brining overnight. After coating your chicken wings in the baking powder and spice blend, arrange them uncovered on a wire rack set over a baking sheet. Place this entire setup in your refrigerator overnight. The open-air exposure in the cold environment draws out excess moisture from the chicken skin, allowing it to dry out significantly. This dehydration is critical because moisture is the enemy of crispiness. As the skin dries, it becomes thinner and more porous, creating the ideal surface for the air fryer to work its high-heat magic. When cooked, this super-dry skin will become incredibly light, airy, and visibly bubbly, providing a textural experience that is truly unmatched. This extra step requires a little planning, but the results are absolutely worth the anticipation.
Can You Achieve Crispy Chicken Wings in a Traditional Oven?
Absolutely, achieving deliciously crispy chicken wings is not exclusive to the air fryer. While an air fryer excels at quickly circulating hot air for maximum crunch, a conventional oven can deliver fantastic results too, especially with a few key techniques. The fundamental principles of crispiness – managing moisture and promoting even heat exposure – remain the same.
To succeed with oven-baked crispy wings, the baking powder method and overnight drying technique are even more crucial. You will definitely want to coat your chicken wings in baking powder as described above, and then allow them to sit uncovered on a wire rack over a baking sheet in the refrigerator overnight. This extended drying time is essential in an oven setting, as the air circulation isn’t as intense as an air fryer, making moisture removal a slower process. The dry skin, combined with the baking powder’s chemical reaction, ensures that the proteins break down effectively, leading to that coveted golden-brown, airy crunch. Additionally, always cook your wings on a wire rack. This elevates the wings, allowing hot air to circulate completely around them and preventing them from sitting in their own rendered juices, which would inevitably lead to a soggy bottom. Without a rack, the bottom of your wings would steam, undermining all your efforts for crispiness.
Once prepped, simply place your wings in a preheated oven at 400°F (200°C). While air fryers cook faster, the oven will take a bit longer, typically around 25 to 35 minutes. To ensure even crisping and cooking on all sides, be sure to flip the wings halfway through the cooking time. Keep an eye on them towards the end, as oven temperatures can vary. You’re looking for that deep golden-brown color and a visibly crispy texture, with an internal temperature of 165°F (74°C). With these steps, your oven-baked wings will rival any air-fried batch!
Elevate Your Wings: The Best Sauces for Air Fryer Chicken Wings
Once you’ve mastered the art of crispy air-fried chicken wings, the next step is to smother them in a fantastic sauce that complements their perfectly crunchy exterior and juicy interior. While our honey mustard sauce offers a delightful balance of sweet and tangy, the world of wing sauces is vast and exciting. Here are some of the best options to consider, each offering a unique flavor profile to elevate your wing experience:
- This delicious buffalo sauce from Savor the Best: A timeless classic, buffalo sauce delivers a spicy, tangy kick that’s incredibly addictive. Its vinegary heat is perfect for cutting through the richness of chicken wings.
- Sriracha sauce: For those who love a bold, garlic-chili punch, sriracha is an excellent choice. It offers a straightforward heat that’s wonderfully aromatic and pairs well with a squeeze of lime.
- Maple chipotle BBQ sauce: This sauce brings together the smoky depth of chipotle peppers with the sweet, caramelized notes of maple syrup, all within a rich barbecue base. It’s a sophisticated twist on traditional BBQ, offering warmth and complexity.
- This amazing pumpkin spice BBQ sauce from A License to Grill: An unconventional but surprisingly delicious choice, this sauce infuses the comforting flavors of pumpkin spice into a savory BBQ base. It’s unique, autumnal, and perfect for adventurous palates.
- Jerk: Transport your taste buds to the Caribbean with a vibrant jerk sauce. Characterized by its fiery heat from scotch bonnet peppers, aromatic spices like allspice and thyme, and often a touch of sweetness, jerk sauce offers an unforgettable flavor journey.
- Pineapple teriyaki: A sweet and savory delight, pineapple teriyaki combines the umami richness of soy sauce with the bright, tropical tang of pineapple. It’s a crowd-pleaser, offering a glaze that’s both sticky and incredibly flavorful.
Don’t be afraid to experiment with combinations or even create your own signature sauce. The beauty of crispy air fryer wings is their versatility; they’re a perfect canvas for almost any flavor you can dream up!
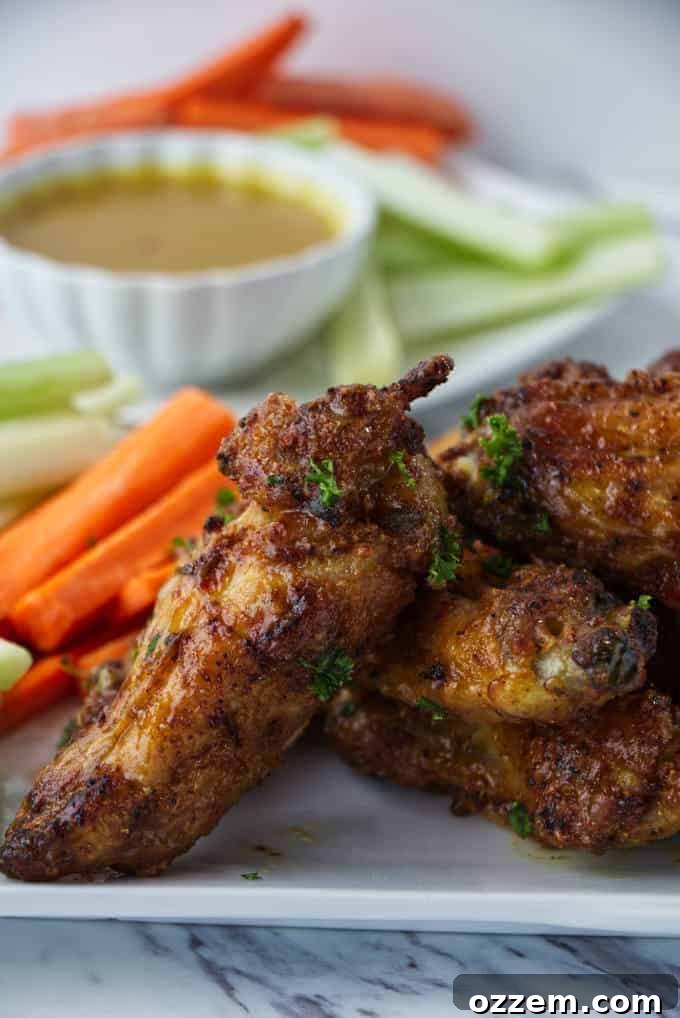
Mastering Your Air Fryer: Essential Tips and Tricks
The air fryer has revolutionized home cooking, offering a healthier and often faster alternative to deep frying and even traditional oven baking. To truly harness its potential and ensure consistently excellent results, understanding a few key tips and tricks is essential. These insights will help you avoid common pitfalls and elevate your air frying game, from preventing smoke to achieving perfect textures every time.
Troubleshooting: Why is My Air Fryer Smoking?
Encountering smoke from your air fryer can be startling, but it’s often a manageable issue, particularly when cooking foods high in fat. As fatty foods like bacon, sausages, or even chicken wings cook, their rendered fat can drip down onto the heating element at the bottom of the air fryer. When this fat burns, it produces white smoke. Don’t panic; this is usually not a sign of a malfunction, but rather an indication that some simple preventative measures can be taken.
One effective way to prevent smoking is to add a small amount of water to the bottom of the air fryer basket, beneath the removable rack. Just a couple of tablespoons can create a steam barrier that helps to prevent fat from burning on the heating coils. For exceptionally greasy foods, another ingenious trick is to place a slice of bread directly into the bottom of the outer basket, underneath the cooking rack. The bread will act like a sponge, soaking up the excess grease as it drips, thereby preventing it from reaching the heating element and smoking. Remember to remove and replace the bread between batches if you’re cooking a large quantity. Additionally, regular cleaning of your air fryer to remove accumulated grease and food particles will significantly reduce the chances of smoking during future use.
The Importance of Preheating for Even Cooking
While air fryers are renowned for their speed, many users overlook a crucial step that ensures superior results: preheating. Just like a conventional oven, allowing your air fryer to reach its target temperature before adding food is vital for even and thoroughly cooked dishes. Without preheating, your food begins cooking in a cool environment, which can lead to uneven results, longer cooking times, and a less crispy exterior, as the appliance spends the initial minutes simply trying to get hot.
Preheating ensures that when your food enters the basket, it’s immediately enveloped by consistent, high-temperature circulating air. This shock of immediate heat is particularly important for crisping the outside of foods like wings, fries, and vegetables, helping to seal in moisture and achieve that desired crunchy texture. Many modern air fryers come with a dedicated preheat setting. If your model lacks this feature, simply set the desired cooking temperature and let the air fryer run empty for 2 to 5 minutes. The exact time will depend on the size and power of your appliance; smaller air fryers generally require less time to come up to temperature. A preheated air fryer means faster, more consistent, and ultimately more delicious results.
Should You Use Oil in Your Air Fryer? Unpacking the Role of Fats
One of the appealing aspects of air frying is its ability to produce crispy food with significantly less oil than traditional frying methods. However, the question of whether to use oil in your air fryer isn’t a simple yes or no; it largely depends on the food you’re cooking and your desired outcome. I almost always use a light coating of oil, and for good reason.
Oil serves multiple beneficial purposes in the air fryer. Firstly, it helps seasonings and spices adhere beautifully to your food, ensuring every bite is flavorful. Secondly, and critically for texture, oil assists in the browning and crisping process, contributing to that desirable golden-brown exterior. It also acts as a non-stick agent, preventing your food from sticking to the air fryer basket, which can be particularly useful for delicate items or marinated meats. If you’re aiming for that extra crisp and robust flavor, a light spray or drizzle of a high smoke-point oil like avocado oil, grapeseed oil, or olive oil (for lower temperatures) is highly recommended.
However, there are instances where oil is unnecessary or even counterproductive. When cooking naturally high-fat foods, such as bacon, chicken wings (especially if coated with baking powder and dried), or certain cuts of meat, their own rendered fat provides enough lubrication and flavor to achieve crispiness without added oil. For those looking to minimize fat content, parchment paper liners designed for air fryers can be used to prevent sticking without any oil. Ultimately, using oil in your air fryer is a tool to enhance flavor, texture, and convenience, but it’s a flexible component that can be adjusted based on the specific recipe and your dietary preferences.
The Golden Rule: Leave Space in Your Air Fryer Basket
This tip is arguably one of the most crucial for successful air frying. Air fryers work by rapidly circulating superheated air around your food, mimicking the effects of deep frying. This hot air circulation is what creates that signature crispy exterior. If you overcrowd your air fryer basket, you impede this essential airflow. Instead of hot air evenly reaching all surfaces of your food, you create pockets where steam gets trapped, leading to a disappointing outcome where food is steamed rather than air-fried.
The consequence of overcrowding is food that is soft, soggy, and unevenly cooked, completely defeating the purpose of using an air fryer for crispiness. To ensure every piece of food gets maximum exposure to the circulating hot air, it is imperative to arrange items in a single layer with some space between them. Think of it as giving each piece its own personal hot air spa treatment. If you’re cooking a larger quantity, it’s always better to work in batches rather than cramming everything in at once. This patience will be rewarded with consistently crispy, perfectly cooked results that make every bite a delight. Remember: space it out, man, for the crispiest outcome!
Shake and Flip: Ensuring Even Cooking and Crispiness
Just as leaving adequate space in your air fryer basket is vital for achieving a good crisp, actively engaging with your food during the cooking process is equally important. Simply setting and forgetting your air fryer is a recipe for uneven results, with one side perfectly browned and crispy while the other remains pale and soft. The solution lies in periodically shaking the basket or flipping individual food items halfway through the cooking time.
The air fryer’s heating element is typically located at the top, and while the fan does circulate hot air, the direct exposure is not always perfectly uniform. Shaking the basket, especially for smaller items like fries, popcorn chicken, or smaller wings, allows them to tumble and redistribute, ensuring that all sides get a turn facing the primary heat source. For larger items like chicken breasts, fish fillets, or larger wings, manually flipping them with tongs ensures both sides receive even exposure to the circulating hot air. This simple action promotes uniform browning, even cooking, and ultimately, a consistent crispiness across the entire surface of your food. It’s a small effort that yields a significant difference in the quality of your air-fried meals.
Adapting Recipes for Air Fryer Success
Air fryers are incredibly efficient cooking appliances, often outperforming conventional ovens in speed and crisping ability due to their concentrated, circulating hot air—similar to a convection oven, but on a smaller, more intense scale. This efficiency means that if you’re converting a traditional oven recipe to an air fryer, direct translation of cooking times and temperatures will likely lead to overcooked food. To avoid this common mistake and achieve optimal results, a general rule of thumb for modification is incredibly helpful.
As a standard guideline, when adapting recipes, I always recommend reducing the cooking temperature by about 10% and shortening the cooking time by approximately 25%. For example, if an oven recipe calls for 400°F for 30 minutes, you might start with 360°F for around 22-23 minutes in your air fryer. However, these are starting points, and monitoring is key. Because air fryers vary in wattage and capacity, and foods differ in density and moisture content, it’s crucial to check your food’s progress throughout the cooking time. You might find that thinner items cook even faster, while denser items may need slightly more time. Always keep a close eye on your dish, especially during the latter half of the adjusted cooking time, to prevent burning and ensure perfect doneness. This adaptive approach will help you master your air fryer and successfully convert a wide array of recipes.
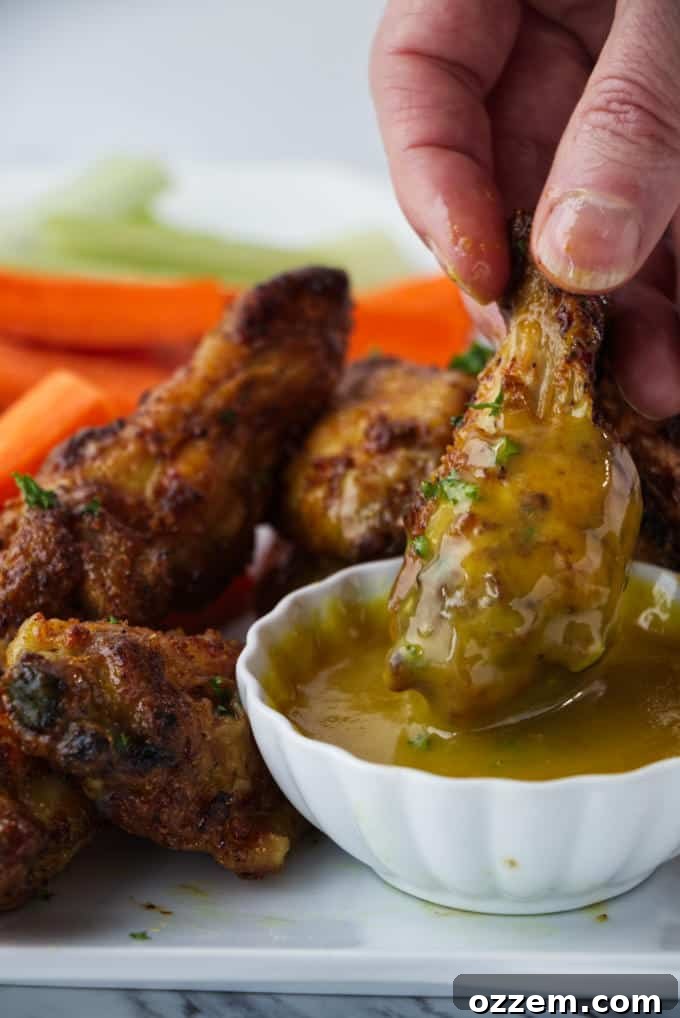
Armed with these comprehensive tips and the secret to ultra-crispy skin, you’re now ready to transform your kitchen into a wing paradise. These honey mustard air fryer chicken wings are more than just a meal; they’re an experience waiting to happen. So go ahead, whip up a batch, and savor the unbeatable combination of sweet, spicy, and perfectly crunchy. Every day truly can be Wing Wednesday!
CONNECT WITH A LICENSE TO GRILL!
Be sure to follow us on our social media accounts for more delicious recipes and grilling tips!
Did you make this recipe? Tell us about it in the comments below!
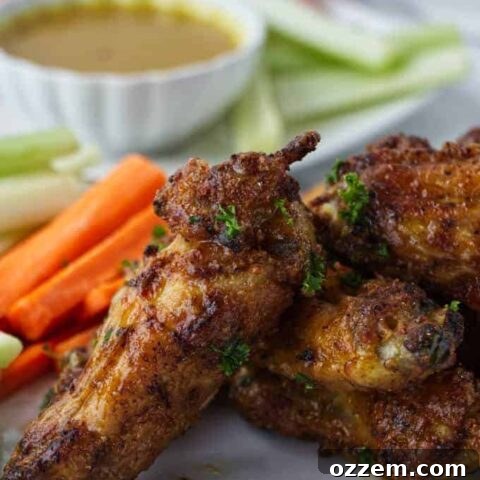
Air Fryer Honey Mustard Chicken Wings
4 Servings
5 minutes
20 minutes
25 minutes
Discover the magic of ultra-crispy air fryer chicken wings, perfected with a secret ingredient: baking powder! This simple addition to your spice rub guarantees a crunch you won’t believe. Easy to make and utterly delicious, these honey mustard wings will become your new go-to recipe. Every day feels like Wing Wednesday when you have an air fryer – so kick back, grab your favorite beverage, and get ready to devour the best wings you’ve ever made!
Ingredients
- 1-1/2 pounds chicken wings
- 1 tablespoon avocado oil
- 1 tablespoon baking powder
- 2 teaspoons onion powder
- 2 teaspoons garlic powder
- 1 teaspoon salt
- Honey mustard sauce (recipe below)
Instructions
- Separate the chicken wings into drummettes and wingettes by cutting them at the joint.
- Lightly spray the air fryer basket with a non-stick cooking spray or a thin coat of cooking oil to prevent sticking.
- Spray the prepared chicken wings with avocado oil, or drizzle them with a small amount of olive oil, ensuring a light, even coating.
- In a small bowl, combine the baking powder, onion powder, garlic powder, and salt. Mix thoroughly.
- Toss the oiled chicken wings with the spice and baking powder blend until each piece is evenly coated. Place them in the air fryer basket in a single layer, making sure not to overcrowd. Work in batches if necessary.
- Set the air fryer to 360°F (180°C) and cook for an initial 10 minutes.
- Open the air fryer basket and carefully stir or flip the chicken wings, ensuring they are rearranged to maintain space between them for continuous air circulation.
- Increase the air fryer temperature to 400°F (200°C) and continue cooking for an additional 10 minutes, or until the wings are golden brown, crispy, and cooked through (internal temperature of 165°F / 74°C).
- Once cooked, transfer the hot chicken wings to a large bowl and toss them generously with your favorite honey mustard sauce until fully coated. Serve immediately and enjoy!
Notes
Nutrition Information:
Yield: 4
Serving Size: 1
Amount Per Serving:
Calories: 273Total Fat: 21gSaturated Fat: 7gTrans Fat: 0gUnsaturated Fat: 12gCholesterol: 63mgSodium: 609mgCarbohydrates: 9gFiber: 0gSugar: 1gProtein: 13g
Nutrition information is a guideline only, is calculated automatically by third party software, and absolute accuracy is not guaranteed.
Did you make this recipe?
Please leave a comment on the blog or share a photo on Instagram