
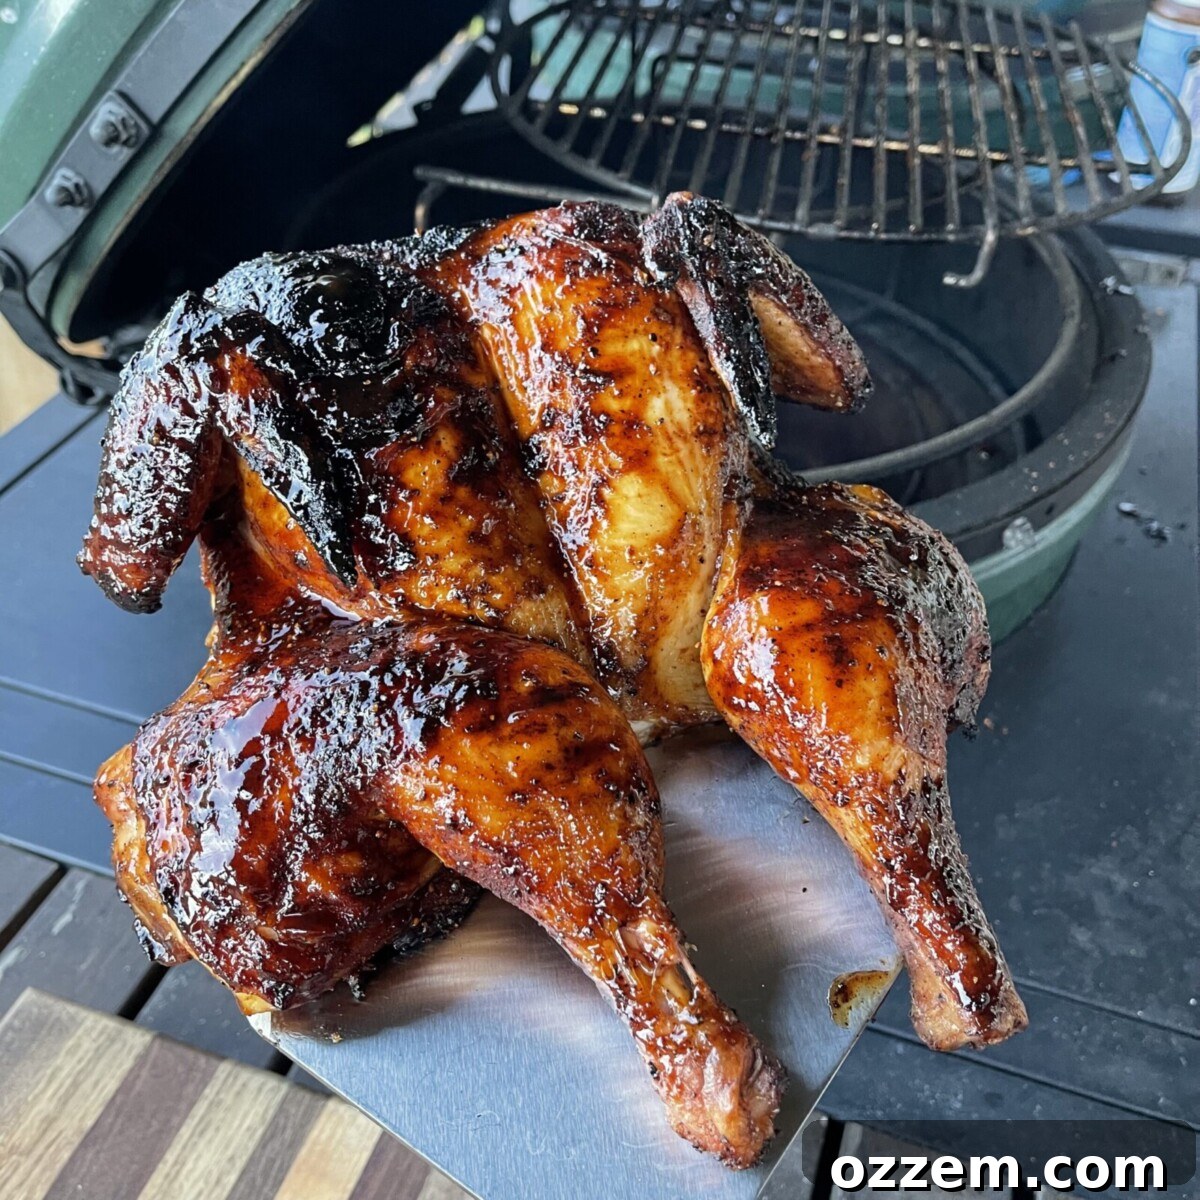
Unlocking the secret to perfectly grilled, tender, and incredibly juicy BBQ Chicken isn’t as complicated as it seems. Forget dry, overcooked poultry and discover a simple yet revolutionary technique that guarantees succulent results every time. Coupled with a rich, flavorful homemade BBQ sauce, this dish transforms into an unforgettable summer classic that will impress family and friends alike. When it comes to outdoor cooking, simplicity often yields the most delicious outcomes, and this recipe is a testament to that philosophy.
If you’re eager to explore more whole chicken grilling adventures, don’t miss my recipe for grilled spatchcock chicken with a vibrant homemade chimichurri sauce, or for a fun twist, try the Dr. Pepper chicken drumsticks!
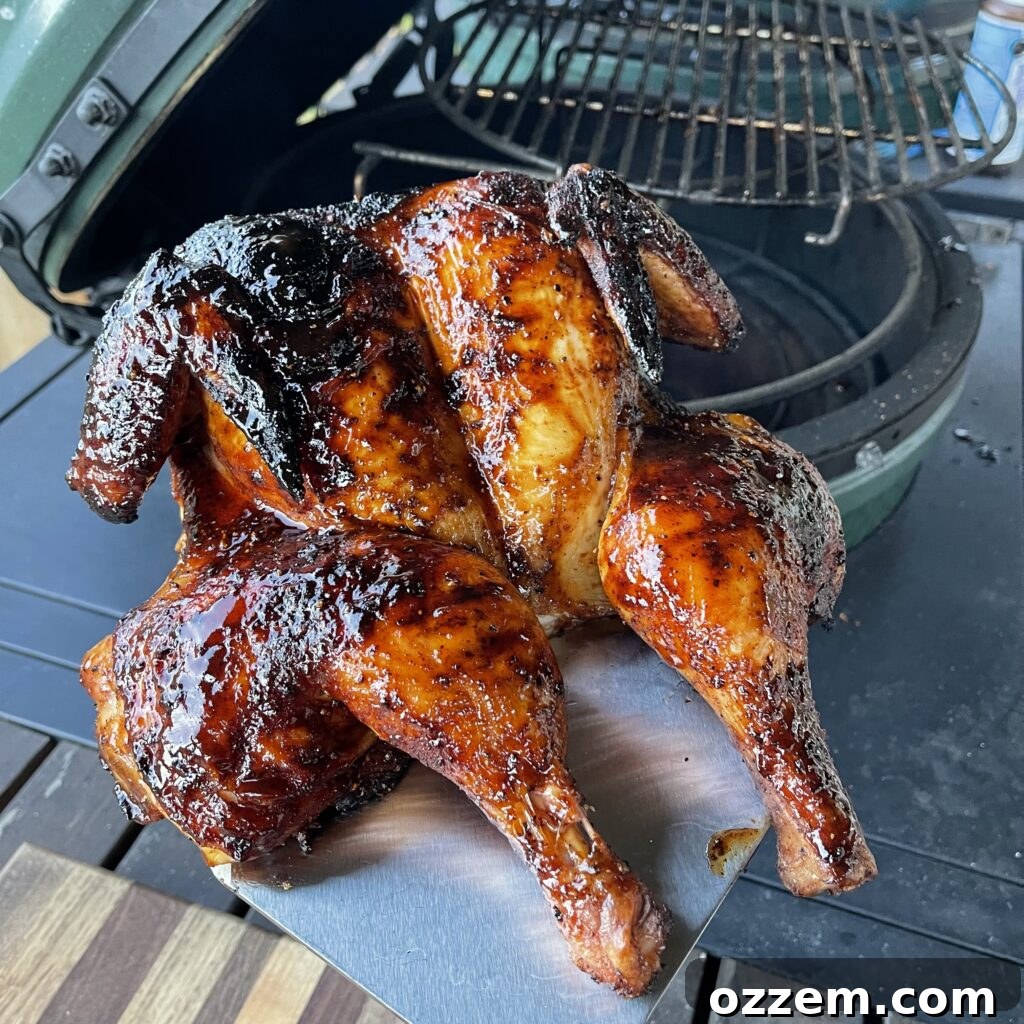
Table of Contents: Your Guide to Ultimate BBQ Chicken
- Why Spatchcock Your BBQ Chicken?
- Mastering the Homemade BBQ Sauce
- Ingredient Essentials for BBQ Perfection
- Step 1: Spatchcocking the Whole Chicken
- Step 2: Crafting Your Signature Homemade BBQ Sauce
- Pro Tips for BBQ Sauce Customization
- Storing Your Homemade BBQ Sauce for Future Feasts
- Step 3: Grilling the Best BBQ Chicken
- Frequently Asked Questions About BBQ Chicken
- More Mouth-Watering Chicken Recipe Ideas
- BBQ Chicken Recipe Card
Why Spatchcock Your BBQ Chicken? The Ultimate Grilling Technique
Achieving perfectly cooked BBQ chicken on the grill can sometimes be a challenge, especially when dealing with a whole bird. The traditional method often leads to uneven cooking, with breast meat drying out while thighs struggle to reach temperature. This is where the magic of “spatchcocking” comes in. Also known as butterflying, this technique involves removing the chicken’s backbone and flattening it, allowing for an incredibly even and significantly faster cook. By ensuring uniform thickness across the entire chicken, every part—from succulent breast to juicy dark meat—cooks simultaneously, guaranteeing a tender, flavorful result with beautifully crispy skin. This simple preparation step is truly a game-changer for grilled chicken enthusiasts.
Mastering the Homemade BBQ Sauce: A Flavor Revelation
While convenience often steers us towards store-bought options, the undeniable truth is that nothing compares to the rich, nuanced flavors of a homemade BBQ sauce. Crafting your own allows for complete control over the sweetness, tanginess, and spice levels, tailoring the sauce perfectly to your palate. This recipe will guide you through creating a sweet and tangy BBQ sauce that not only complements the grilled chicken but also elevates it to new heights. Once you experience the depth of flavor and freshness of a homemade sauce, you’ll find it hard to go back to pre-made alternatives. Plus, it’s surprisingly quick and easy to whip up a large batch, ensuring you have delicious sauce on hand for future meals or spontaneous grilling sessions throughout the week.
Ingredient Essentials for BBQ Perfection: Chicken & Homemade Sauce
To create the best BBQ chicken, you’ll need two main components: a high-quality chicken and a selection of common pantry staples for our signature sweet and tangy BBQ sauce. Each ingredient plays a crucial role in developing the complex flavor profile that makes this recipe truly stand out.
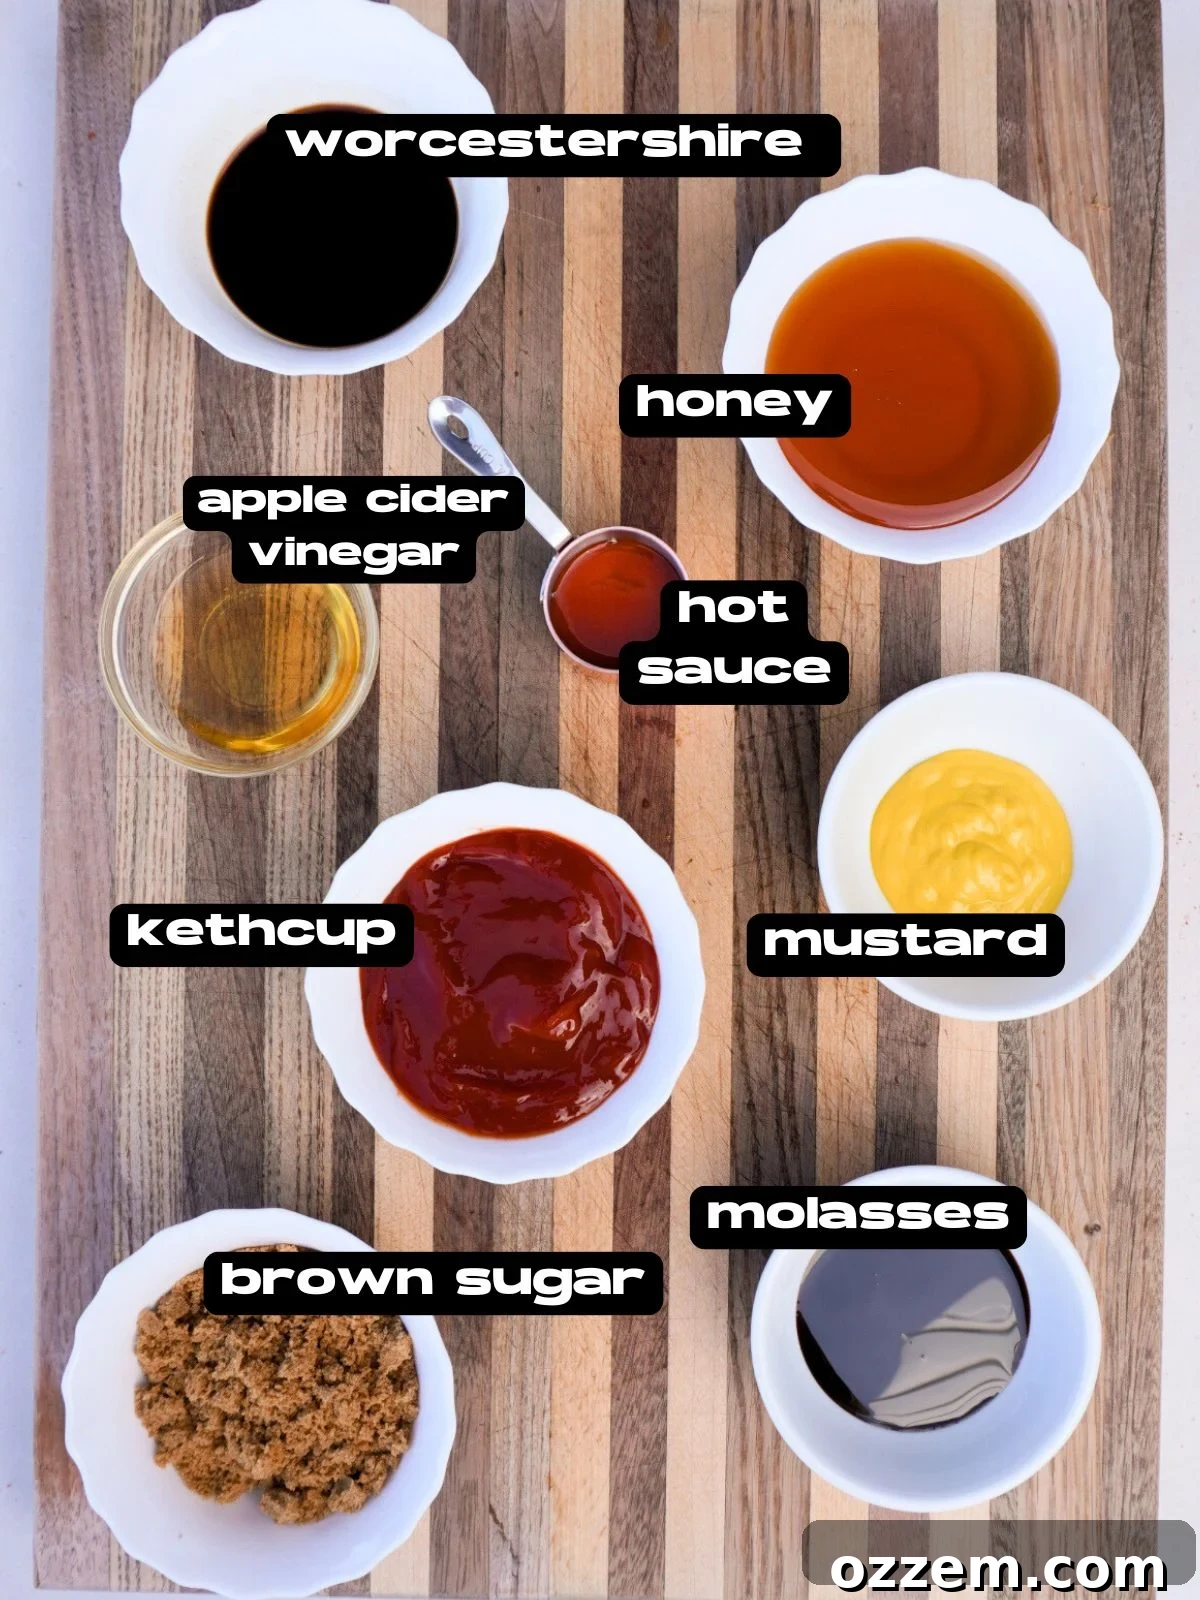
For the Chicken:
- Whole Chicken: Opt for a fresh, whole chicken. Spatchcocking it, as detailed below, is key for an even cook and fantastic results on the grill. This method ensures maximum flavor and consistent tenderness throughout the bird.
For the Homemade Sweet & Tangy BBQ Sauce:
- Ketchup: The foundational base for most classic tomato-based BBQ sauces, providing a rich, savory backdrop.
- Yellow Mustard: Adds a crucial acidic tang and a subtle sharpness, balancing the sweetness and enhancing the overall depth of flavor.
- Honey: Contributes natural sweetness and helps create that desirable glossy sheen and sticky texture as the sauce caramelizes on the grill.
- Brown Sugar: Delivers a deep, caramelized sweetness that develops a beautiful crust when brushed onto meats during grilling, adding layers of flavor.
- Molasses: Offers a distinct, robust sweetness with smoky undertones, providing complexity and a classic BBQ flavor profile.
- Apple Cider Vinegar: Essential for cutting through the sweetness, providing a bright, tangy balance that makes the sauce incredibly addictive.
- Hot Sauce: A customizable ingredient that introduces a pleasant kick and prevents the sauce from becoming overly sweet. Adjust the amount to match your preferred level of heat.
- Worcestershire Sauce: A powerhouse of umami and savory notes, it adds an incredible depth and richness to the BBQ sauce that can’t be replicated.
- All-Purpose Seasoning: Incorporates additional savory elements and classic BBQ spices, such as smoked paprika, further enriching the sauce’s flavor. Using a high-quality rub like Dad’s All Purpose rub can make a significant difference.
Step 1: Spatchcocking the Whole Chicken for Optimal Grilling
Spatchcocking is the cornerstone of this recipe, ensuring your grilled BBQ chicken cooks perfectly every time. This technique involves removing the backbone and flattening the chicken, which dramatically improves cooking uniformity and speed. Here’s how to do it:
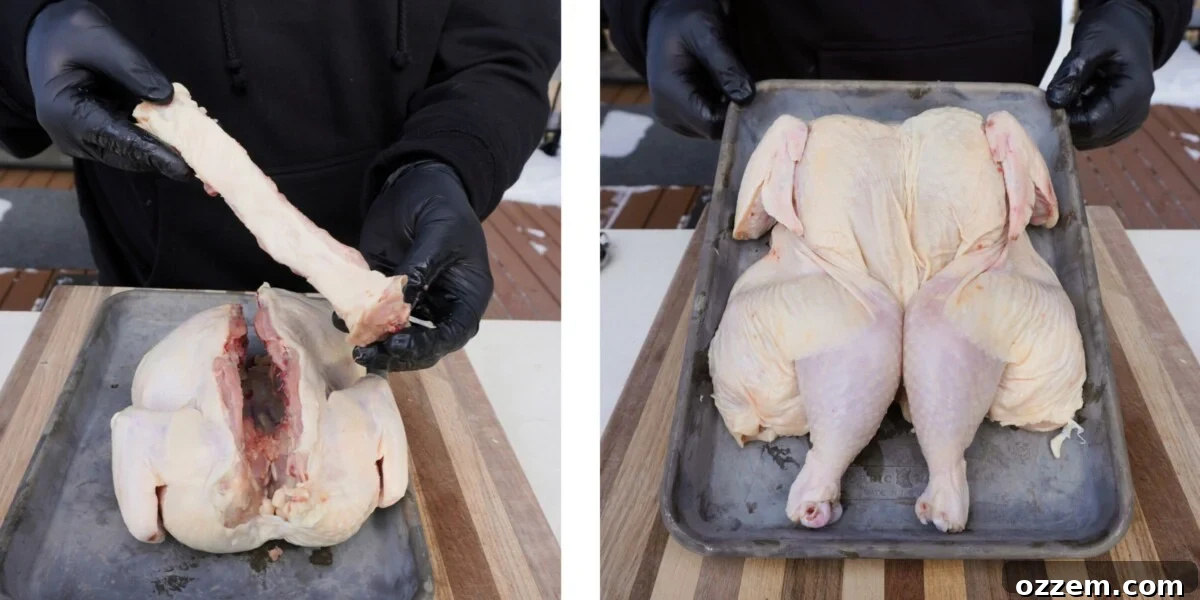
- Prepare Your Workspace: Lay the whole chicken breast-side down on a clean cutting board.
- Remove the Backbone: Using sturdy kitchen shears or a sharp chef’s knife, carefully cut along both sides of the backbone, from the tail end up to the neck cavity. Once both cuts are made, remove the backbone entirely. (You can save the backbone for making stock!).
- Flatten the Chicken: Flip the chicken over so it’s breast-side up. Using the heel of your hand, press down firmly on the center of the breastbone until you hear it crack. This allows the chicken to lay completely flat, creating an even cooking surface.
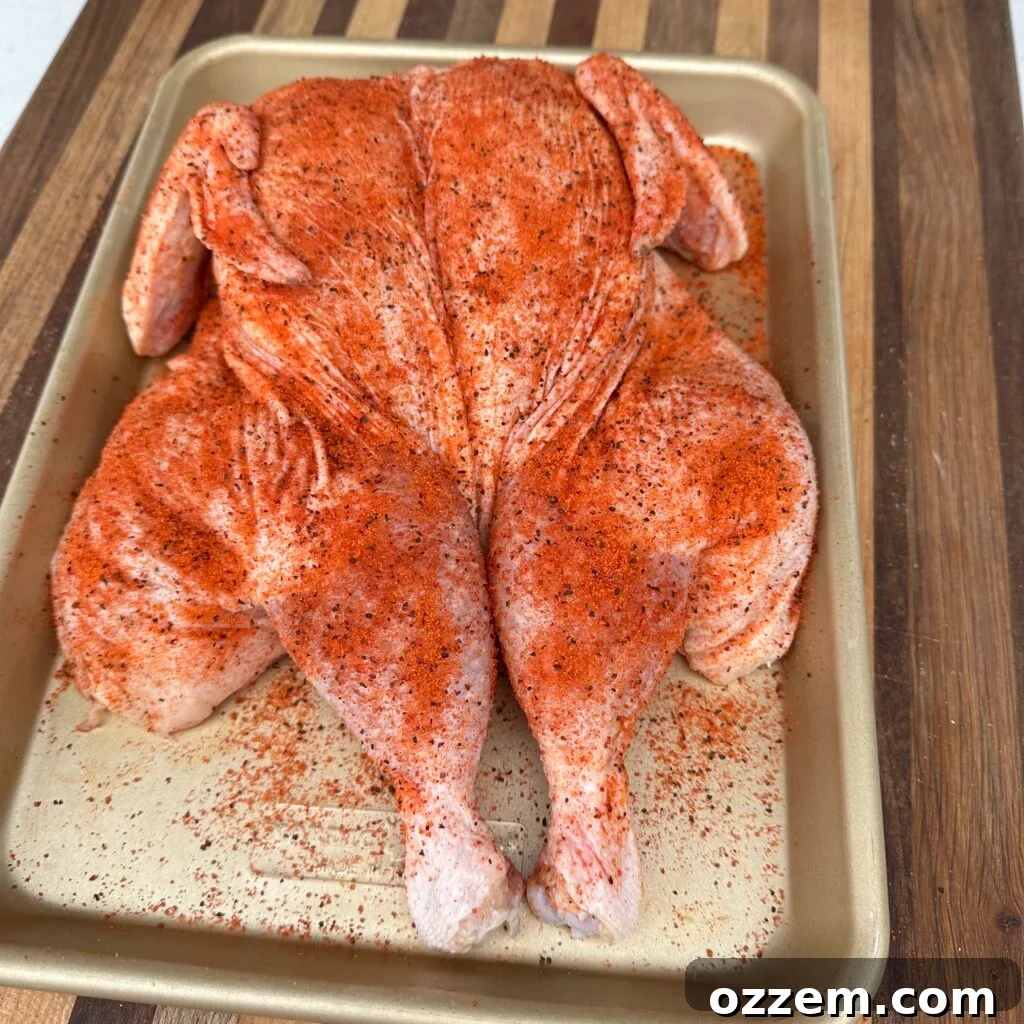
- Prepare for Seasoning: Lightly coat the entire spatchcocked chicken with a thin layer of olive oil or cooking spray. This acts as a binder, helping the seasoning adhere better to the skin and ensuring a flavorful crust.
- Generously Season: Now, it’s time to impart incredible flavor. Liberally cover both sides of the chicken with your favorite all-purpose rub. For an exceptional taste, I highly recommend using Dad’s All Purpose rub. This seasoning blend is designed to complement grilled chicken beautifully, adding savory notes and a delightful aroma that deepens during cooking.
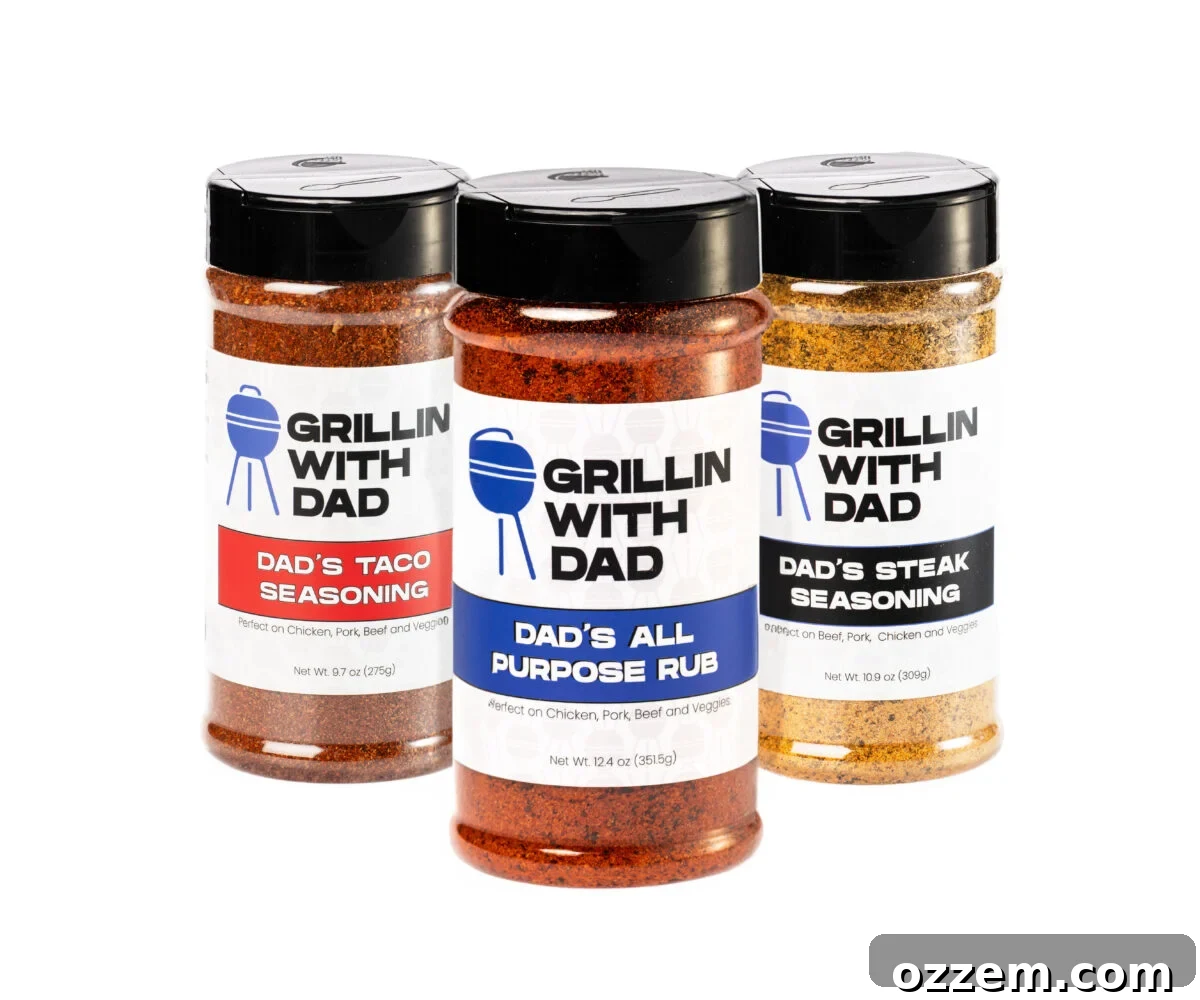
Dad’s Signature Seasonings
Elevate your grilling game with our essential, must-have seasoning blends, crafted for unparalleled flavor!
Step 2: Crafting Your Signature Homemade BBQ Sauce
Once you venture into making your own BBQ sauce, you’ll likely never return to store-bought varieties. The ability to customize flavors—from adjusting the level of sweetness or spice to adding unique smoky notes—is incredibly rewarding. This homemade sauce is not only superior in taste but also surprisingly quick to prepare, allowing you to easily make a large batch to enjoy all week long or store for future culinary adventures. It’s truly the perfect complement to your grilled BBQ chicken!
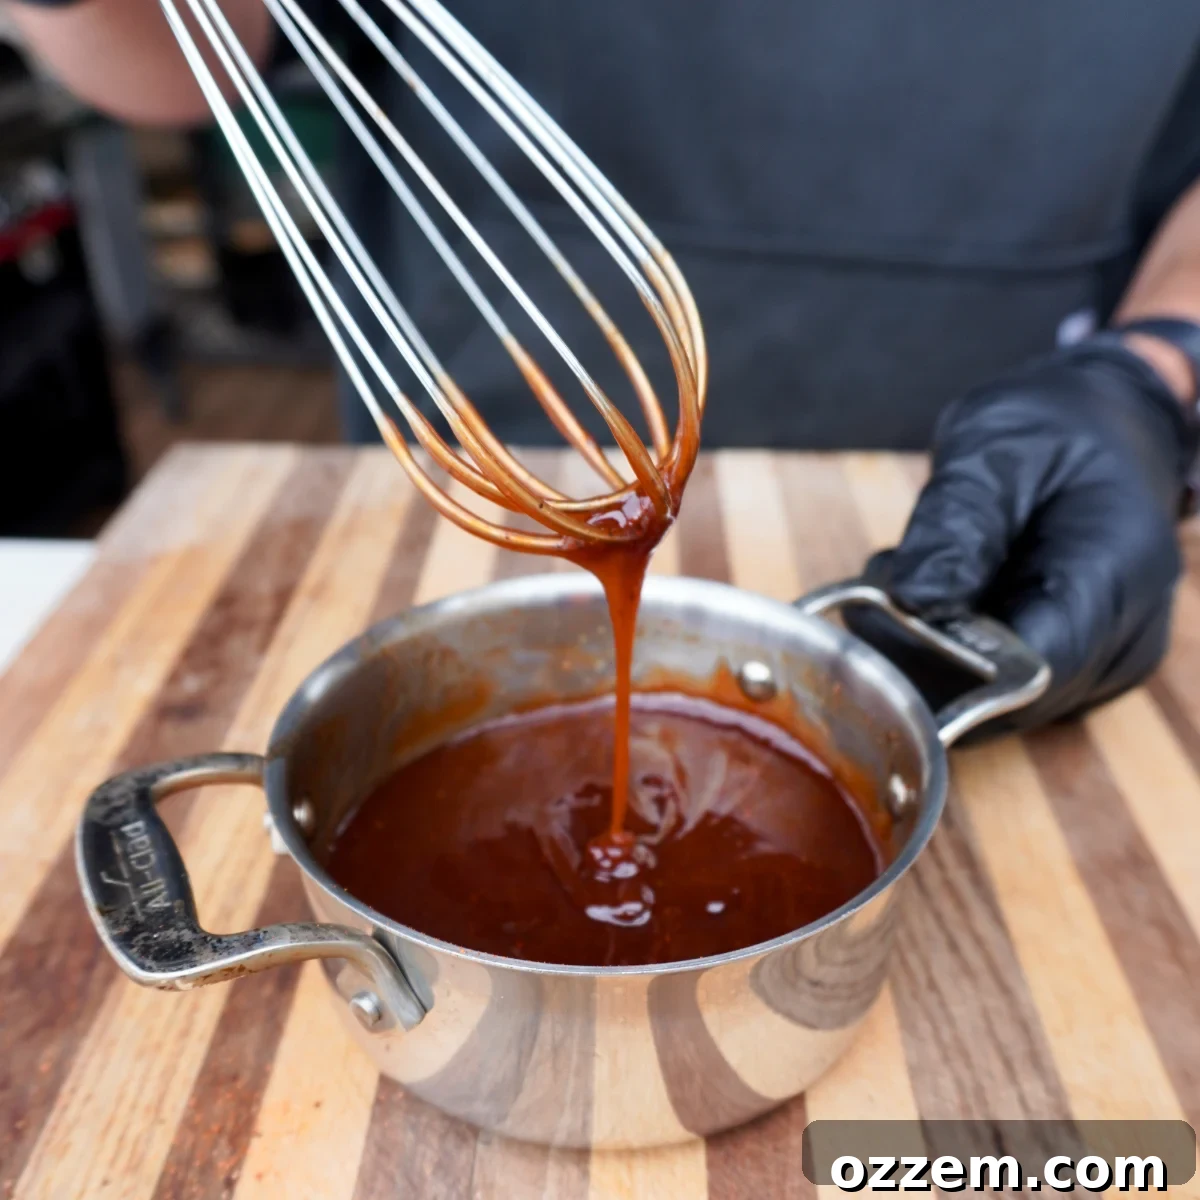
- Combine Ingredients: In a medium saucepan, combine all your BBQ sauce ingredients: ketchup, yellow mustard, brown sugar, honey, molasses, Dad’s All Purpose rub, Worcestershire sauce, apple cider vinegar, and hot sauce.
- Simmer to Perfection: Place the saucepan over low heat on your stovetop. Allow the mixture to gently simmer, stirring frequently (every few minutes) with a whisk. This regular whisking is crucial to prevent the sauce from sticking and burning to the bottom of the pan.
- Achieve Desired Consistency: Continue simmering until the sauce begins to thicken to your desired consistency. This process ensures all the flavors meld beautifully and the sugars dissolve completely, creating a smooth and luscious sauce. The low and slow approach is key to developing a rich, complex flavor.
Once your homemade BBQ sauce is complete, the possibilities are endless! Beyond being the star of your BBQ chicken, it’s fantastic brushed onto smoked beer can chicken, perfect for dunking grilled chicken lollipops into its sticky goodness, or as a flavorful condiment on your favorite grilled burger. This versatile sauce truly elevates any dish it touches.
Pro Tips for BBQ Sauce Customization
Recipe Tip: Tailor Your BBQ Sauce to Your Taste
- Adjust Heat Levels: Traditional BBQ sauce often leans sweeter. To introduce a delightful counterpoint and a subtle “punch,” generously add more hot sauce. Feel free to experiment with different types of hot sauce to find your perfect balance.
- Enhance Smokiness Naturally: Instead of relying on artificial liquid smoke, infuse your sauce with natural smoky flavors by incorporating smoked paprika. This spice adds an authentic depth that complements grilled meats beautifully. For even more complexity, a dash of bourbon can add a savory, rich finish, or a splash of your favorite soda pop can introduce a fun, unexpected twist.
Storing Your Homemade BBQ Sauce for Future Feasts
One of the greatest advantages of making your own BBQ sauce from scratch is the ability to prepare it in advance. This saves time and ensures you always have a batch of delicious, homemade goodness ready for your next meal or unexpected grilling cravings. Proper storage is key to maintaining its freshness and flavor.
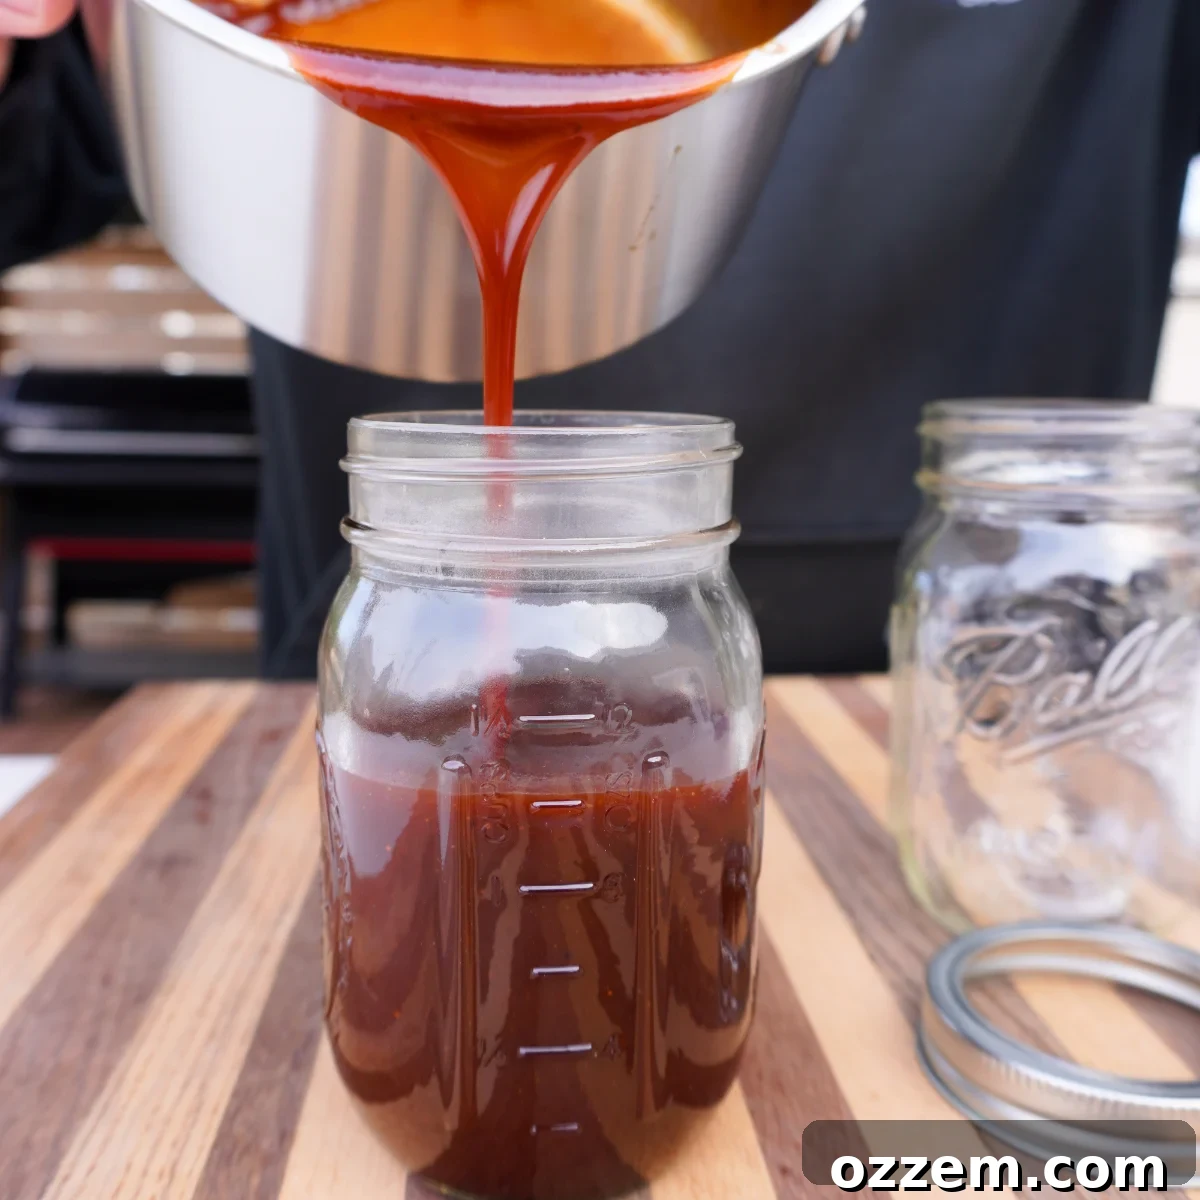
I highly recommend storing your freshly made sauce in airtight mason jars. Once the sauce has cooled completely to room temperature, simply pour it into clean jars, seal them tightly with lids, and refrigerate. Your homemade Sweet and Tangy BBQ Sauce will remain fresh and delicious in the fridge for up to two weeks. This makes it incredibly convenient to enjoy your labor of love throughout the week for lunches and dinners, whether as a marinade, glaze, or dipping sauce.
Furthermore, a beautifully bottled homemade BBQ sauce also makes for a thoughtful and impressive holiday gift. It’s a perfect present for the foodies in your family, the avid backyard BBQ’er, or anyone who appreciates gourmet, handcrafted treats. Personalize the jars with labels for an extra special touch!
Step 3: Grilling the Best BBQ Chicken to Juicy Perfection
Now for the grand finale: grilling your perfectly prepped chicken! This step combines precise temperature control with expert basting to achieve that coveted crispy skin and tender, flavorful meat.
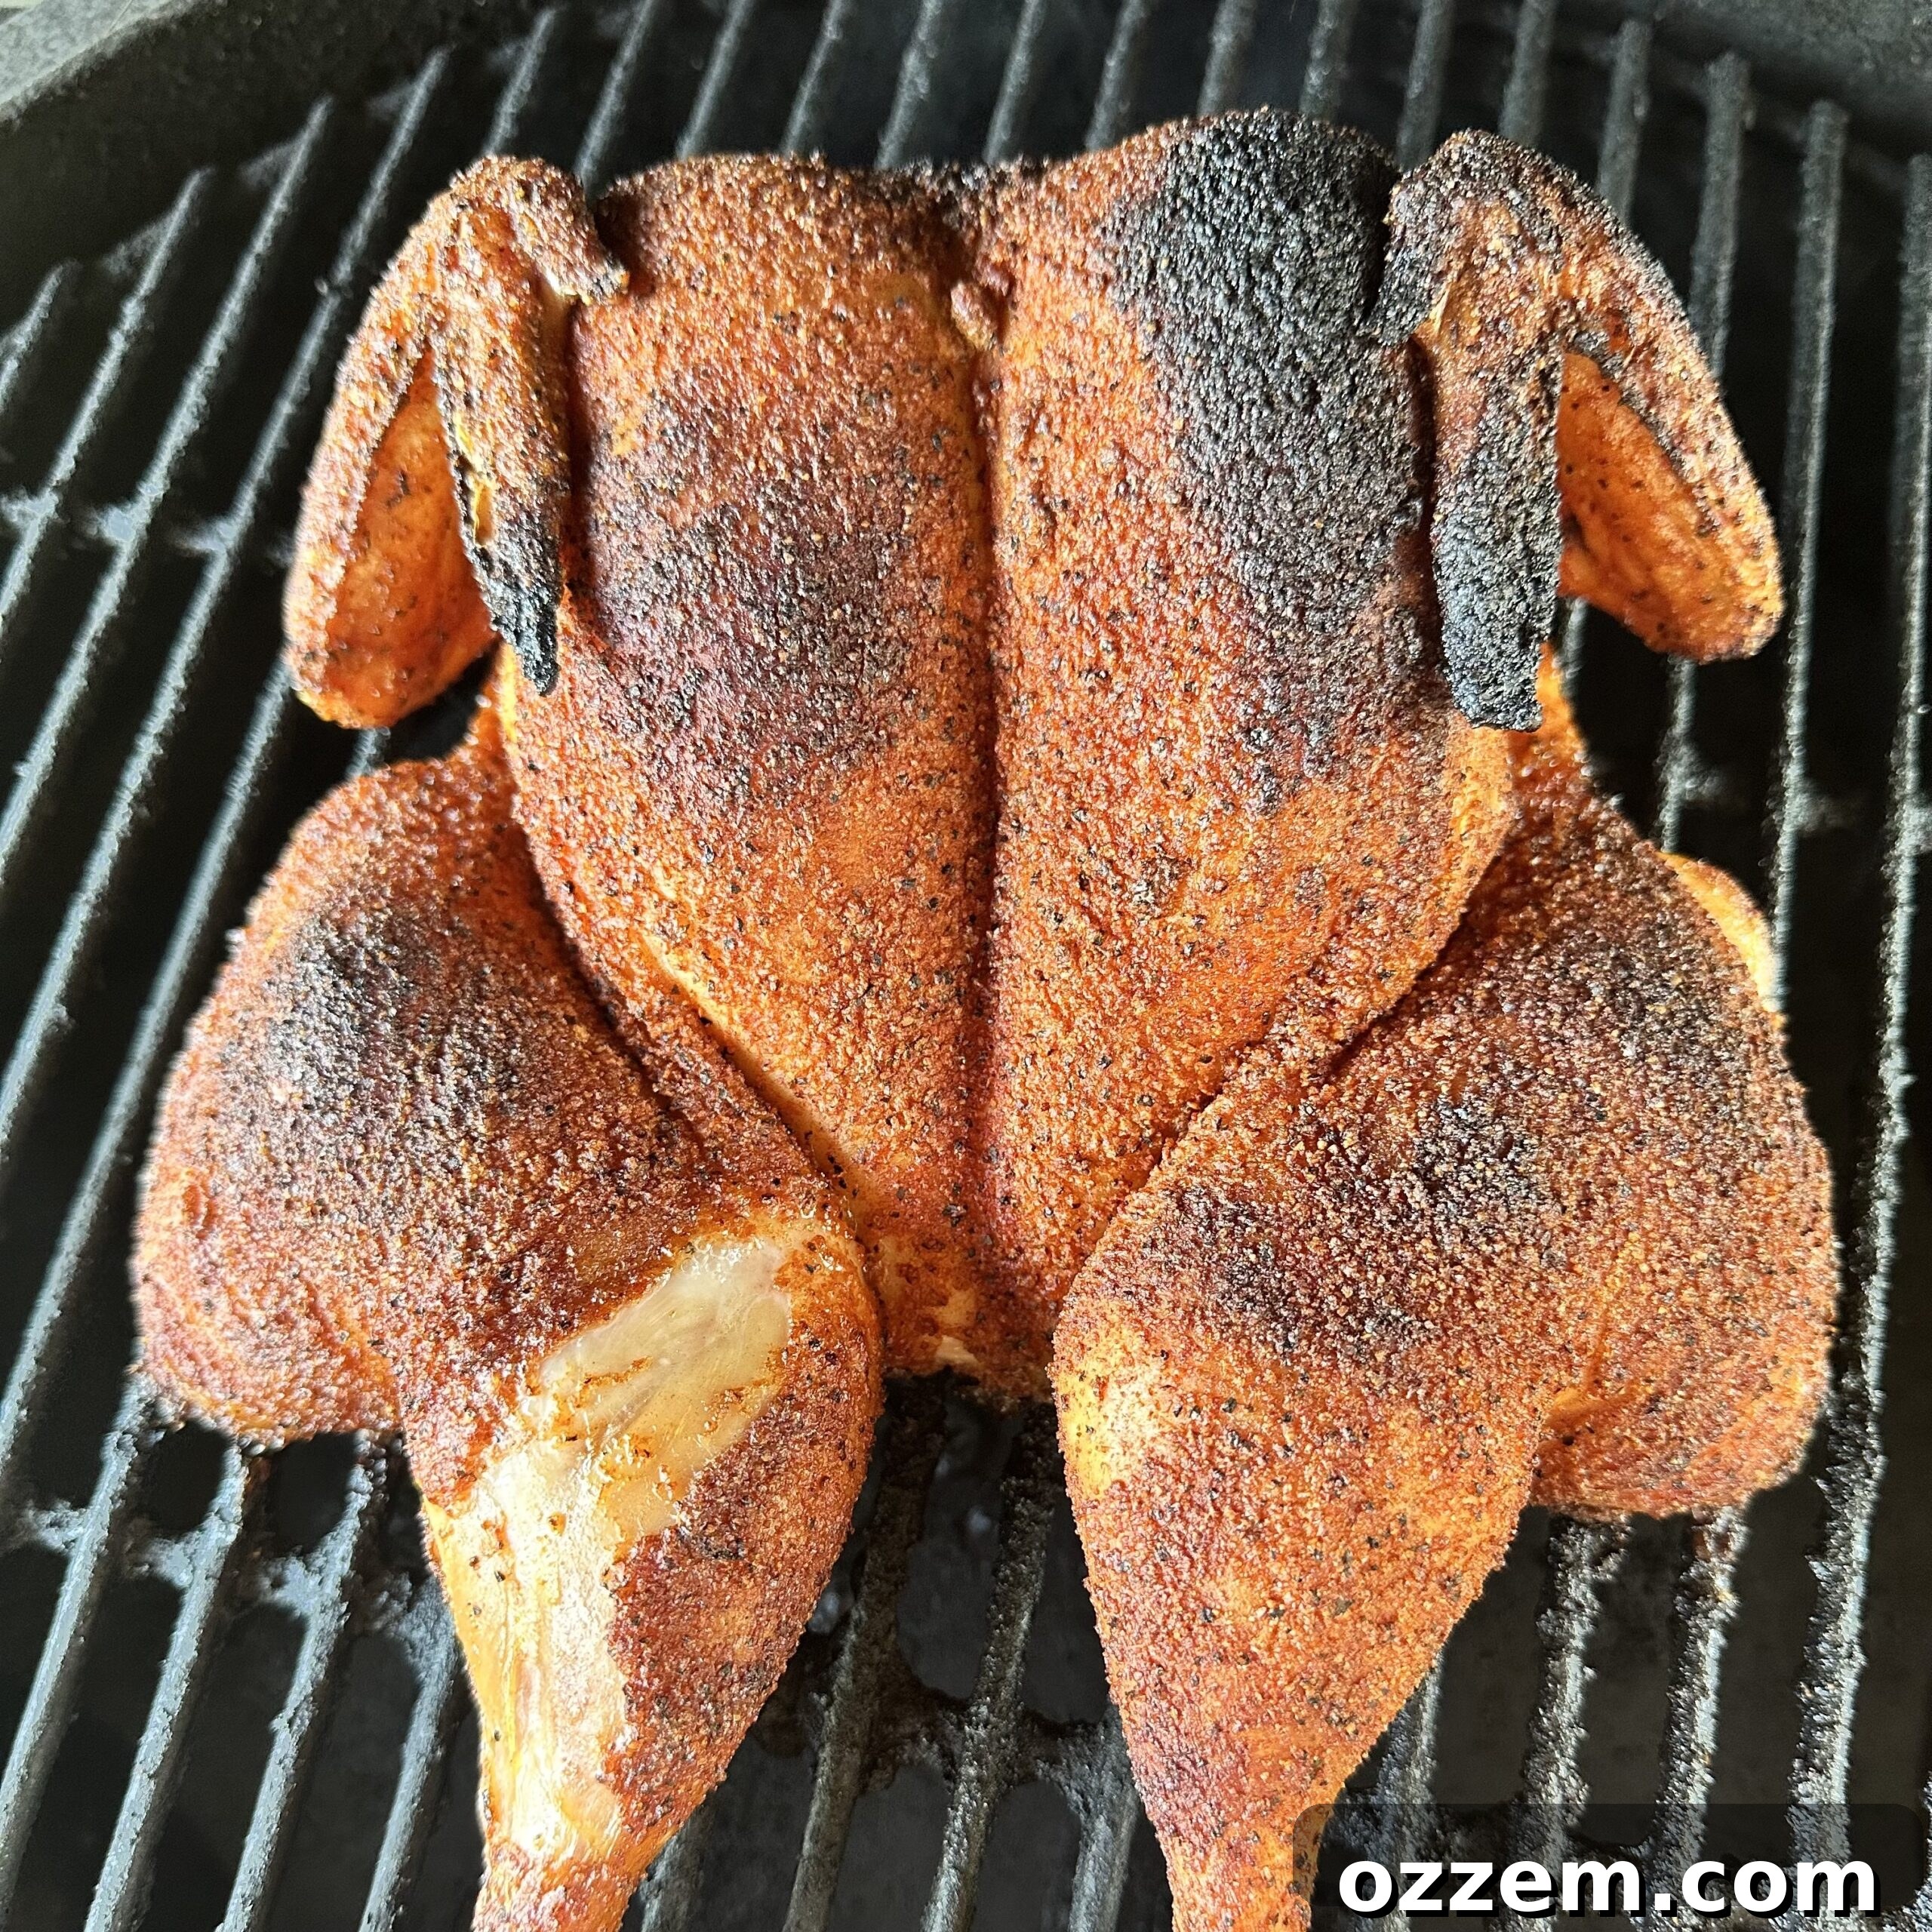
- Preheat Your Grill: Begin by preheating your grill to a consistent 375 degrees Fahrenheit (approximately 190 degrees Celsius). For optimal results, set up your grill for indirect heat. This means creating a cooler zone where the chicken can cook slowly without direct exposure to flames, preventing burning while ensuring a thorough cook. On a gas grill, this might mean turning off the burners directly beneath the chicken. On a charcoal grill, arrange coals to one side and place the chicken on the opposite side.
- Initial Cook: Place the spatchcocked chicken on the indirect heat side, skin-side up. Close the lid and let it cook undisturbed. Monitor the internal temperature using a reliable meat thermometer inserted into the thickest part of the breast, avoiding the bone. Continue cooking until the breast registers an internal temperature of 155 degrees Fahrenheit (68 degrees Celsius).
- Apply BBQ Sauce & Caramelize: Once the chicken reaches 155°F, it’s time to introduce that glorious homemade BBQ sauce. Generously brush the entire chicken with the homemade BBQ sauce. Return it to the grill, still over indirect heat, and allow the sauce to caramelize and set on the skin. This step is crucial for developing that irresistible sticky, slightly charred, and intensely flavorful crust.
- Final Cook & Doneness: Continue grilling and basting periodically until the chicken’s internal temperature reaches 165 degrees Fahrenheit (74 degrees Celsius) in the thickest part of the thigh and breast. The total cook time typically ranges around 45 minutes, but this can vary depending on the size of your bird and your grill’s efficiency. Always rely on a thermometer for accuracy rather than just visual cues.
- The Critical Resting Period: This is arguably one of the most vital steps for achieving truly juicy meat. Once the chicken reaches 165°F, remove it immediately from the grill and transfer it to a cutting board. Tent it loosely with foil and let it rest for 10-15 minutes. During this rest period, the muscle fibers relax, and the internal temperature will slightly increase (carryover cooking), allowing the juices to redistribute throughout the meat. Skipping this step often leads to dry chicken, as the juices would simply run out when sliced. Patience here is rewarded with an incredibly tender and moist final product. Enjoy your perfectly grilled BBQ chicken!
For more flavorful chicken recipes that push the boundaries of taste, explore my grilled spicy bang bang chicken skewers or the delectable sweet Hawaiian huli huli chicken thighs. Each offers a unique and exciting grilling experience.
Frequently Asked Questions About BBQ Chicken
Absolutely! While grilling imparts a unique smoky flavor, all my recipes, including this BBQ chicken, can be successfully replicated in a conventional oven or even partially on a stovetop. You don’t need a specialized smoker or a high-end grill like a Big Green Egg or Weber to achieve delicious results. For oven cooking, follow the same internal temperature guidelines and consider a final broil for crispy skin. For the sauce, the stovetop method is already detailed in the recipe. The key is consistent heat and proper internal temperature monitoring.
Spatchcocking a chicken offers several significant advantages. Firstly, it allows the entire chicken to lay flat, ensuring more even cooking throughout the breast and thigh meat. This prevents the breast from drying out while waiting for the thighs to cook. Secondly, it drastically reduces cooking time, making it a faster option for weeknight dinners. Finally, a flattened chicken cooks more uniformly, leading to consistently crispy skin across the entire bird, which is a hallmark of great grilled chicken.
Several factors contribute to crispy BBQ chicken skin. Spatchcocking is the first step, as it exposes more skin to the heat. Ensure the skin is as dry as possible before seasoning by patting it thoroughly with paper towels. Start cooking skin-side up on indirect heat to render the fat slowly. Towards the end of the cooking process, after applying the BBQ sauce, you can briefly move the chicken to a slightly more direct heat zone (if your grill allows for a milder direct heat) for a few minutes per side, watching it closely to avoid burning the sauce. The sugars in the homemade BBQ sauce will caramelize beautifully, contributing to a wonderfully crisp and flavorful crust.
Yes, you can certainly adapt this recipe for individual chicken pieces like thighs, drumsticks, or breasts. Adjust grilling times accordingly, as smaller pieces will cook faster. Chicken thighs are an excellent choice due to their higher fat content, which keeps them moist and flavorful. Regardless of the cut, always use a meat thermometer to ensure chicken reaches an internal temperature of 165°F (74°C) for food safety. Apply the homemade BBQ sauce during the last 10-15 minutes of cooking to allow it to caramelize without burning.
More Mouth-Watering Chicken Recipe Ideas: Explore and Enjoy!
Chicken & Turkey
Pineapple Throne Chicken: A Tropical Twist
Chicken & Turkey
Smoked Turkey Breast: Juicy & Flavorful
Chicken & Turkey
Over The Top White Chicken Chili: A Hearty Delight
Chicken & Turkey
Grilled Chicken Lollipops: Fun & Flavorful
If you tried this amazing BBQ Chicken recipe or any other on my blog, please take a moment to leave a 🌟 star rating and share your experience in the📝 comments below. Your feedback helps me create even better recipes!
Grilled BBQ Chicken
Ingredients
- 1 Whole Chicken
- 4 tbsp Dad’s All Purpose Rub
- 1 tbsp Olive oil
BBQ Sauce Ingredients
- 1.5 cups Ketchup
- 1.5 cups Brown sugar
- 1/2 cup Honey
- 1/4 cup Apple cider vinegar
- 1/4 cup Molasses
- 1/4 cup Worcestershire sauce
- 2 tbsp Yellow mustard
- 1 tbsp Hot sauce
- 1 tsp All Purpose Rub
Instructions
-
To spatchcock the chicken, cut out the backbone from the chicken with sturdy kitchen shears or a sharp knife. Press down hard on the breast bone to break it so the chicken can lay nice and flat.
-
Coat the entire chicken evenly with olive oil (as a binder for seasoning) and generously season with Dad’s All Purpose Rub.
-
To make the homemade BBQ sauce, combine ketchup, yellow mustard, brown sugar, honey, molasses, Worcestershire sauce, apple cider vinegar, hot sauce, and 1 tsp of All Purpose Rub in a saucepan. Simmer over low heat, whisking often, until the sauce thickens to your desired consistency.
-
Preheat your grill to 375 degrees Fahrenheit (190°C) and set it up for indirect heat cooking.
-
Place the seasoned chicken skin-side up on the indirect heat zone. Cook until the thickest part of the breast registers an internal temperature of 155 degrees Fahrenheit (68°C). Brush the entire chicken liberally with the homemade BBQ sauce and continue cooking to allow the sauce to caramelize on the skin.
-
Once the chicken’s internal temperature reaches 165 degrees Fahrenheit (74°C) in both breast and thigh, it is fully cooked. Total cooking time is typically around 45 minutes, depending on the chicken’s size. Remove it from the grill and let it rest, loosely tented with foil, for 10-15 minutes. This crucial resting period ensures the juices redistribute, resulting in a tender and juicy final product.
Notes
- Purchasing a whole chicken is often more cost-effective per pound compared to pre-cut chicken pieces.
- If you prefer pre-cut chicken, bone-in, skin-on chicken thighs are an excellent choice due to their rich flavor and natural fattiness, which helps keep them juicy on the grill.
- Always remember to rest the grilled chicken for at least 10-15 minutes before carving and serving. This allows the juices to settle back into the meat, ensuring maximum tenderness and moisture.
BBQ Sauce Notes:
How to adjust flavor levels:
- For a deeper, richer smokey flavor, consider adding an extra pinch of smoked paprika to your sauce.
- A splash of bourbon can introduce a sophisticated, savory richness to the BBQ sauce, creating a more complex profile.
- Experiment with adding a touch of your favorite soda pop (like cola or root beer) for a unique and fun twist on the classic BBQ sauce recipe.
- If you love a fiery kick, don’t hesitate to increase the amount of hot sauce to your personal preference.
Nutrition Facts (Approximate Per Serving)
Carbohydrates: 114g |
Protein: 26g |
Fat: 22g |
Saturated Fat: 6g |
Polyunsaturated Fat: 5g |
Monounsaturated Fat: 10g |
Trans Fat: 0.1g |
Cholesterol: 95mg |
Sodium: 939mg |
Potassium: 881mg |
Fiber: 2g |
Sugar: 101g |
Vitamin A: 779IU |
Vitamin C: 7mg |
Calcium: 222mg |
Iron: 7mg
Like this recipe? Rate and comment below!
Don’t stop here! Discover more delicious culinary inspirations on the Recipes Page for other tasty ideas to spice up your cooking repertoire!