

The Ultimate Guide to Deep Frying a Turkey for a Perfect Feast
Deep frying has transformed the way many prepare their holiday turkey, quickly becoming a beloved method for its ability to deliver an exceptionally juicy bird with incredibly crispy skin in a fraction of the time compared to traditional roasting. While the technique offers unparalleled results, it’s crucial to approach it with a strong emphasis on safety. Tales of unfortunate accidents involving turkey fryers are common, but with proper precautions and the right equipment, you can avoid hazards and create a magnificent centerpiece for your Thanksgiving spread. This comprehensive guide will walk you through every step, from selecting and preparing your turkey to safely frying and carving it, ensuring your deep-fried turkey is nothing short of spectacular this holiday season.
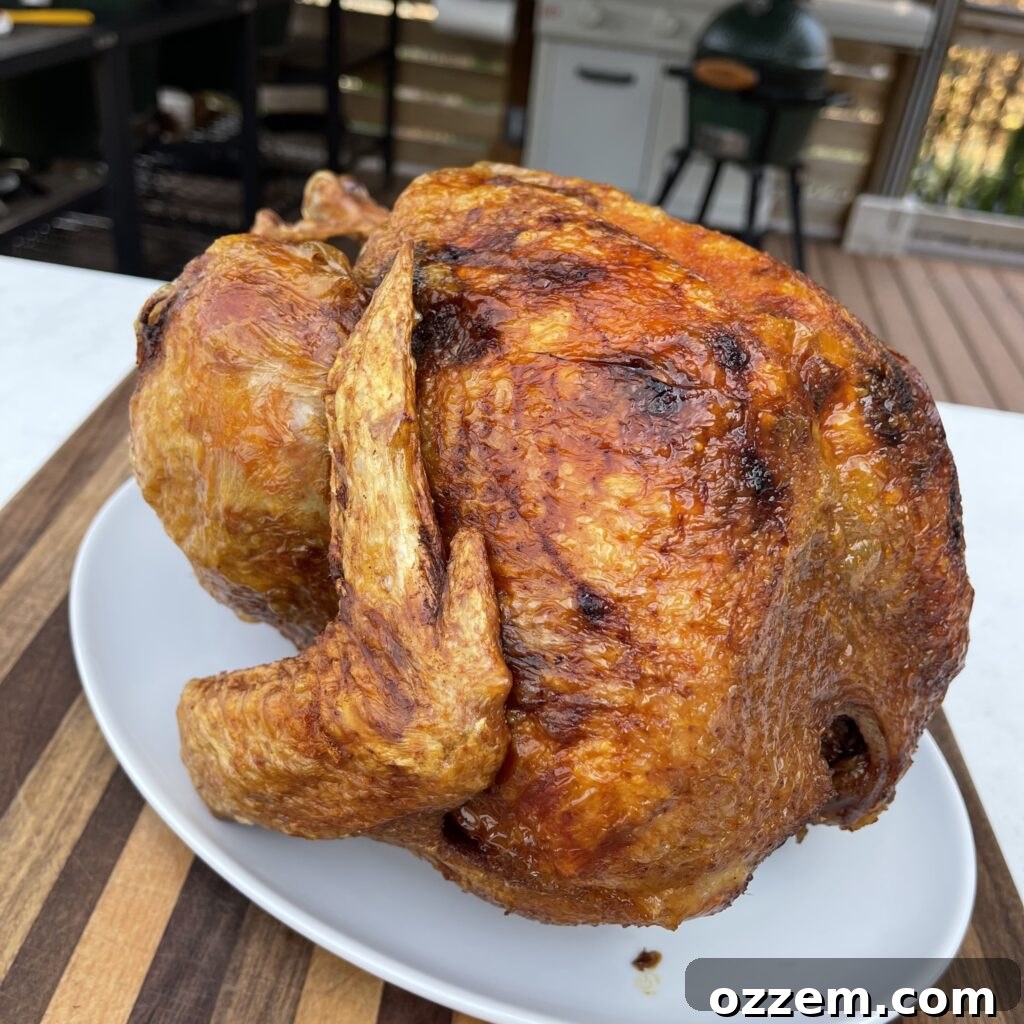
Table of Contents
- Selecting and Defrosting Your Turkey
- How to Infuse Your Deep Fried Turkey with Flavor and Moisture
- Essential Deep Fryer Setup and Safety Guidelines
- The Deep Frying Process for Perfect Results
- Best Deep Fried Turkey Recipe
- Frequently Asked Questions
- Similar Recipe Ideas
Selecting and Defrosting Your Turkey
The journey to a perfect deep-fried turkey begins with choosing the right bird and ensuring it’s properly defrosted. A turkey weighing between 12-16 pounds is ideal for deep frying, as larger birds can be more challenging to handle safely and cook evenly in a standard fryer. Always ensure your turkey is completely thawed before it even comes near the hot oil; a frozen or partially frozen turkey poses a significant fire risk and can lead to uneven cooking.
Safe Defrosting Methods
- **Refrigerator Method (Recommended):** This is the safest and most reliable way to defrost a turkey. Plan for approximately 24 hours of defrosting time for every 4-5 pounds of turkey. Place your frozen turkey in a pan to catch any drips and keep it in the refrigerator for 4-5 days prior to your cook day. This slow, controlled thawing ensures the turkey remains at a safe temperature throughout the process.
- **Cold Water Bath Method (Faster Alternative):** If you’re short on time, you can defrost your turkey in a sink or large cooler filled with cold water. Ensure the turkey is still in its original, sealed packaging. Change the water every 30 minutes to keep it cold. This method requires about 30 minutes per pound of turkey. For example, a 16-pound turkey would need approximately 8 hours.
Once your turkey is fully defrosted, it’s time for preparation. Carefully remove it from its packaging and rinse it thoroughly under cold running water. Reach inside both the neck and body cavities to remove the giblets and neck. These are often tucked away in small bags and can be used for gravy or discarded. After removing all internal components, pat the turkey completely dry with paper towels. Achieving a thoroughly dry turkey is paramount for deep frying, as any excess moisture will cause the hot oil to splatter dangerously.
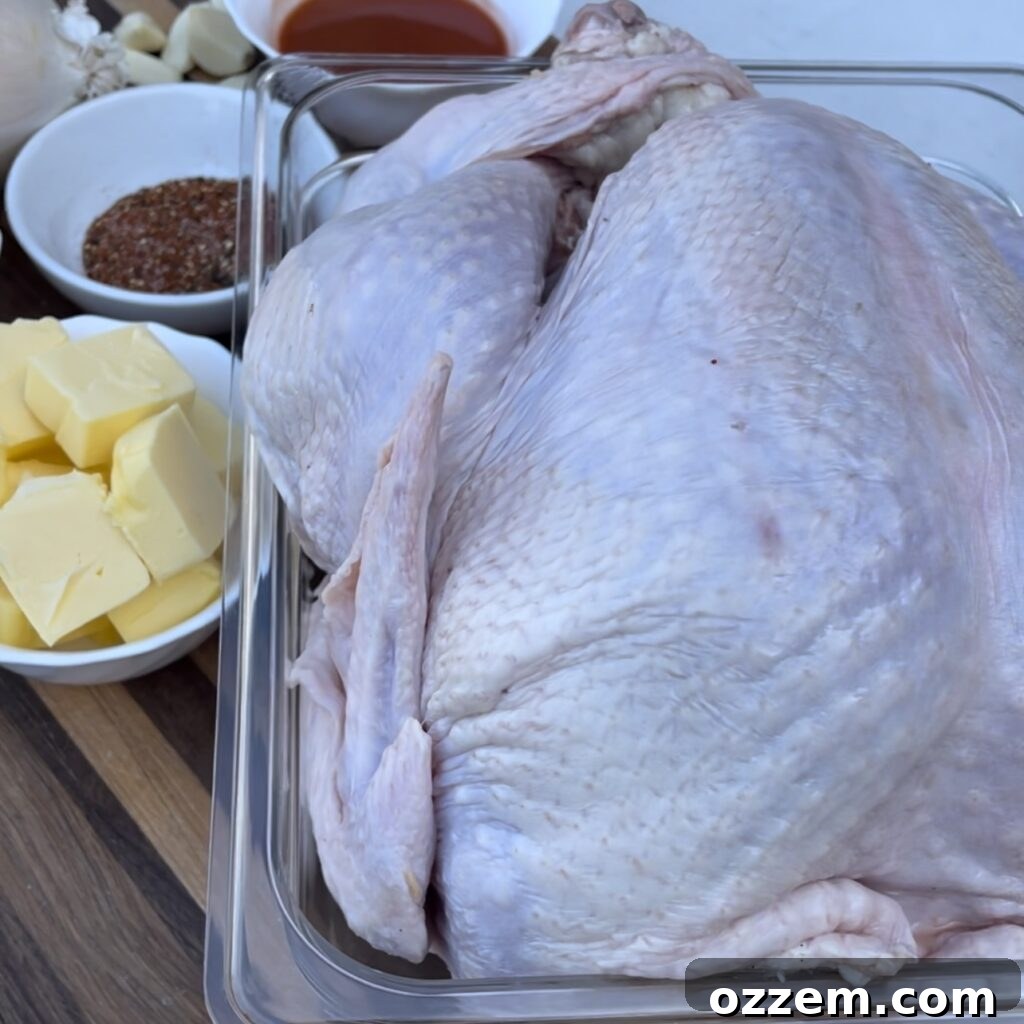
How to Infuse Your Deep Fried Turkey with Flavor and Moisture
Deep frying cooks a turkey incredibly fast – often in less than an hour – which means traditional marinades or rubs applied only to the surface won’t have enough time to penetrate deep into the meat. To ensure every bite is bursting with flavor and moisture, injection is the secret weapon. This technique allows your chosen flavors to directly permeate the muscle fibers, locking in succulence and seasoning the bird from the inside out.
Crafting Your Flavorful Injection Marinade
Our go-to injection recipe is a savory and slightly spicy blend that enhances the turkey’s natural taste. In a sturdy mixing bowl, combine the following:
- Melted unsalted butter for richness and moisture
- Minced garlic for an aromatic kick
- Your favorite BBQ rub for a foundational savory flavor
- Beer or apple juice for added moisture and a subtle sweet or malty note (apple juice is an excellent non-alcoholic alternative)
- Grated white onion for a fresh, pungent depth
- Hot sauce of your choice for a touch of heat and complexity
Whisk these ingredients together until well combined. The mixture should be thin enough to pass through a syringe, but still robust in flavor.
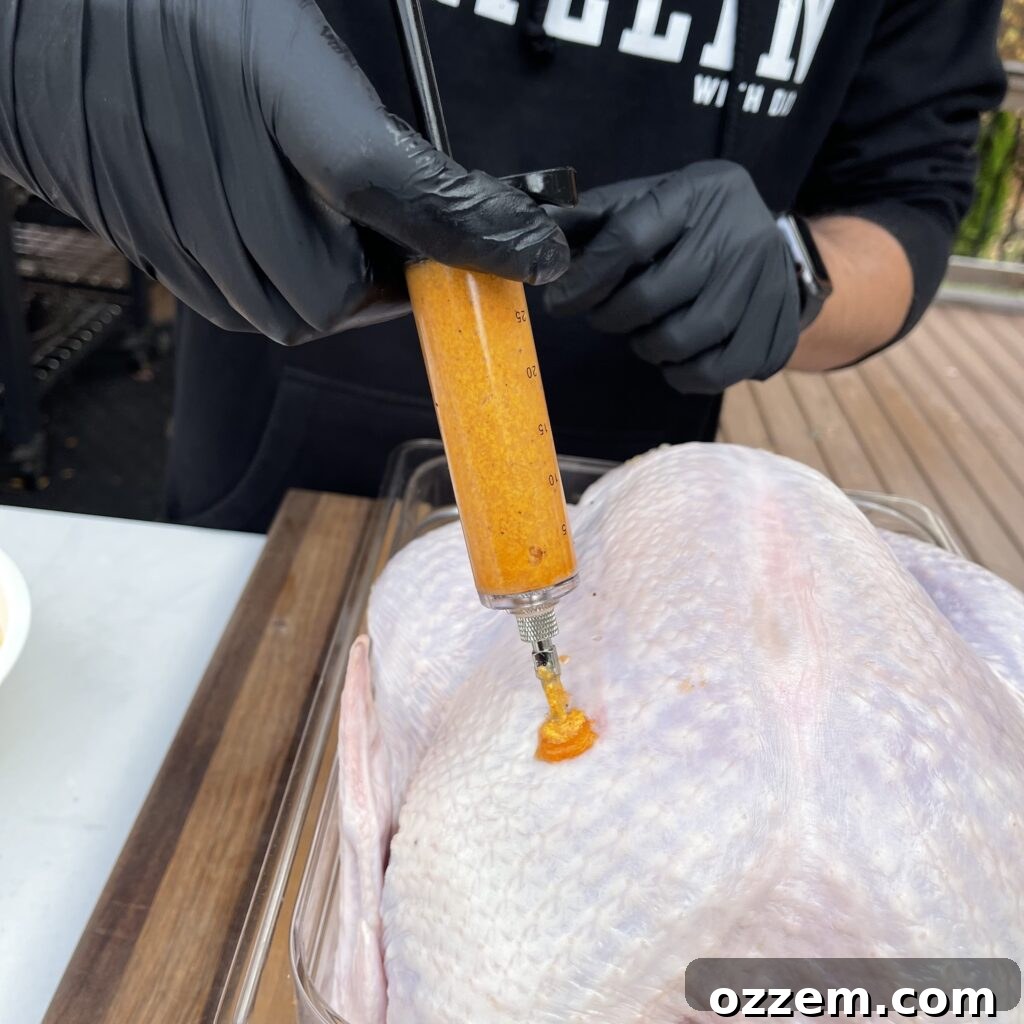
The Art of Injection
Using a food-grade meat injector, draw up your marinade. Systematically inject the liquid into various areas of the turkey, focusing heavily on the breast and thigh meat. These are the thickest parts of the bird and benefit most from internal flavoring. Insert the needle deep into the meat, then slowly depress the plunger as you withdraw the needle, distributing the marinade evenly. Repeat this process every few inches across the turkey. Don’t worry if some liquid seeps out; simply wipe away any excess with paper towels. There’s no need to apply an external rub or seasoning, as it would likely fall off or burn in the hot oil.
This internal flavor delivery ensures that even with the rapid cooking time of deep frying, your turkey will be incredibly moist and delicious from the first slice to the last.
Dad’s Seasonings
Elevate your grilling game with Dad’s essential grillin’ seasonings!
Essential Deep Fryer Setup and Safety Guidelines
Safety is paramount when deep frying a turkey. Taking the time to set up your fryer correctly and understand the potential risks will ensure a safe and successful cooking experience. Never leave a hot fryer unattended, and always have a fire extinguisher specifically rated for grease fires (Class K or Class B) readily available.
Choosing the Right Equipment and Location
- **Deep Fryer:** Invest in a sturdy outdoor turkey fryer kit that includes a large pot, burner stand, regulator, and a poultry lifting hook. Ensure all components are in good working order before use.
- **Oil Thermometer:** A reliable thermometer is non-negotiable for monitoring oil temperature accurately.
- **Gloves:** Heat-resistant gloves are highly recommended for handling the turkey and basket.
- **Location:** Set up your deep fryer outdoors on a flat, level, non-combustible surface like concrete or dirt, far away from any structures (house, garage, deck, overhanging eaves), flammable materials, or dry vegetation. Never fry indoors or in a garage.
Selecting and Measuring Your Frying Oil
Peanut oil is the preferred choice for deep frying turkeys due to its high smoke point (around 450°F / 232°C) and neutral flavor that won’t overpower the turkey. Other good alternatives include canola, sunflower, or corn oil, which also have high smoke points. Avoid oils with low smoke points like olive oil.
Determining the correct amount of oil is a critical safety step to prevent overflow, which can cause severe fires. **Do this BEFORE heating the oil:**
- Place the turkey into the empty fryer pot.
- Fill the pot with water until the turkey is just covered by about 1-2 inches.
- Carefully remove the turkey from the pot.
- Note the water level or use a ruler to measure the depth of the water. This is the exact amount of oil you’ll need.
- Empty and thoroughly dry the pot. Ensure no water remains, as water introduced to hot oil can cause dangerous splattering and steam explosions.
Now, pour the measured amount of peanut oil into the clean, dry fryer pot.
Preheating the Oil
Place your fryer on its stand and carefully ignite the burner. Slowly heat the oil to the target temperature of 325°F (163°C). Use your oil thermometer to monitor the temperature continuously. It’s vital to let the oil reach the correct temperature before introducing the turkey, as oil that isn’t hot enough will result in a greasy bird, while oil that’s too hot can burn the exterior before the inside is cooked.
The Deep Frying Process for Perfect Results
With your turkey prepared and the oil preheated to precisely 325°F (163°C), it’s time for the moment of truth. This step requires focus and caution, but the reward of a perfectly cooked deep-fried turkey is well worth it.
Carefully Lowering the Turkey
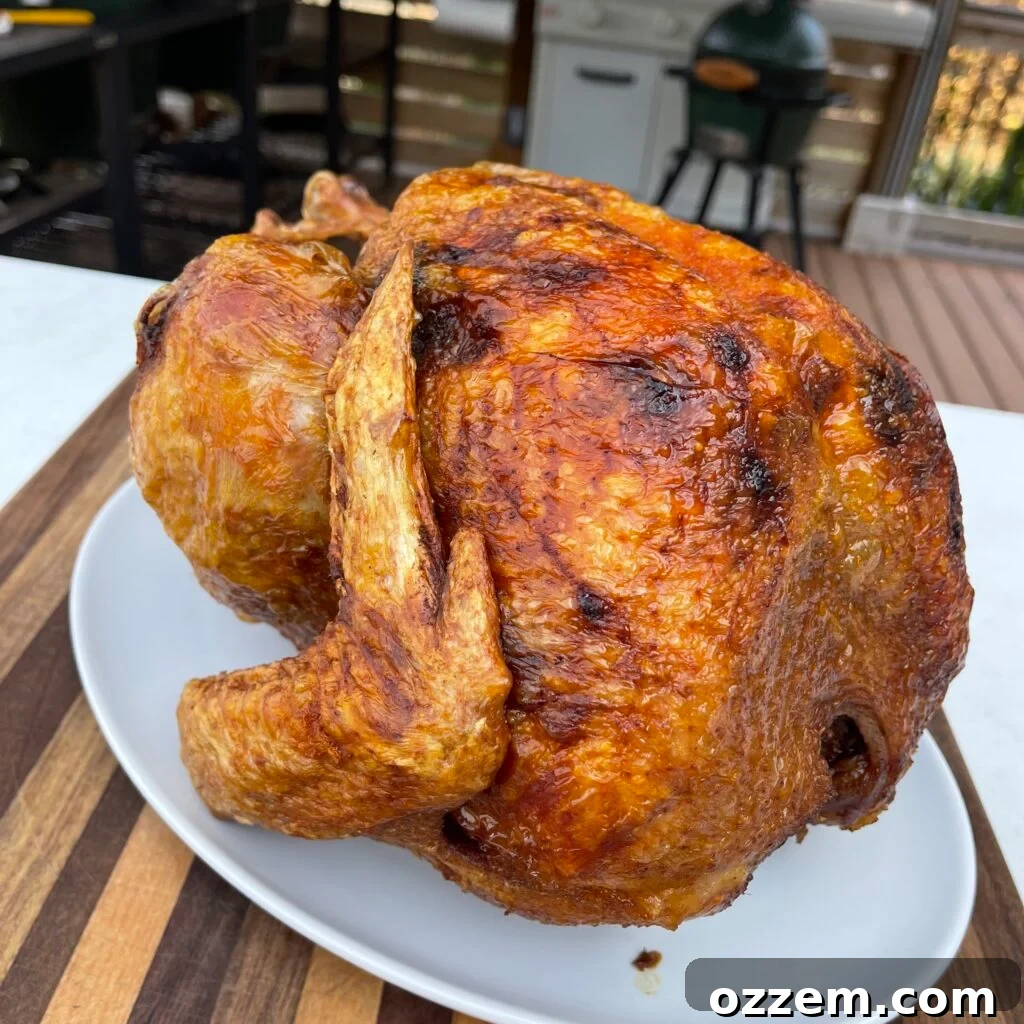
This is arguably the most critical step for safety. Using the poultry lifting hook, very slowly and gently lower the turkey, breast-side down, into the hot oil. Doing this slowly allows the oil to stabilize and prevents dangerous splattering. Take your time; rushing this step is a common cause of accidents. The breast side down initially helps protect the leaner breast meat from drying out and allows the legs and thighs, which require more cooking, to be submerged deeper in the hottest part of the oil.
Monitoring and Cooking Time
Once the turkey is fully submerged, the oil temperature will drop. Adjust the burner to bring the temperature back to 325°F (163°C) and maintain it as consistently as possible throughout the cooking process. The general rule of thumb for frying time is approximately 3 minutes per pound of turkey. So, a 16-pound turkey will take roughly 48 minutes to cook. However, this is just an estimate. The true indicator of doneness is the internal temperature.
Using a reliable meat thermometer, check the internal temperature in the thickest part of the thigh (without touching the bone) and the deepest part of the breast. The turkey is fully cooked when it reaches an internal temperature of 165°F (74°C). For the juiciest results, you can remove the turkey when it hits 160°F (71°C), as it will continue to cook slightly during the resting period (carry-over cooking).
Resting Before Carving
Once your turkey reaches the target internal temperature, slowly and carefully pull it up and remove it from the fryer, allowing any excess oil to drain back into the pot. Transfer the turkey to a large platter or cutting board, and let it rest uncovered for at least 10-15 minutes before carving. Resting allows the juices to redistribute throughout the meat, ensuring a tender and moist bird. Skipping this step will result in dry meat as all the delicious juices will run out when you cut into it.
Now, carve your perfectly cooked deep-fried turkey and enjoy the fruits of your labor! Happy Thanksgiving!
Frequently Asked Questions:
While the flavor profile of the injection marinade is versatile, this specific guide and its cooking times are tailored for deep frying. Deep frying cooks much faster and results in a distinct crispy skin that can’t be replicated in a conventional oven or on a stove top. If you’re looking for oven or grill recipes, please refer to our other turkey guides.
The best way to guarantee tender and juicy meat, whether deep-fried or otherwise, is to monitor the internal temperature diligently. For turkey, remove it from the heat when the thickest part of the thigh and breast reaches 165°F (74°C). Allowing it to rest for 10-15 minutes after cooking is also crucial for the juices to redistribute, preventing a dry bird.
Allow the oil to cool completely back to room temperature. Once cool, you can carefully strain it through a fine-mesh sieve or cheesecloth to remove any food particles, allowing you to reuse it once or twice. If you don’t plan to reuse it, pour the cooled oil back into its original container or a sturdy, sealable container (like an empty milk jug) and dispose of it with your regular trash. Never pour cooking oil down the drain, as it can solidify and cause plumbing issues.
Similar Recipe Ideas:
Chicken & Turkey
Smoked Turkey
Chicken & Turkey
Mexican Inspired Turkey Breast
Chicken & Turkey
BBQ Turkey Legs
Chicken & Turkey
Best Deep Fried Turkey
For your convenience, here is a printer-friendly recipe card:
Best Deep Fried Turkey Recipe
By: Maciek Zurawski
Learn how to make the best deep-fried turkey this Thanksgiving season for an incredibly flavorful and crispy holiday meal!
Prep Time: 10 minutes
Cook Time: 45 minutes (approx. 3 minutes per pound)
Servings: 6-8 People (for a 16lb turkey)
Ingredients
- 1 whole turkey (12-16 lbs, thoroughly defrosted and dried)
- 2 sticks unsalted butter, melted
- 2 tbsp minced garlic
- 2 tbsp BBQ rub (your preferred blend)
- 1/4 cup hot sauce (of your choice)
- 1/2 white onion, grated
- 1/2 can beer or apple juice (as an alternative)
- 3-4 gallons peanut oil (or enough to cover turkey in fryer)
Instructions
- Ensure the turkey is completely defrosted. Place it in the refrigerator 4-5 days before cook day for proper thawing.
- Once defrosted, rinse the turkey under cold water, remove all giblets from the inside cavity, and pat it thoroughly dry with paper towels. A dry turkey is crucial for safety and crispiness.
- Prepare the injection marinade: In a mixing bowl, combine the melted butter, minced garlic, BBQ rub, hot sauce, grated white onion, and beer or apple juice. Mix well until all ingredients are incorporated.
- Using a meat injector, inject the liquid into multiple areas of the turkey, focusing on the breast and thighs for maximum flavor and moisture. Wipe off any excess liquid on the skin.
- Prepare your deep fryer: Set it up outdoors on a level, non-combustible surface, away from any structures. Add peanut oil (or chosen oil) to the fryer. (Refer to the “Oil Level Determination” section above to correctly measure the oil amount before heating).
- Preheat the oil in the deep fryer to 325°F (163°C). Use an oil thermometer to monitor the temperature precisely.
- Once the oil reaches the correct temperature, very slowly and carefully lower the turkey, breast-side down, into the fryer using the poultry lifting hook. Do not drop it quickly to prevent dangerous splattering.
- Maintain the oil temperature at 325°F (163°C) throughout cooking. Fry the turkey for approximately 3 minutes per pound. For a 16lb turkey, this would be around 45-48 minutes.
- Monitor the internal temperature of the turkey. It is cooked when the thickest part of the thigh and breast reaches 165°F (74°C).
- Once cooked, slowly and carefully pull the turkey up and remove it from the fryer. Allow any excess oil to drain. Transfer the turkey to a carving board.
- Let the turkey rest for 10-15 minutes before carving. This allows the juices to redistribute, ensuring a tender and moist bird.
- Carve and enjoy your delicious deep-fried turkey!
Nutrition
Calories: 1489kcal | Carbohydrates: 2g | Protein: 186g | Fat: 79g | Saturated Fat: 32g | Polyunsaturated Fat: 14g | Monounsaturated Fat: 24g | Trans Fat: 2g | Cholesterol: 699mg | Sodium: 1273mg | Potassium: 1957mg | Fiber: 0.2g | Sugar: 1g | Vitamin A: 1423IU | Vitamin C: 2mg | Calcium: 110mg | Iron: 7mg
Like this recipe? Rate and comment below!
Check out the Recipes Page for other tasty ideas!