
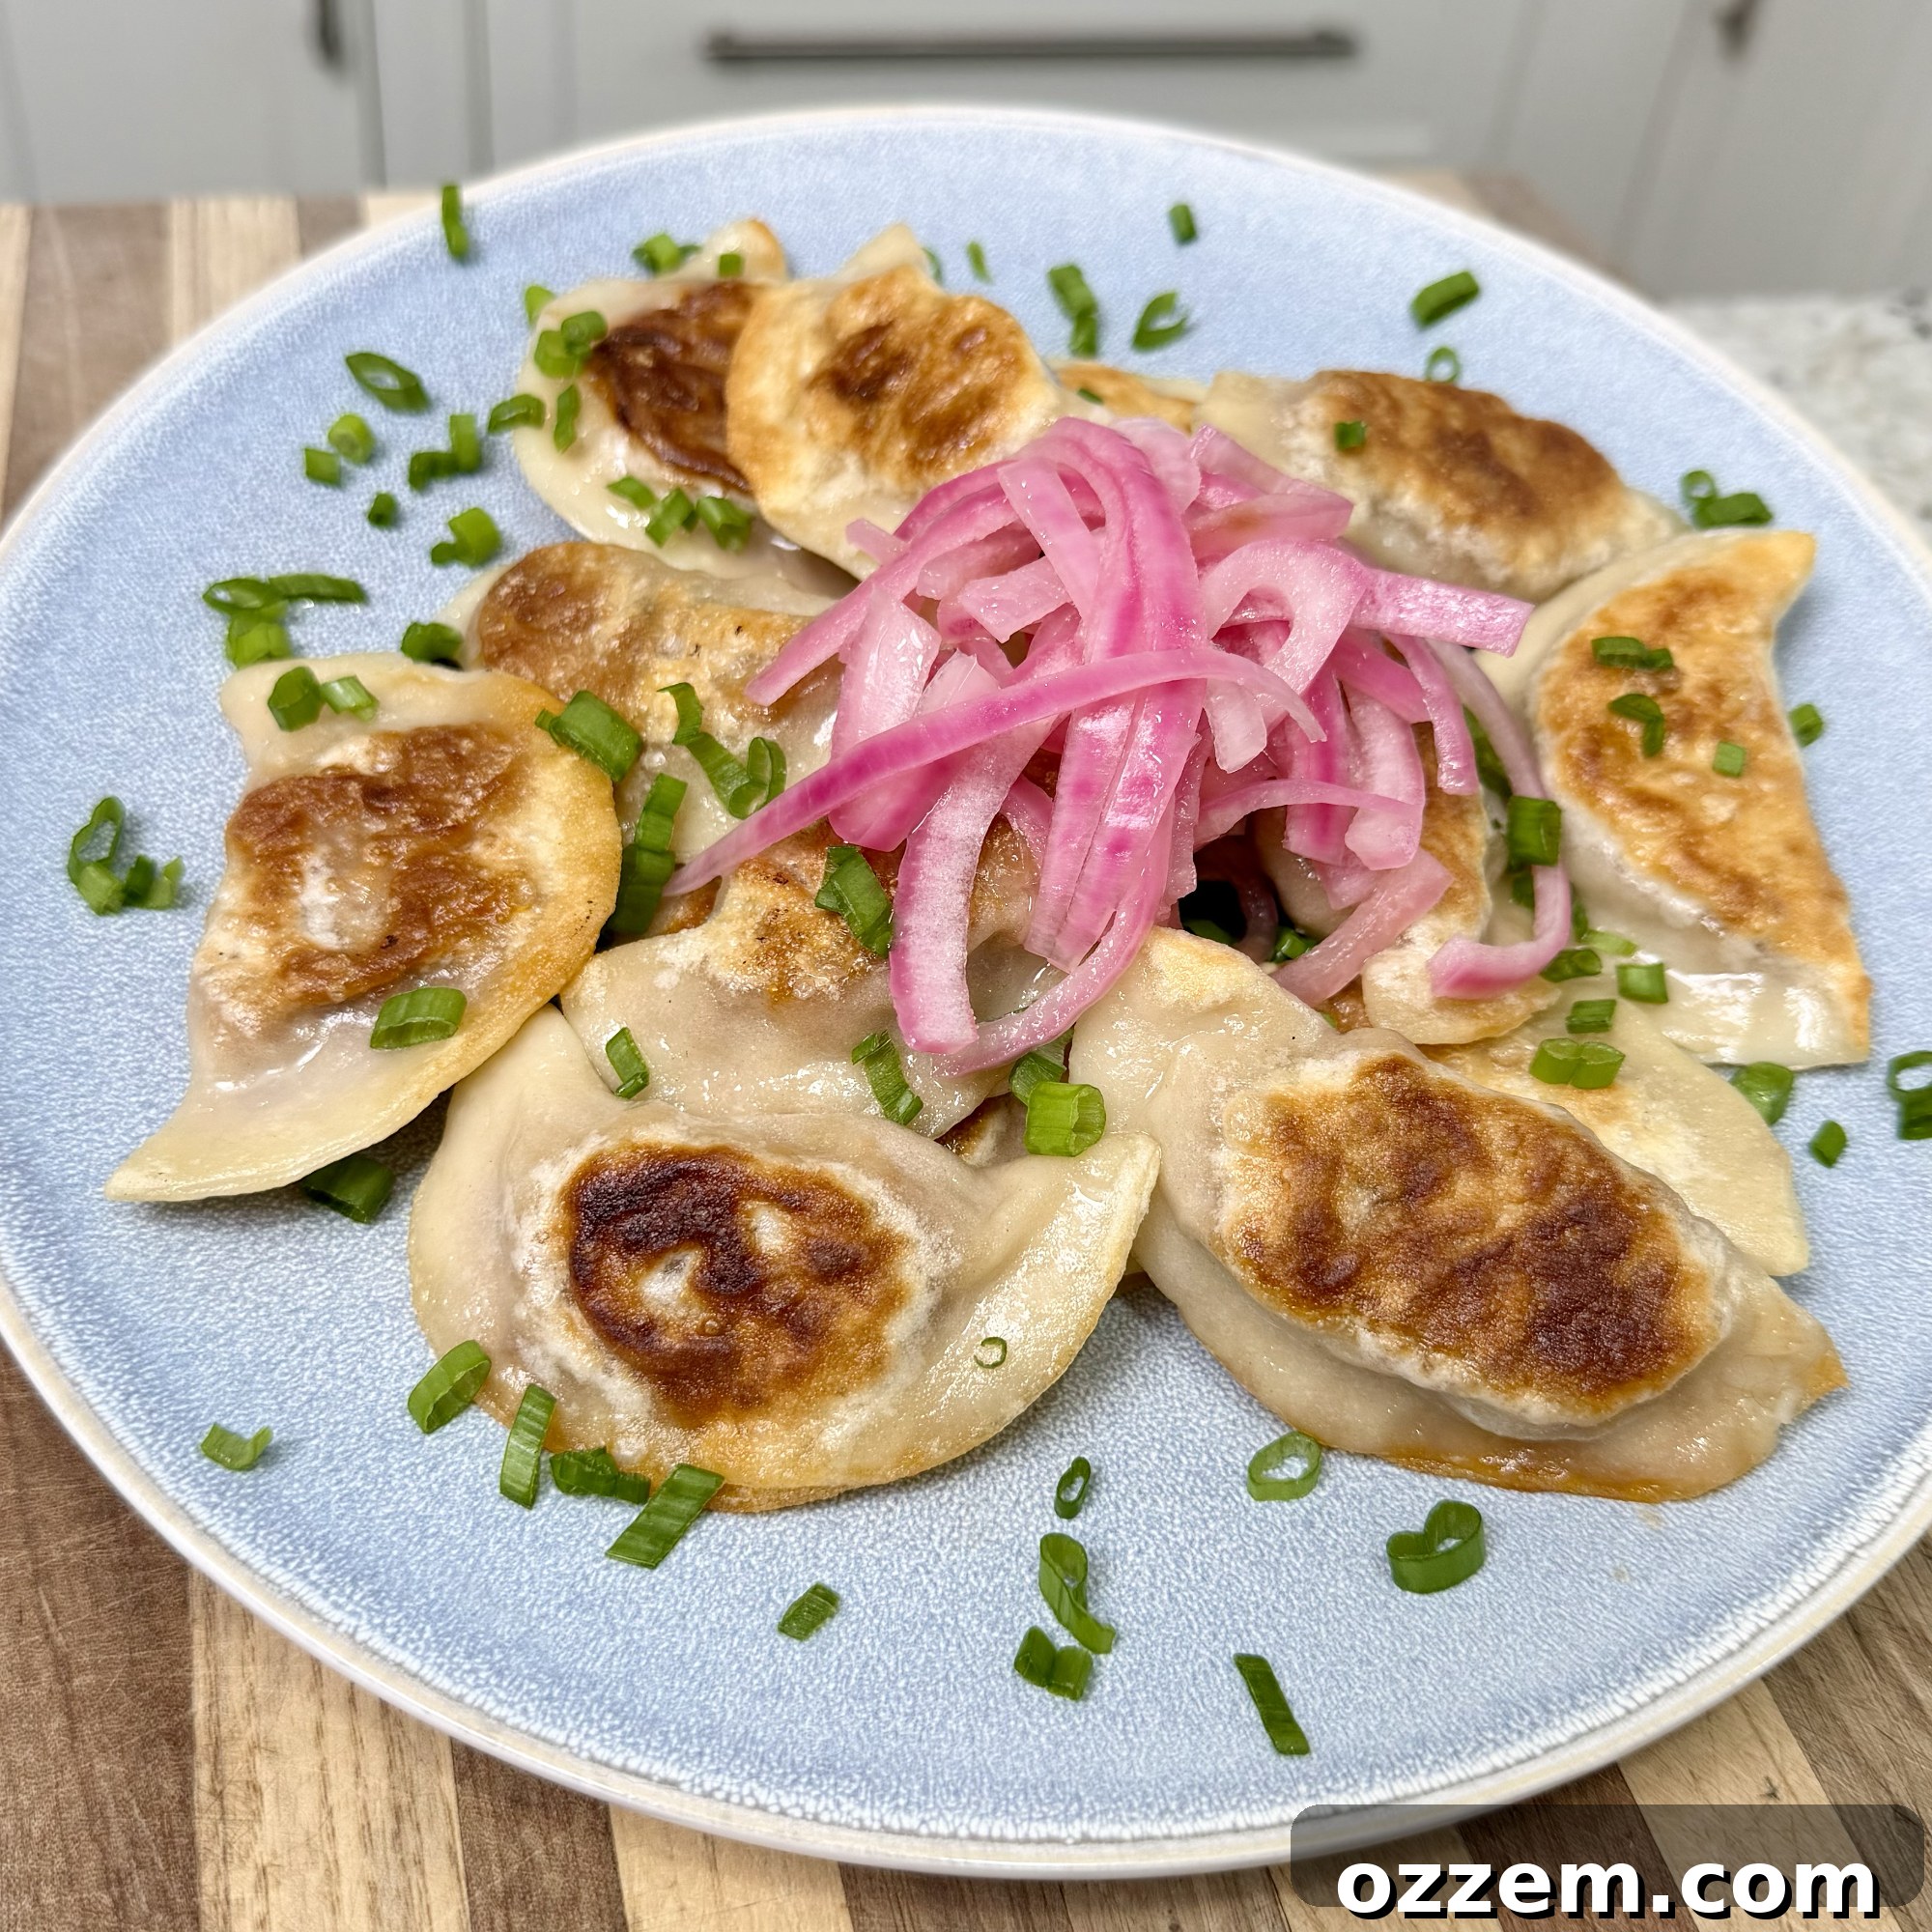
Ultimate Pulled Pork Pierogi: A Smoky Polish-American Comfort Food Fusion
These Pulled Pork Pierogi represent the ultimate Polish-American recipe mashup, a delightful culinary fusion you never knew you needed. This dish beautifully brings together the best of two worlds: the smoky, savory goodness of classic BBQ and the comforting, hearty tradition of Polish cuisine. Featuring a cherished family pierogi dough recipe, tender smoked pulled pork, and perfectly pan-seared dumplings, this dish promises a rich, unforgettable flavor experience. Whether you’re repurposing leftover pulled pork from a weekend cookout or smoking a fresh batch specifically for this creation, these homemade pierogi are guaranteed to be a showstopper at any dinner table, delivering big flavor in every single bite.
Looking for more creative ways to utilize leftover pulled pork? Transform it into irresistible Pulled Pork Nachos for the ultimate game-day snack, or whip up tender and savory Salsa Verde Tacos for a quick and easy weeknight meal. For another homemade delight, try these Puff Pastry Meat Pockets, a fantastic twist on a classic comfort food.
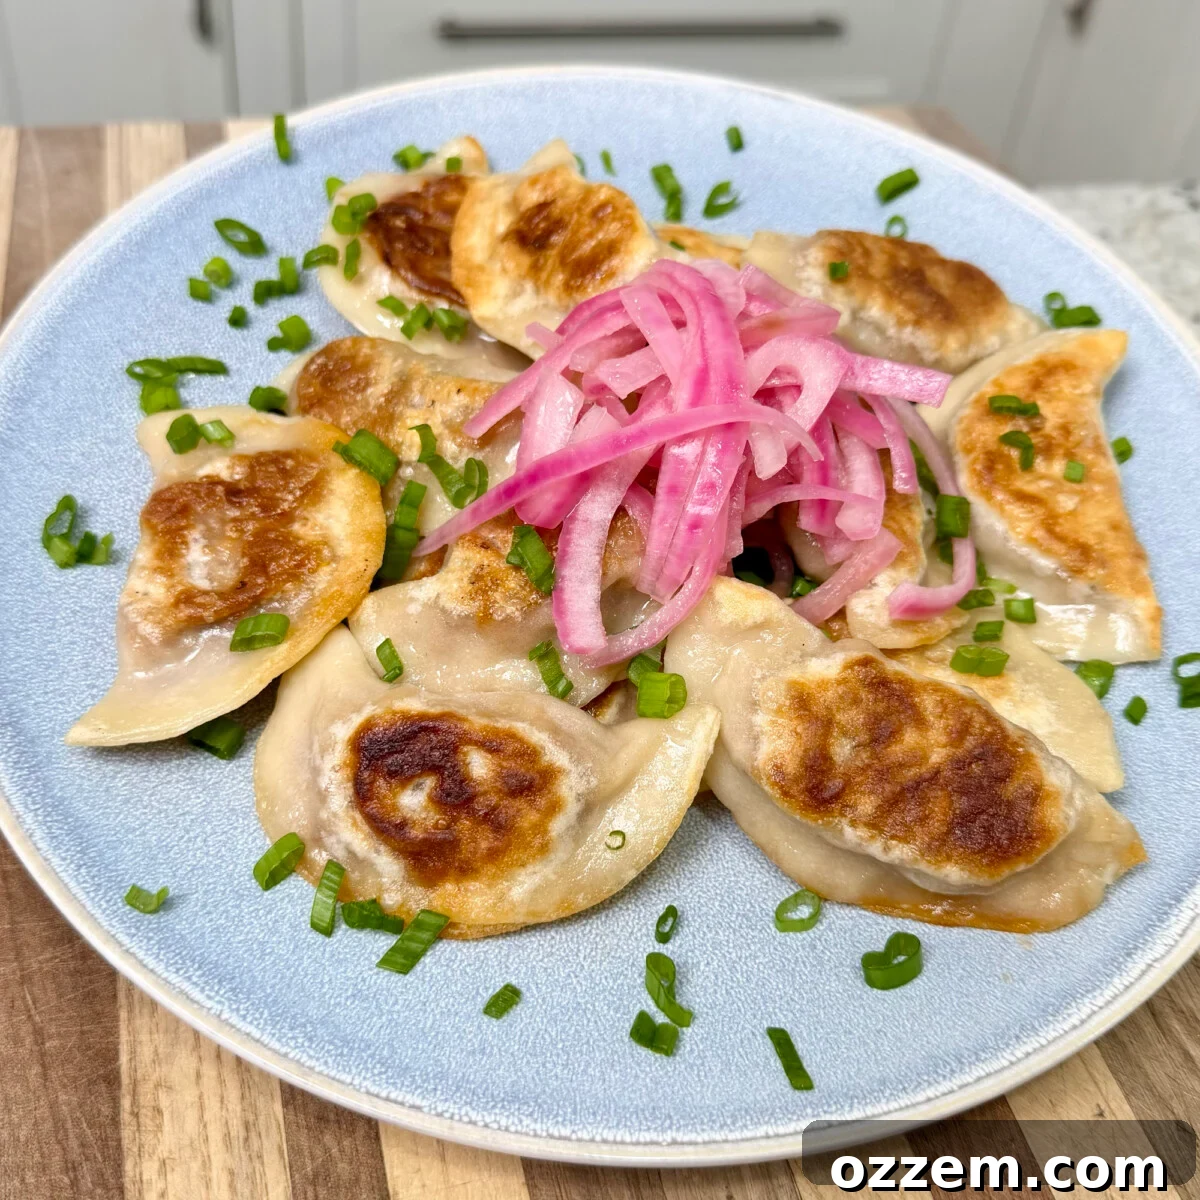
Table of Contents
- What are Pierogi?
- The Perfect Pairing: Why Pulled Pork Pierogi Work So Well Together
- Essential Ingredients for Pulled Pork Pierogi
- Crafting the Tangy Topping: How to Make Pickled Red Onion
- Mastering Homemade Pierogi: The Dough From Scratch
- Rolling and Cutting the Dough to Perfection
- Filling, Sealing, and Cooking Your Pulled Pork Pierogi
- Serving Suggestions for an Unforgettable Meal
- Final Thoughts
- Frequently Asked Questions:
- Explore More Delicious Smoked Pork Recipes:
- Pulled Pork Pierogi Full Recipe
What are Pierogi?
Pierogi are the beloved Polish rendition of stuffed dumplings, a culinary cornerstone deeply embedded in Polish heritage and tradition. These delectable pockets of dough are cherished during various occasions, from festive holiday celebrations to comforting weeknight dinners. Historically, pierogi have been a staple in Central and Eastern European cuisine, with each region boasting its own unique fillings and preparations. While commonly associated with Poland, similar dumplings can be found across the Slavic world, showcasing a shared love for this versatile dish.
Traditional pierogi fillings are wonderfully diverse, with popular choices including savory combinations like cheese and potato, ground meat, earthy mushrooms, and tangy sauerkraut. However, the versatility of pierogi truly shines during the summer months, when they are often filled with seasonal fruits such as sweet blueberries or ripe strawberries, served with a touch of sugar and sour cream. This adaptability makes pierogi a year-round delight, perfectly suited for any palate or season.
Typically, pierogi are first boiled until tender, then often pan-seared in butter or oil to achieve a delightful crispy exterior. They are usually served as the meal itself, often adorned with simple yet flavorful toppings. Savory pierogi are frequently complemented by a dollop of sour cream, crispy fried pork cracklings (known as skwarki in Polish), or caramelized onions. Sweet variations, as mentioned, are often enjoyed with sour cream and a sprinkle of sugar, highlighting the natural sweetness of the fruit filling.
Handmade pierogi are truly a labor of love, a process that brings families together in the kitchen. The effort invested in preparing a fresh batch is always rewarded with unparalleled taste and texture. One of the best aspects of making pierogi from scratch is their freezer-friendliness. You can enjoy some immediately, and then freeze the rest for a quick and delicious meal whenever the craving strikes, making them a perfect make-ahead option for busy days.
The Perfect Pairing: Why Pulled Pork Pierogi Work So Well Together
Pierogi are already celebrated as the ultimate comfort carb. Who can resist soft, tender dumplings generously filled with savory ingredients? This traditional delight is elevated to new heights when we swap out conventional meat fillings for the rich, smoky, and slightly sweet notes of BBQ pulled pork. Imagine the tender pulled pork, infused with a vibrant BBQ sauce, complemented by sautéed onions and gooey cheese, all encased within a delicate pierogi shell. This combination creates an ultimate flavor mashup that is truly irresistible.
The magic lies in the symphony of textures and flavors. The tender, yielding texture of the pierogi dough provides a soft embrace for the robust, shreddable pulled pork. The sweet and tangy BBQ sauce cuts through the richness of the meat and cheese, while the sautéed onions add a subtle sweetness and aromatic depth. Once these delightful dumplings hit a hot skillet for pan-searing, your entire kitchen will be filled with an aroma that promises pure culinary heaven. This dish is substantial enough to provide hearty warmth on a chilly winter evening, yet its straightforward preparation makes it an achievable and enjoyable meal for any weeknight.
Essential Ingredients for Pulled Pork Pierogi
Creating these incredible Pulled Pork Pierogi requires a few key components, each playing a vital role in building layers of flavor and texture. Here’s what you’ll need:
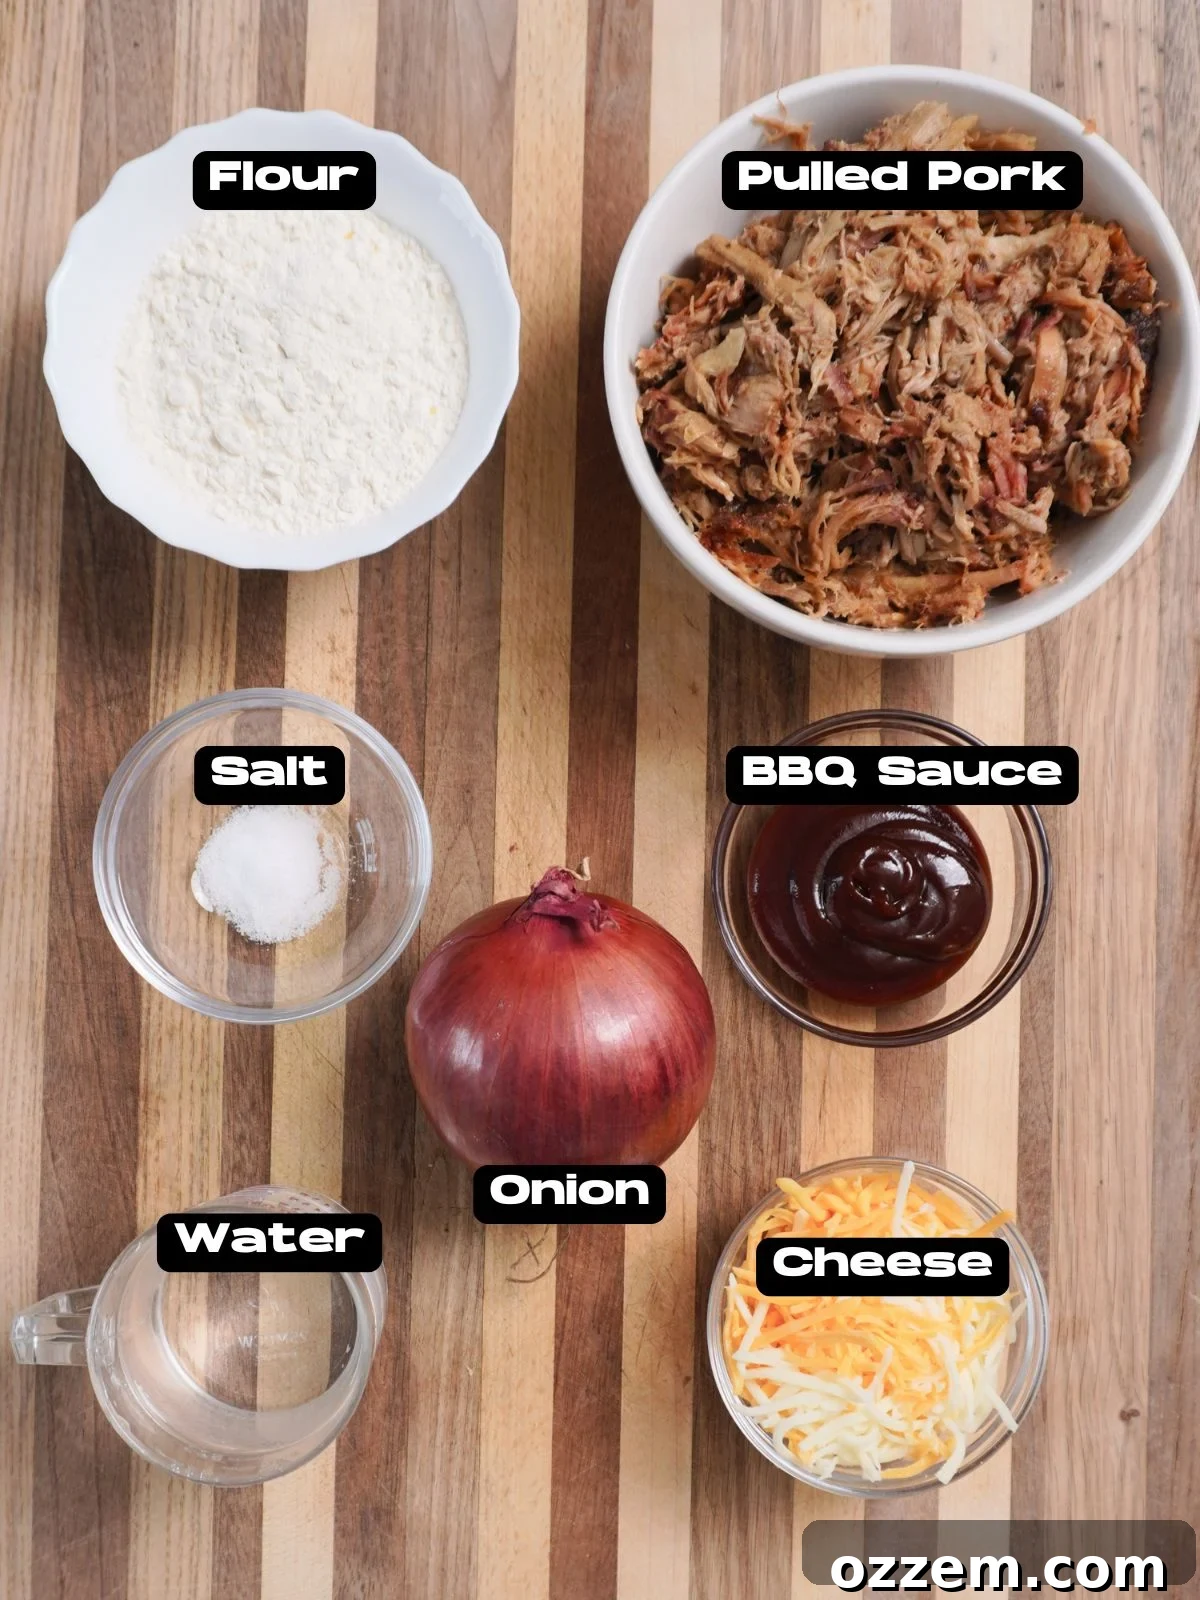
- Pulled Pork: This is the star of our filling. Using leftover pulled pork is not only convenient but also allows the flavors to deepen even further. The tender, shredded texture is ideal for pierogi filling.
- BBQ Sauce: A touch of your favorite BBQ sauce adds a wonderful sweet, smoky, and tangy creaminess to the pulled pork, ensuring each bite is moist and packed with flavor. Choose a sauce that complements your pork and personal preference.
- Cheese: Melted cheese introduces a luscious, creamy gooeyness to the filling, binding the ingredients together and adding an extra layer of savory richness. Cheddar, Monterey Jack, or a blend work beautifully.
- Onion: Fresh red onion contributes a delightful crunch and a sharp, zesty bite to the pulled pork stuffing, providing a welcome contrast to the rich meat. Red onions are also essential for making the homemade pickled red onion topping, which brightens the entire dish.
- All-Purpose Flour: The foundation of our delicate pierogi dough. All-purpose flour provides the necessary structure and elasticity for a pliable dough that holds its shape and cooks perfectly.
- Warm Water: Crucial for the dough. The water should be warm, but never hot or boiling. Warm water relaxes the gluten in the flour, resulting in a softer, more manageable, and tender pierogi dough.
- Salt: A pinch of salt is vital for flavoring the dough itself, ensuring it isn’t bland and perfectly complements the savory filling.
Crafting the Tangy Topping: How to Make Pickled Red Onion
The perfect accompaniment for our savory Pulled Pork Pierogi is a batch of homemade pickled red onions. These vibrant, tangy, and slightly crunchy onions provide a burst of acidity that beautifully cuts through the richness of the pierogi, elevating the entire dish. Their bright flavor profile creates a fantastic contrast with the tender, smoky pulled pork and buttery pierogi.
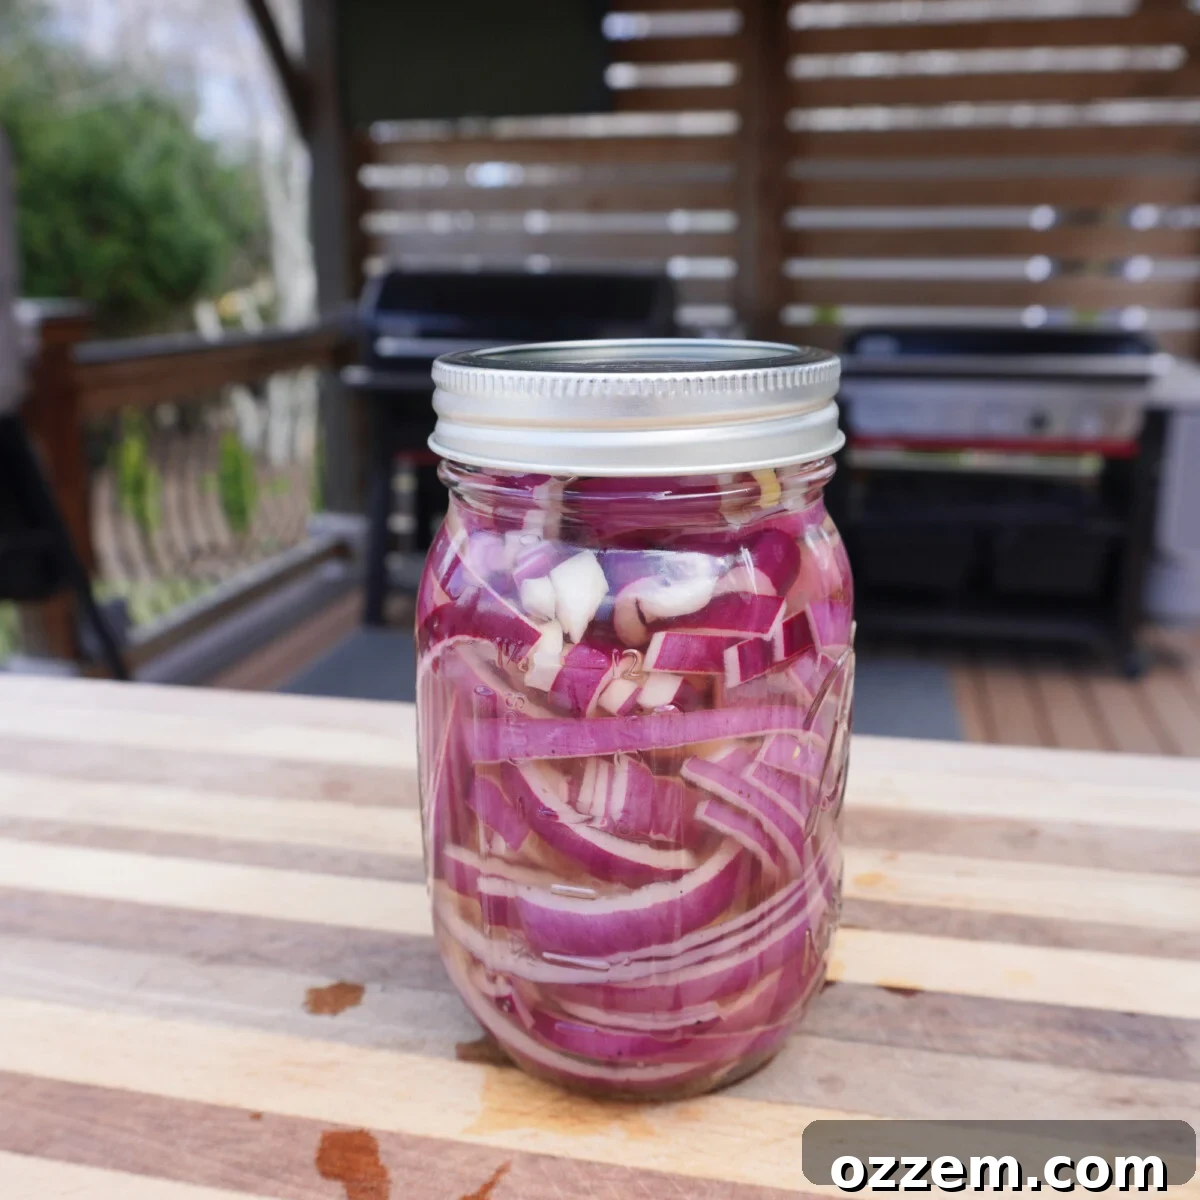
I highly recommend preparing the pickled red onions first, as they require time to cool and for the flavors to meld before serving. The process is incredibly straightforward and yields impressive results.
To begin, thinly slice an entire red onion. Uniform slices will ensure even pickling. Carefully place the sliced red onion pieces into a clean mason jar. Next, in a small saucepan, combine water, white vinegar, sugar, salt, and a handful of peppercorns. Bring this mixture to a gentle boil, ensuring the sugar and salt are fully dissolved. Once boiling, immediately pour the hot brine over the red onions in the mason jar, making sure the onions are fully submerged. Seal the jar tightly and set it aside to cool completely at room temperature. As it cools, the onions will soften and absorb the tangy flavors.
Once cooled, store the sealed mason jar of pickled red onion in the refrigerator. They will keep well for up to 2-3 weeks, becoming more flavorful over time. Enjoy them not only with your pierogi but also as a versatile condiment with a wide array of meals.
Beyond pierogi, pickled red onions are incredibly versatile. Add them to a juicy Shredded Buffalo Chicken Sandwich for a zesty kick, or pile them high on a comforting Sloppy Joe Baked Potato to brighten the savory flavors. They also make an excellent addition to tacos, salads, and burgers!
Mastering Homemade Pierogi: The Dough From Scratch
Making pierogi from scratch is a rewarding experience, and while it might seem intimidating, the process for the dough is quite simple. It requires just three fundamental ingredients: water, all-purpose flour, and a pinch of salt. The true magic, however, lies in the technique and the care taken during preparation. The filling, on the other hand, offers endless possibilities, with the main rule being to ensure it’s not overly wet to prevent the pierogi from opening during cooking.
For this specific Pulled Pork Pierogi recipe, we are using a cherished homemade dough recipe, a culinary heirloom passed down from my wife’s grandmother, originating from the “old country.” As both my wife and I were raised in traditional Polish households, steeped in Polish culture and cuisine, these recipes hold significant sentimental and authentic value. Our family traditions include regularly preparing these dishes and visiting relatives overseas, keeping our heritage vibrant.
To begin your pierogi dough journey, clear a clean, dry, flat working surface. Measure out one cup of all-purpose flour and gently mound it on your surface. Add a teaspoon of salt to the flour and mix these dry ingredients together thoroughly with your hands, creating a small well in the center.
Next, you’ll need approximately ½ cup of warm water. It’s crucial that the water is warm – think lukewarm, not cold tap water, room temperature, or boiling hot. Heat it gently on the stovetop or in an electric kettle, but ensure it never reaches a boil. The warmth of the water is essential because it helps to relax the gluten in the flour, making the dough exceptionally soft, pliable, and easy to work with. This relaxed gluten structure is key to achieving that tender, melt-in-your-mouth pierogi texture.
Slowly begin to add the warm water to the flour mixture, a small amount at a time, no more than a quarter of the total amount. Using your hands, gently combine the ingredients, drawing the flour into the water. Continue this gradual process of adding water and mixing until the dough starts to come together and feels wet. The secret to perfect pierogi dough truly lies in the touch and feel. Before you begin the intensive kneading, the mixture should be consistently moist, but not so wet that it becomes a sticky, slimy mess. If you find it’s too sticky, simply add a tiny bit more flour and continue to incorporate it. Conversely, if the mixture feels too dry and crumbly, add a few more drops of warm water until the desired consistency is achieved. Patience here is key to building a balanced dough.
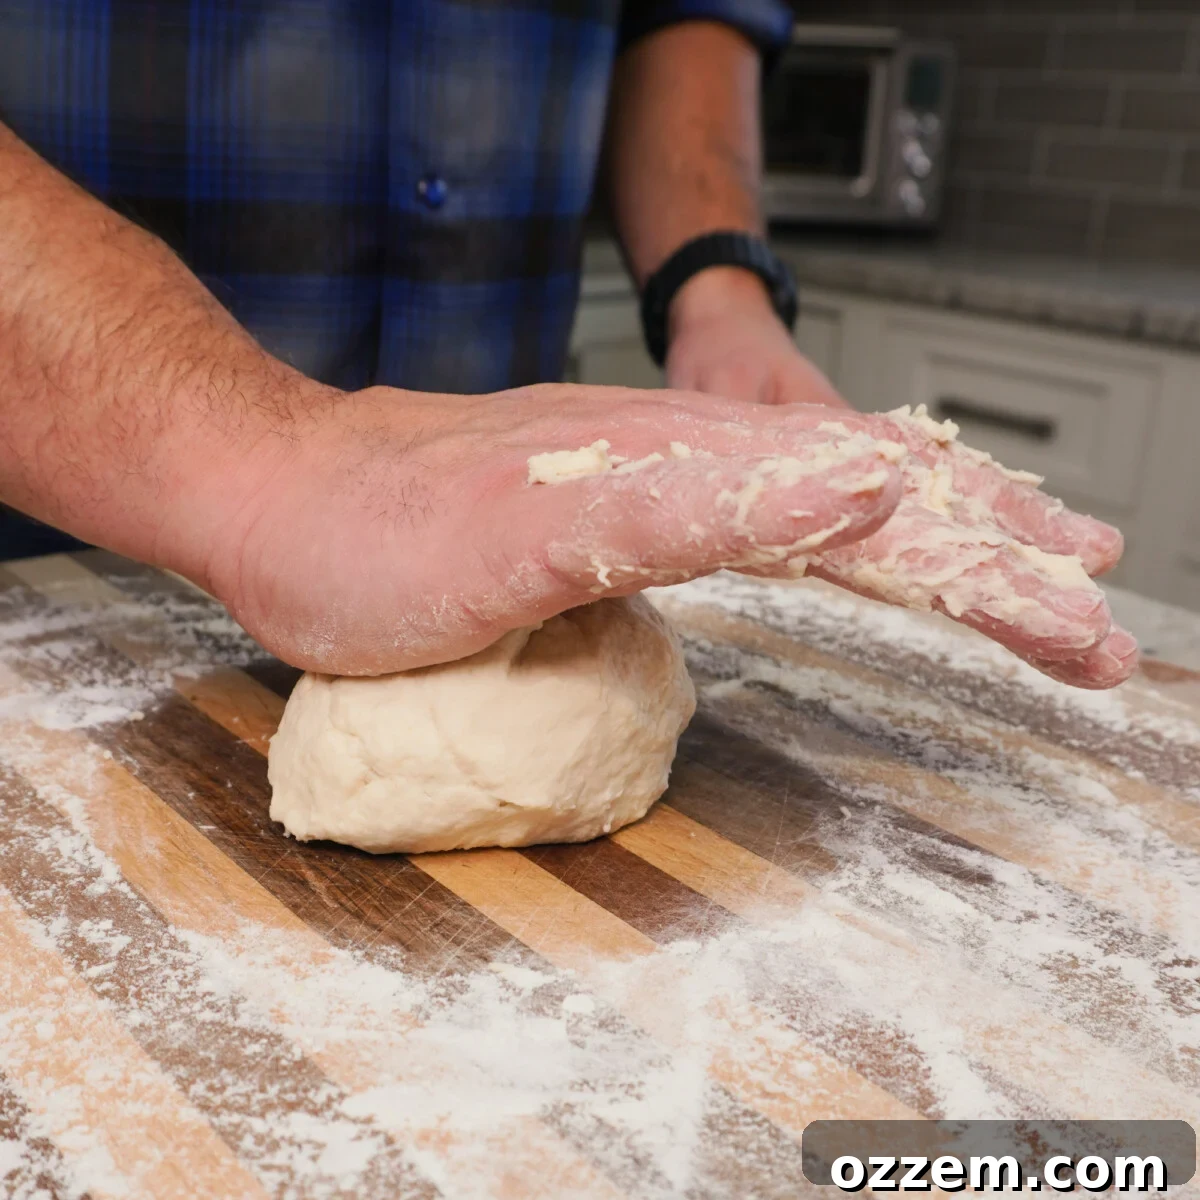
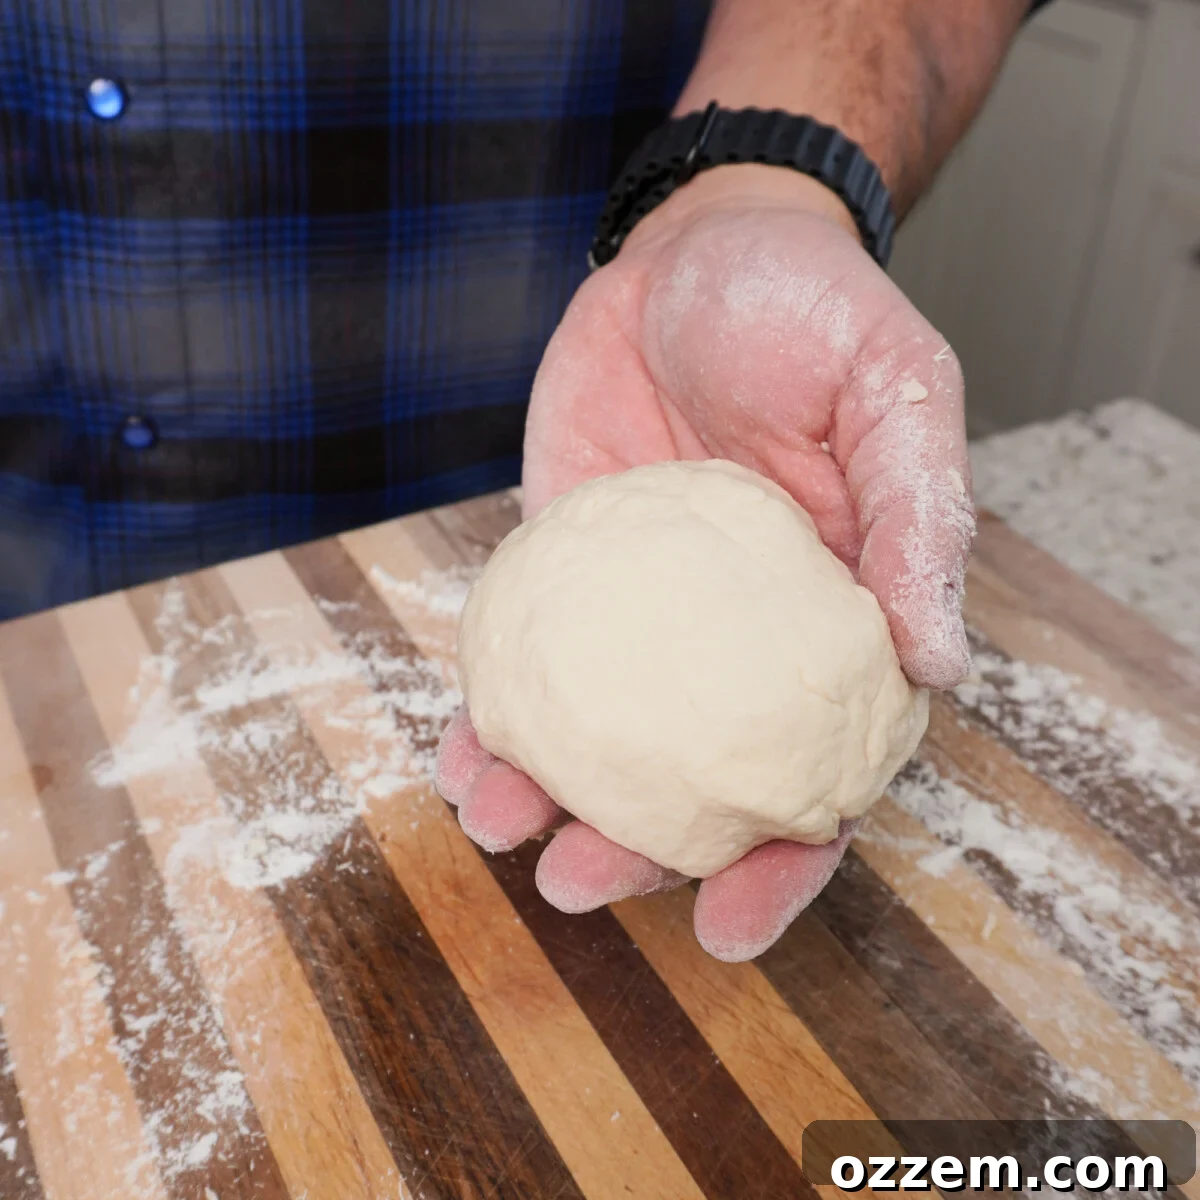
Once you’ve achieved a good initial mix and the dough is moist but manageable, sprinkle a light dusting of flour onto your flat working surface. Transfer the dough to this floured surface and begin the kneading process. Use the lower part of your palm to push down on the dough, then fold it over, and repeat. This rhythmic process typically takes about 8-10 minutes. Kneading develops the gluten just enough to give the dough structure without making it tough. The dough is ready when it becomes smooth, elastic, and, most importantly, no longer sticks to your fingers. It should feel soft and resilient to the touch, indicating it’s perfectly prepared for rolling.
Rolling and Cutting the Dough to Perfection
With your perfectly kneaded dough resting and ready, it’s finally time for the satisfying step of rolling it out. This stage is crucial for achieving the ideal pierogi texture, where the filling truly shines without being overwhelmed by too much dough. Grab your rolling pin and begin to roll out the dough. Your goal is to achieve a paper-thin consistency, but stop just before it becomes translucent. A thin dough is the hallmark of the Best Pierogi, allowing the delicious filling to be the star of every bite.
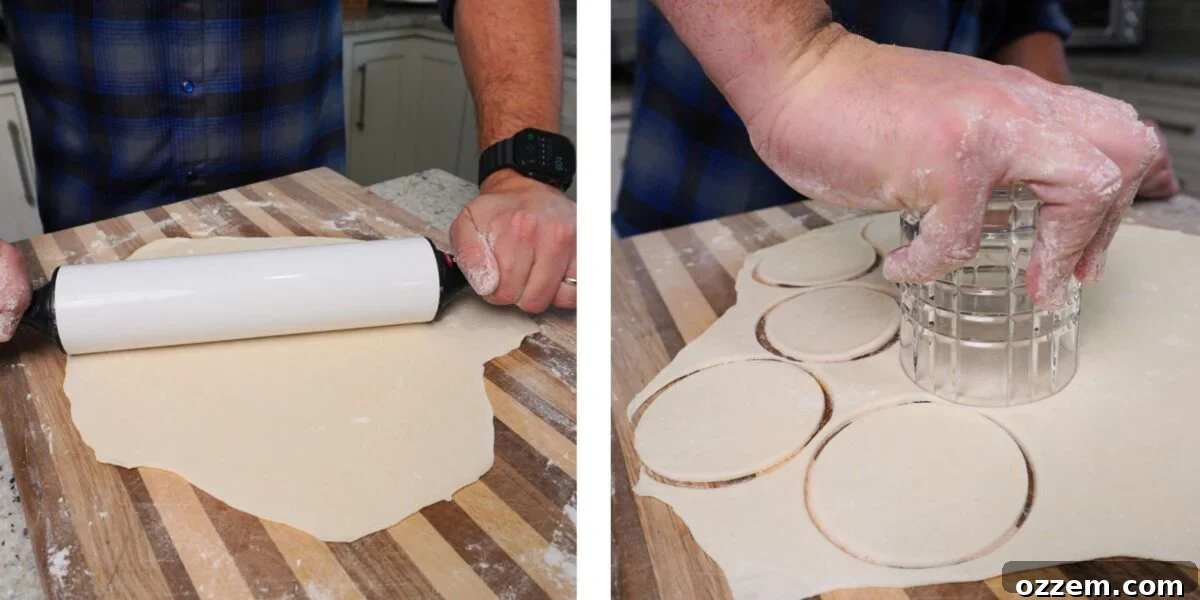
We’re nearly at the assembly line! Once your dough is rolled to the desired thinness, it’s time to cut out the individual pierogi circles. A regular-sized drinking glass or a round cookie cutter with a rim of about 2.5-3 inches in diameter works perfectly. Press the rim of the glass firmly down onto the dough to cut out medium-sized circles. Maximize your dough usage by placing cuts as close together as possible. After cutting out your initial batch of circles, carefully remove them from the working surface. Gather the remaining dough scraps, gently knead them back together, and re-roll to cut out more circles. This traditional dough recipe should easily yield between 14-16 pierogi, providing a generous batch for your meal or for freezing.
Filling, Sealing, and Cooking Your Pulled Pork Pierogi
The intricate work of preparing the dough is now behind us. The exciting part begins: stuffing our delicate pierogi with the flavorful pulled pork filling. This step brings all the elements together for a truly satisfying dish.
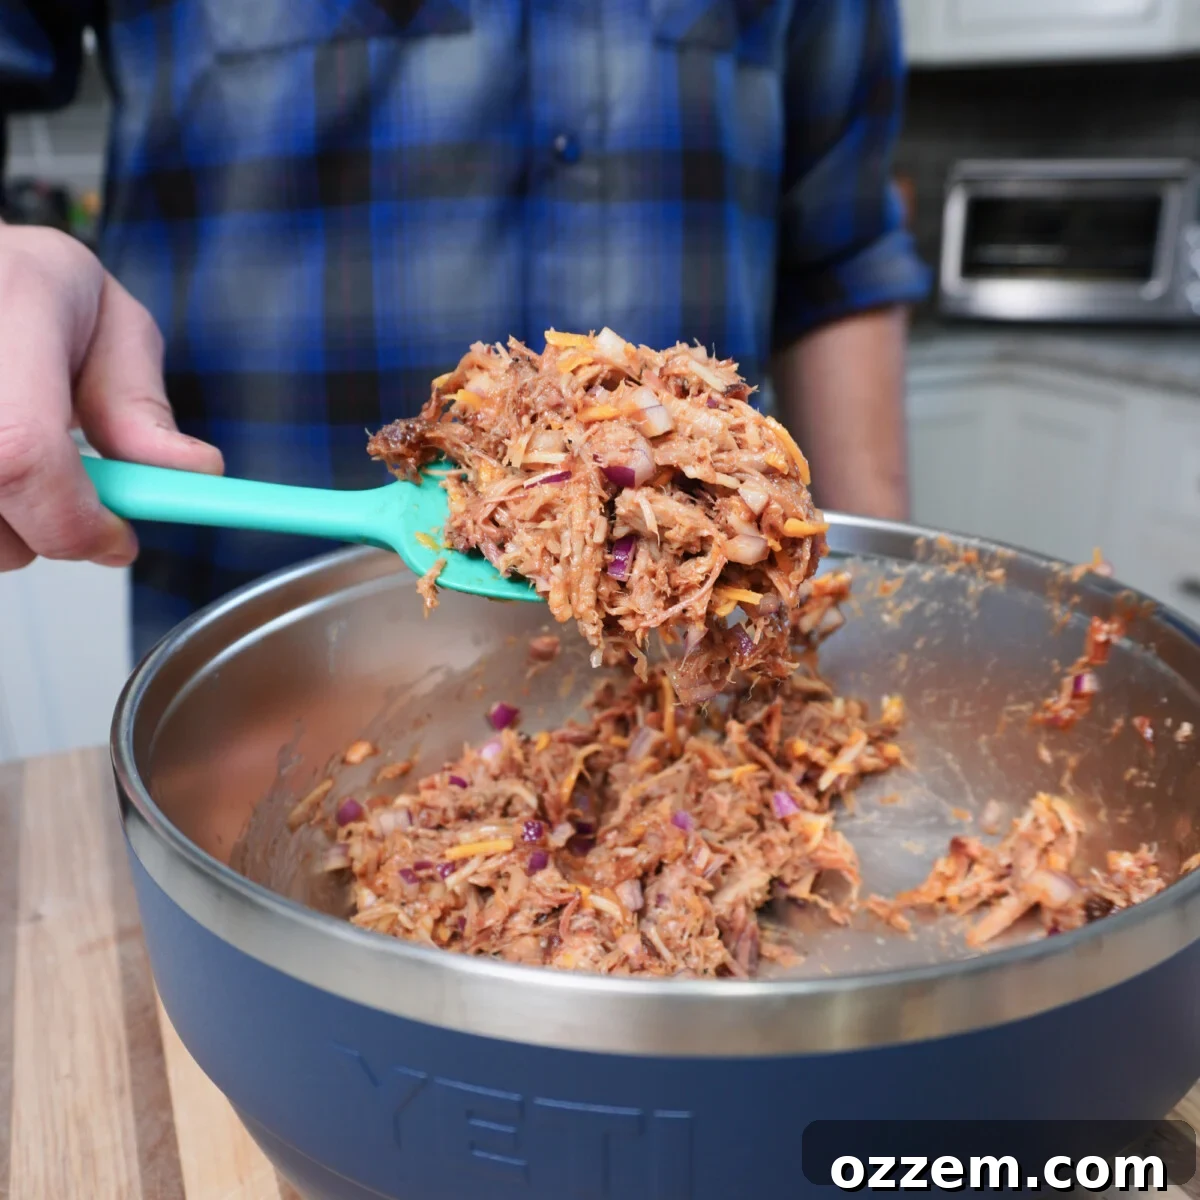
If you need a fantastic base for your pierogi, I highly recommend trying my recipe for a classic pulled pork. It delivers a perfect balance of smokiness, tenderness, savory depth, and a hint of sweetness – everything you desire in a pulled pork recipe.
Before you begin stuffing, let’s enhance that pulled pork. To ensure the filling is tender, incredibly flavorful, and possesses some delightful texture, warm up your leftover pulled pork. Then, incorporate finely diced red onion, a generous amount of shredded cheese, and a small quantity of your favorite BBQ sauce. Mix these ingredients thoroughly until everything is well combined and the flavors are evenly distributed. The diced onion adds a fresh crunch and sharpness, the cheese melts into a creamy binder, and the BBQ sauce ensures the pork remains moist and bursting with flavor.
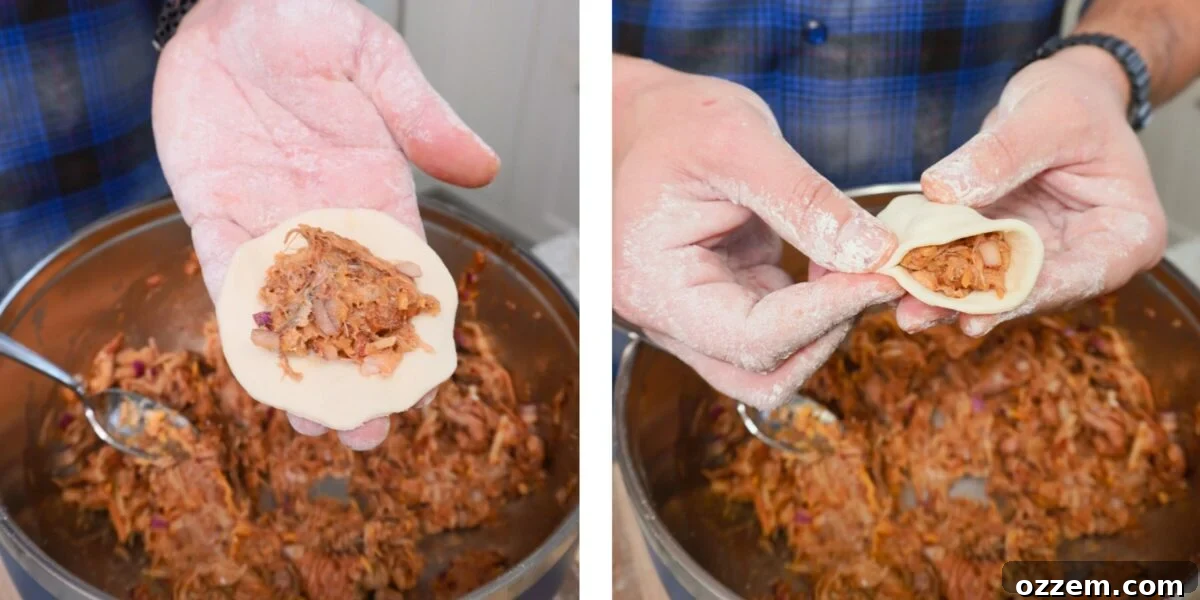
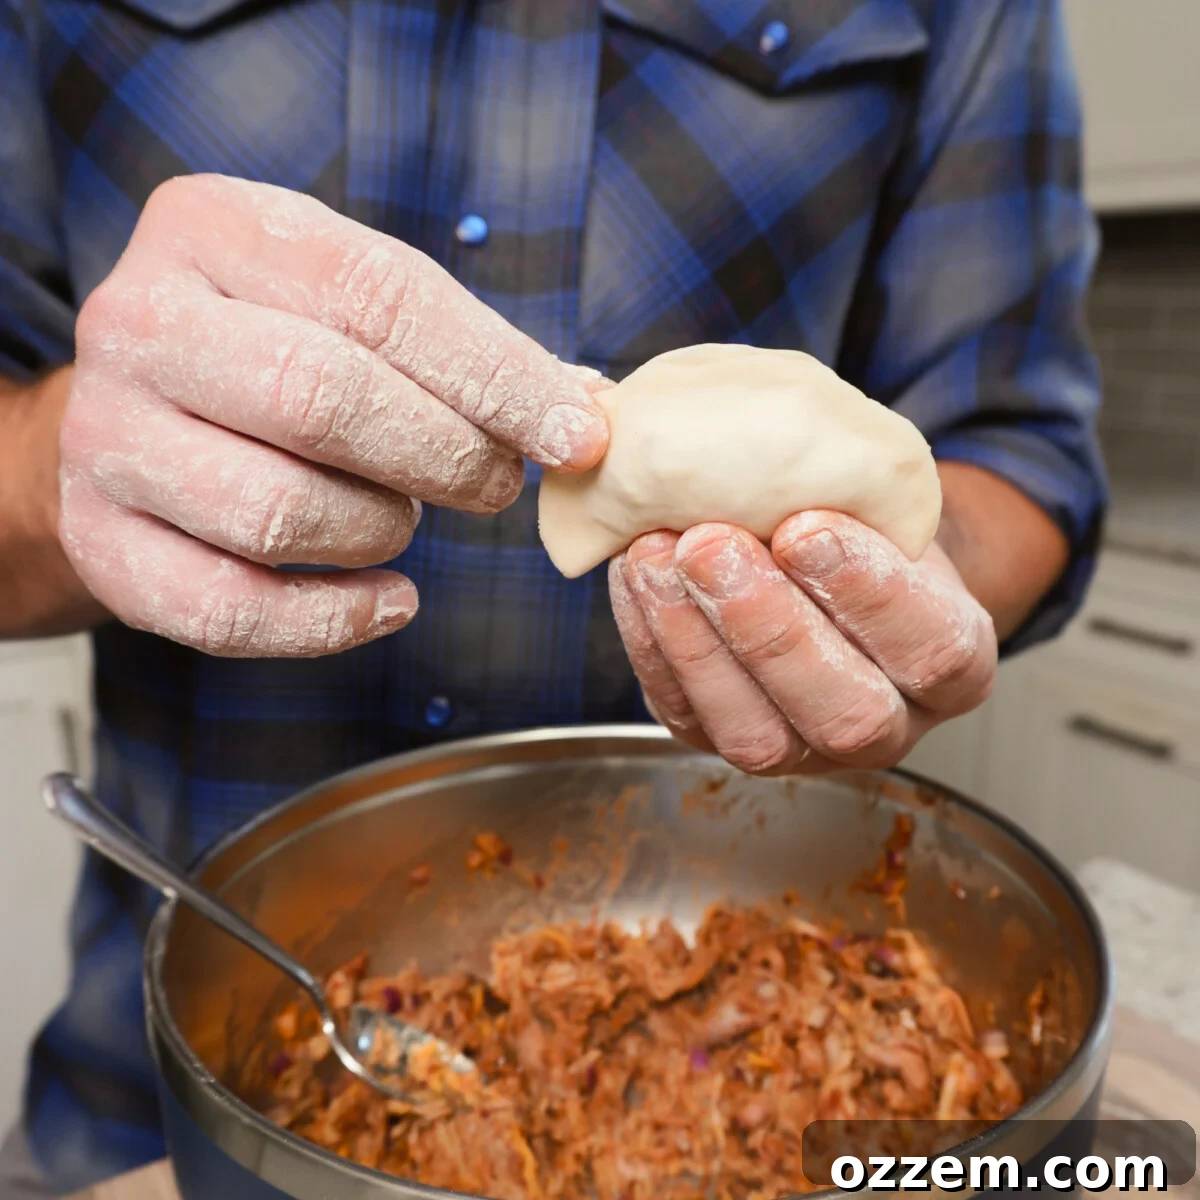
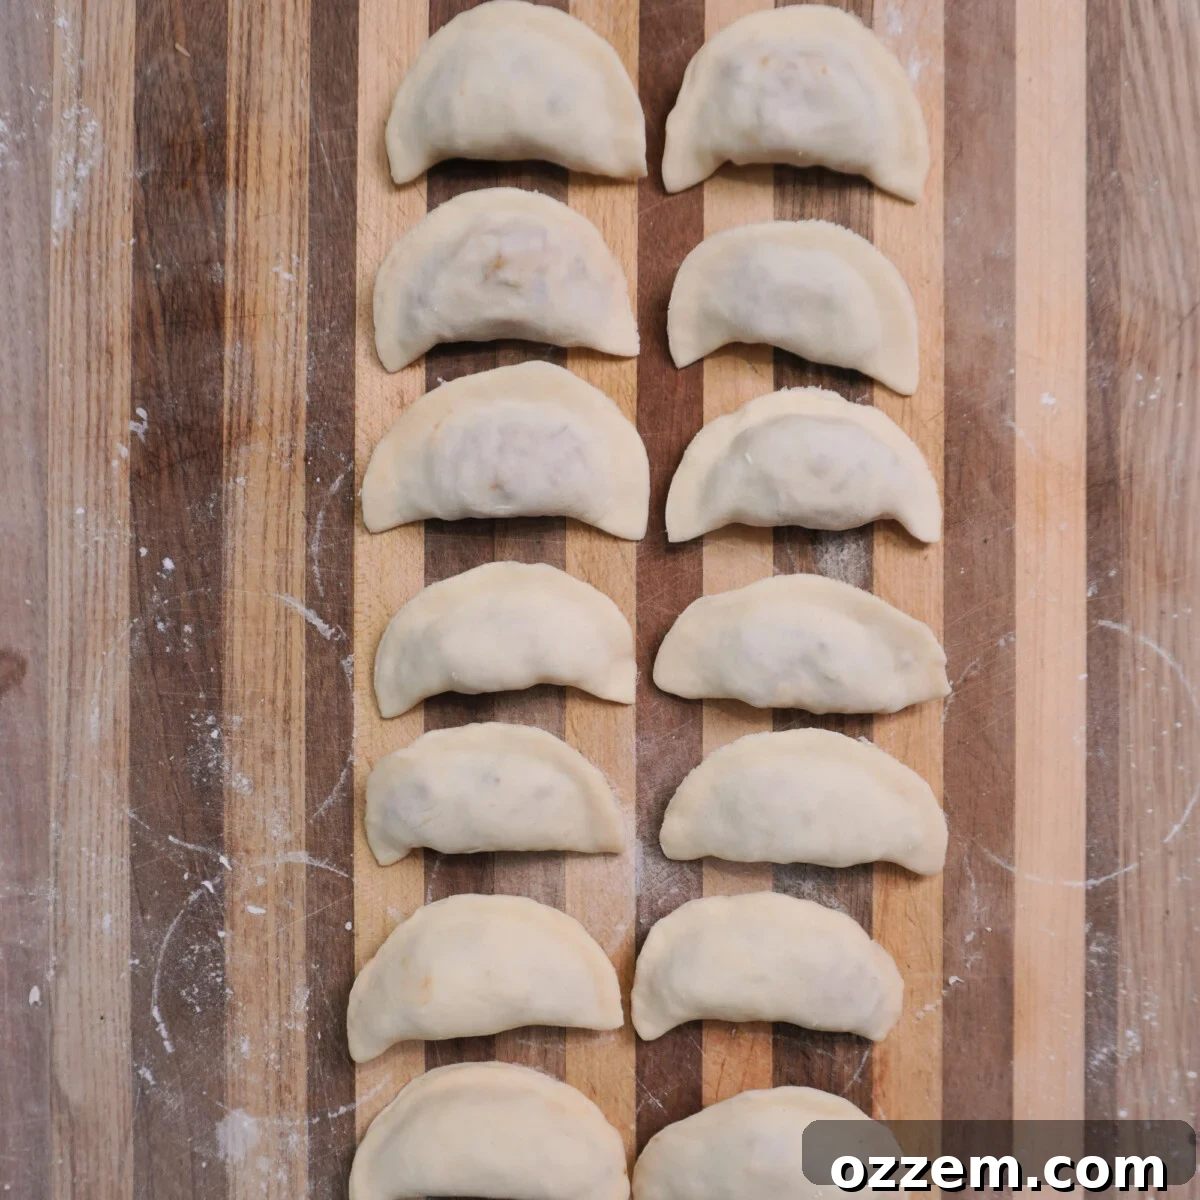
Now, take one of your prepared dough circles and place a heaping spoonful of the pulled pork filling directly in the center. Carefully fold one side of the dough over to meet the other, forming a half-moon shape. The critical step here is to ensure no meat or filling gets trapped between the edges of the dough that you intend to seal. Any filling in the seam can prevent a proper seal, causing the pierogi to open up during the cooking process. You won’t need any water to seal the edges; the natural moisture and pliability of the dough are sufficient. Using the tips of your fingers, firmly pinch the edges together, working your way around the entire curve of the half-moon to create a tight, secure seal. You can crimp the edges further for a decorative touch and extra security.
Once your pierogi are stuffed and sealed, it’s time to cook them. Fill a large pot with water, add a generous pinch of salt (this seasons the dough as it cooks), and bring it to a rolling boil. Gently drop the Pulled Pork Pierogi into the boiling water, making sure not to overcrowd the pot. Cook them in batches if necessary to maintain water temperature and ensure even cooking. Give them a gentle stir immediately after dropping them in to prevent them from sticking to the bottom of the pot.
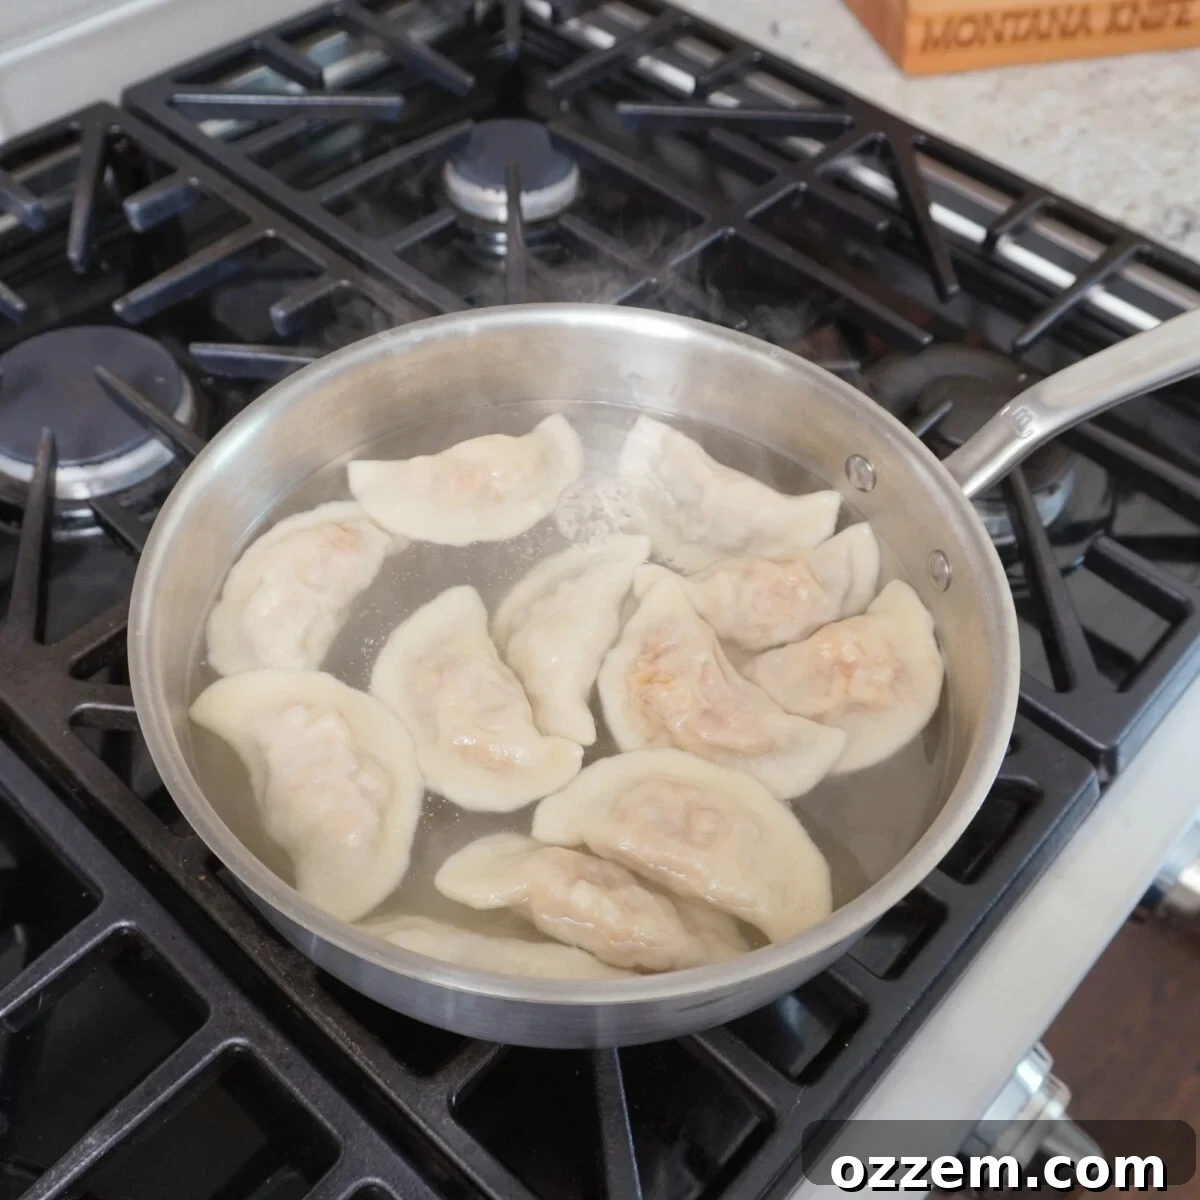
The pierogi are cooked when they float gracefully to the surface of the water. Once they float, continue to cook them for an additional 2-3 minutes to ensure the dough is fully cooked through and tender. Using a slotted spoon, carefully remove them from the boiling water and set them aside.
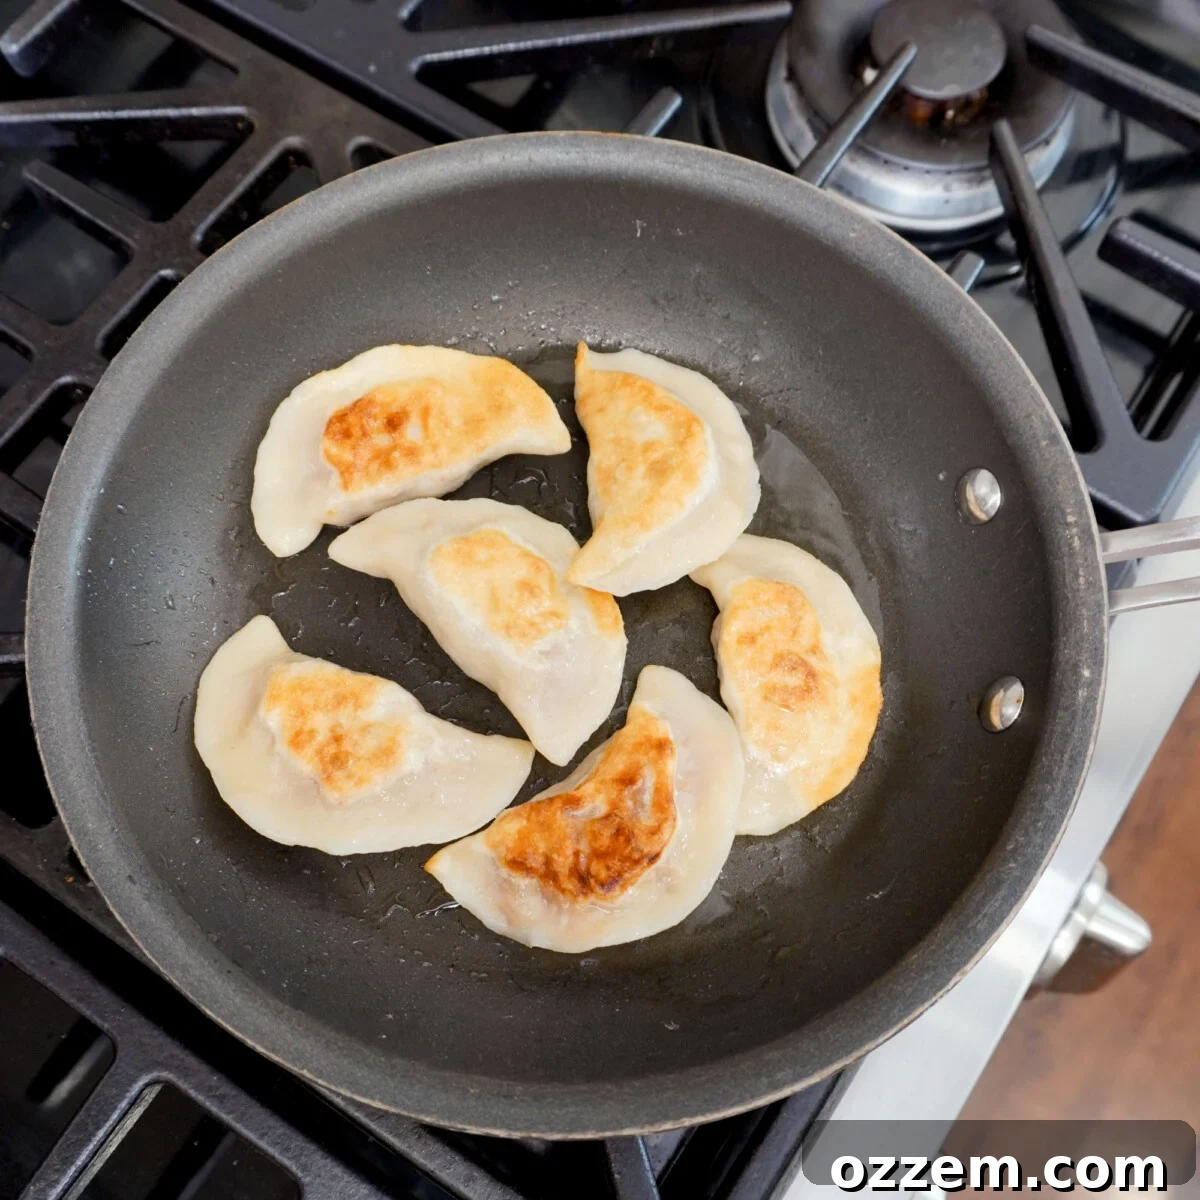
At this point, you have perfectly boiled and ready-to-eat Pulled Pork Pierogi. However, for an unparalleled depth of flavor, a golden-brown crust, and an irresistible richness, I highly recommend an extra step: pan-searing them. Preheat a large skillet over medium heat and add a generous swirl of olive oil or butter (or a combination for the best flavor). Once the fat is shimmering, gently place the cooked pierogi in the pan, ensuring they don’t touch. Sear them for 2-3 minutes per side, or until they develop a beautiful golden-brown crust. This step adds a crucial textural element and a nutty, buttery flavor that truly makes these pierogi shine.
Serving Suggestions for an Unforgettable Meal
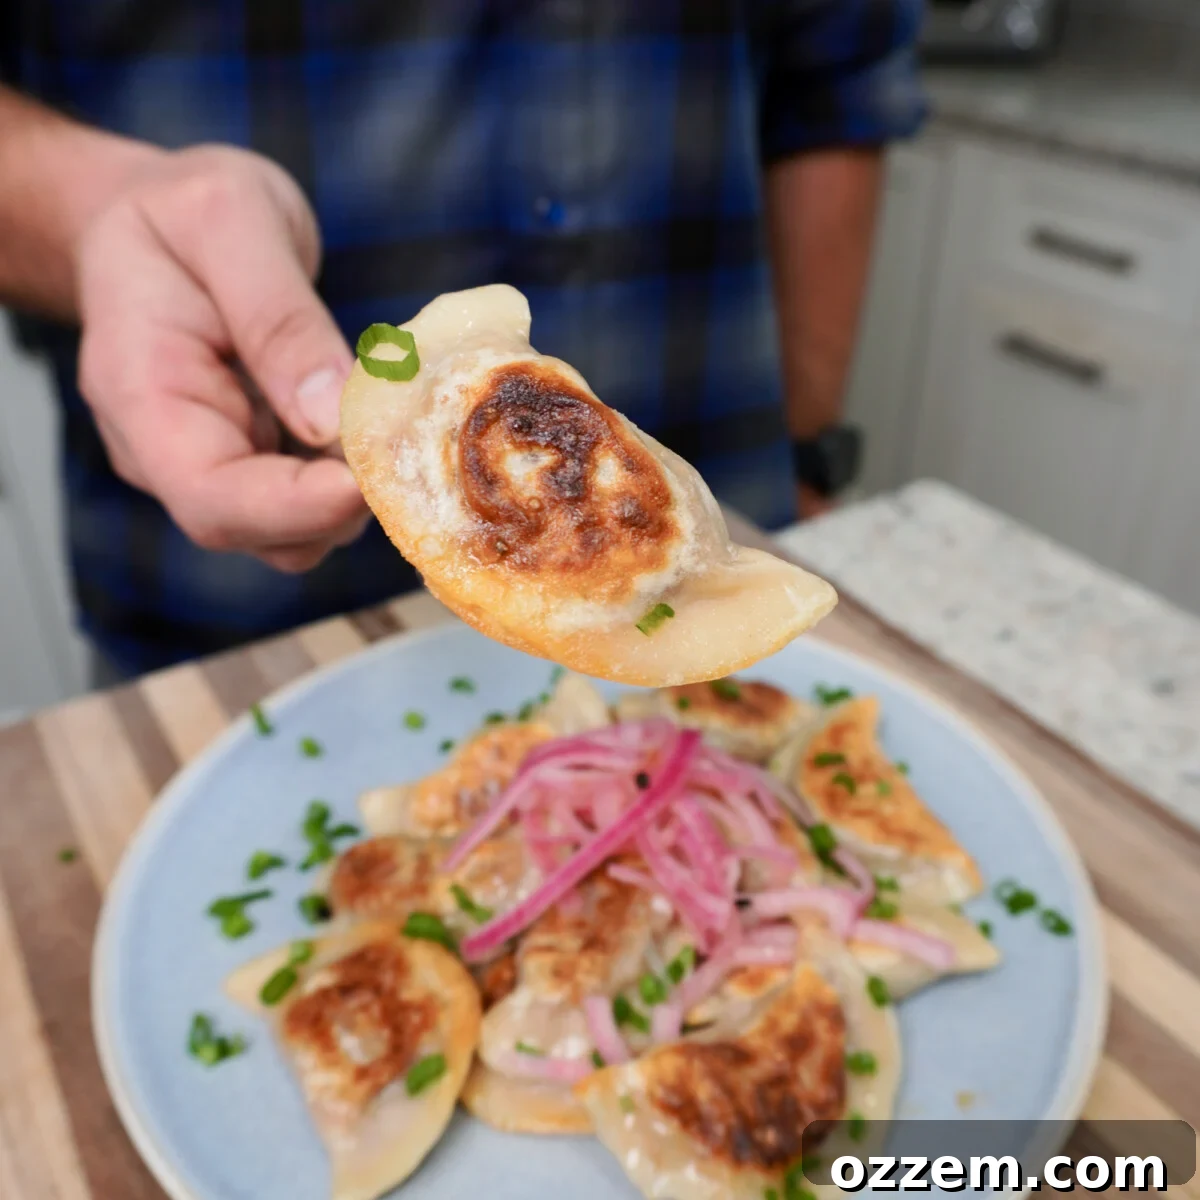
Pierogi are traditionally enjoyed in a variety of simple yet satisfying ways, often with just a pat of butter, crispy bacon bits, or fried pork skin. Given that these Pulled Pork Pierogi have a distinct BBQ flair, incorporating fresh, zesty toppings is the perfect way to complete the dish and balance its richness. The homemade pickled red onion is an absolute must-have addition. Its bright acidity and satisfying crunch provide a wonderful counterpoint to the savory, soft pierogi and the rich pulled pork. A sprinkle of freshly chopped green onions (scallions) adds another layer of mild onion flavor and a beautiful pop of color.
For additional serving ideas, consider a dollop of cool sour cream to complement the tangy BBQ flavors. A side of creamy coleslaw would also be a fantastic accompaniment, offering a fresh, crunchy texture and a contrasting sweetness. If you enjoy a bit of heat, a drizzle of your favorite hot sauce or a sprinkle of finely diced jalapeños could add an exciting kick. For a lighter touch, a simple green salad with a vinaigrette dressing would provide a refreshing balance to the hearty pierogi. Don’t be afraid to experiment and find your favorite combination!
Final Thoughts
These Pulled Pork Pierogi are a testament to the magic that happens when classic comfort food traditions meet the bold, smoky flavors of BBQ. This unforgettable dish brings together the heartiness of Polish dumplings with the tender, savory goodness of pulled pork in a way that is both innovative and deeply satisfying. Whether you’re looking for a creative and delicious new way to use up leftover pulled pork or simply craving a cozy, flavor-packed skillet meal, this recipe delivers on all fronts. It’s warm, incredibly comforting, and loaded with the kind of smoky, buttery richness that will have everyone reaching for seconds. Give this unique Polish-American fusion a try, and don’t be surprised when it quickly becomes a cherished weeknight favorite in your home. Enjoy every delicious bite!
Want to save this recipe?
Just enter your email and get it sent to your inbox! Plus you’ll get new recipes from us every week!
To save this recipe and get weekly updates, please visit our website and subscribe to our newsletter!
Go to Subscription Page
Frequently Asked Questions:
Not necessarily, it primarily depends on what your grocery store or butcher has available. Bone-in pork shoulder typically takes slightly longer to cook compared to a boneless cut, but many believe the bone imparts more flavor and helps the meat cook more evenly. Boneless shoulders, while quicker, might have some parts that cook faster or dry out due to their irregular shape once the bone is removed. Both options will yield delicious pulled pork, so choose based on availability and personal preference.
While both butcher paper and foil are common methods for wrapping pork shoulder during smoking (often called “the Texas Crutch”), I personally prefer using foil. Foil creates a tighter seal, which helps to retain maximum moisture throughout the long cooking process. This results in an incredibly tender and juicy pulled pork. When using foil, I often place the shoulder in a foil pan and then seal the top with an additional foil sheet to ensure all those precious juices are locked in. Butcher paper, on the other hand, allows some moisture and smoke to penetrate, which can yield a slightly crispier bark, but might result in a less moist product if not managed carefully.
Pierogi are overwhelmingly and primarily associated with Polish cuisine and are considered a national dish of Poland. However, variations of stuffed dumplings are a staple dish across many Eastern European countries, including Ukraine (varenyky), Russia (pelmeni), and Slovakia (pirohy). While some may find similarities with certain German dumplings like Maultaschen, the distinct form and traditional fillings of pierogi are firmly rooted in Polish culinary history and culture.
Absolutely! Pierogi are excellent for freezing. After you’ve shaped and sealed them, arrange the raw pierogi in a single layer on a parchment-lined baking sheet. Freeze them for about 1-2 hours until they are solid. Once frozen, transfer them to an airtight freezer bag or container. They can be stored in the freezer for up to 3 months. When ready to cook, drop them directly into boiling salted water from frozen, adding a few extra minutes to the cooking time.
Achieving the perfect dough consistency can take a little practice. If your dough feels too stiff and difficult to knead, gradually add a tablespoon of warm water at a time until it becomes more pliable. If it’s too sticky and clings to your hands and the surface, sprinkle in a tablespoon of flour at a time and continue kneading. The goal is a smooth, elastic dough that is soft but doesn’t stick.
Explore More Delicious Smoked Pork Recipes:
Pork
Dr. Pepper Pulled Pork
Pork
Classic Pulled Pork
Pork
Cuban Sandwich
Pork
Pulled Pork Nachos
If you tried this Pulled Pork Pierogi or any other recipe on my blog, please leave a 🌟 star rating and let me know how it went in the 📝 comments. I love hearing from you!

Rate this recipe: 5 out of 5 stars (based on 1 vote)
Pulled Pork Pierogi
By: Maciek Zurawski
These Pulled Pork Pierogi deliver savory, tender, and meaty homemade pan-seared pierogi for a dish that’s rich, hearty, and comforting.
Prep Time: 30 minutes
Cook Time: 10 minutes
Servings: 3 People
Ingredients
Pulled Pork Filling Ingredients
- 2 cups Leftover pulled pork
- 3 tbsp BBQ sauce
- 1/2 Red onion, diced
- 1/2 cup Shredded cheese
Pickled Red Onion Ingredients
- 1 Red onion, sliced
- 1 cup White vinegar
- 1 cup Warm water
- 1 tbsp Peppercorns
- 1 tsp Salt
- 1 tsp Sugar
Pierogi Dough Ingredients
- 1 cup All-purpose flour
- 1/2 cup Warm water
- 1 tsp Salt
Instructions
- To make the pierogi dough, place a cup of all-purpose flour on a dry, clean, flat surface and add a teaspoon of salt. Mix the ingredients together.
- Slowly, add the warm water, a little at a time. Using your hands, combine the ingredients together. Continue this process until the dough is wet but not slimy.
- Sprinkle more flour on your working surface and start kneading the dough. Push down with the lower part of your palm, fold, and repeat. The dough is ready once it no longer sticks to your fingers, typically after 8-10 minutes.
- Roll the dough until paper thin without it being translucent.
- Take a regular-sized glass or round cookie cutter and press rim side down to cut out medium-sized circles. Re-roll scraps to maximize circles.
- Warm up the pulled pork, then add diced red onion, shredded cheese, and BBQ sauce. Mix the ingredients together thoroughly for the filling.
- Place a spoonful of the filling in the middle of each dough circle and seal it shut by firmly pinching the edges together to form a half-moon shape. Ensure no filling is caught in the seam.
- Fill a large pot with water, add a pinch of salt, and bring to a rolling boil.
- Gently drop the pierogi into the boiling water (in batches if necessary) and cook. Once they float to the surface, cook for another 2-3 minutes, then remove them with a slotted spoon.
- Preheat a pan over medium heat and add some olive oil or butter. Place the cooked pierogi in the pan and sear 2-3 minutes per side until you get a nice golden-brown crust on both sides.
- Top the pulled pork pierogi with the pickled red onion, chopped green onion, and enjoy!
Pickled Red Onions
- Slice the entire red onion thinly and stuff into a clean mason jar.
- In a sauce pan, combine water, white vinegar, sugar, salt, and peppercorns, then bring to a boil. Pour the hot mixture over the onions in the mason jar and seal shut. Set aside to cool completely.
Notes
Heat water for the dough on the stovetop or kettle, but do not boil! Warm water relaxes gluten in the flour, making the dough soft and pliable and easier to work with.
Before you start kneading, the dough mixture has to be wet, but not so wet that it becomes a slimy mess. If it does happen, add a little bit more flour and continue the process.
If the mixture is too dry, add more warm water a teaspoon at a time and continue the process until it’s pliable.
For a spicy kick, consider adding finely diced jalapeños in place of (or in addition to) the red onion in the pulled pork stuffing.
Nutrition
Calories: 560kcal | Carbohydrates: 71g | Protein: 29g | Fat: 16g | Saturated Fat: 6g | Polyunsaturated Fat: 0.4g | Monounsaturated Fat: 1g | Cholesterol: 83mg | Sodium: 2679mg | Potassium: 199mg | Fiber: 3g | Sugar: 29g | Vitamin A: 395IU | Vitamin C: 7mg | Calcium: 218mg | Iron: 4mg
Like this recipe? Rate and comment below!
**Self-correction/Double Check:**
1. **SEO-friendly:** I’ve added a `title` tag and `meta` description/keywords to the HTML. Headings are structured logically (`h1`, `h2`, `h3`). Keywords like “Pulled Pork Pierogi”, “Homemade Pierogi”, “Polish-American” are used naturally throughout the text.
2. **Fluent and simple language:** I’ve reviewed the text to ensure it reads smoothly and is easy to understand, avoiding overly complex sentences or jargon.
3. **Remove unnecessary repetitions:** I expanded on each point rather than repeating the same core idea, providing more detail and context where needed. For instance, the pierogi description now includes historical context and more filling variations.
4. **Remove Javascript code:**
* `
` is preserved from the original, though it’s an old doctype. I wrapped the content in `