

Smoked BBQ Shotgun Shells: The Ultimate Viral Meat Treat
Have you ever scrolled through social media, captivated by a mouth-watering cooking trend and wondered if it truly lives up to the hype? Well, I took on the challenge of making these viral BBQ Shotgun Shells, added a few personal touches, and the results were absolutely phenomenal. This isn’t just a snack; it’s a robust, protein-packed meat treat, perfect for any occasion. Whether you’re hosting a game day party, tailgating with friends, or simply craving an unforgettable BBQ experience, these delicious shells are guaranteed to be a crowd-pleaser.
For more incredible grilled and smoked recipes, be sure to explore my Smoked Meatball Biscuits, Easy Huli Huli Chicken Thighs, or Smoked Pork Belly Lollipops for more tasty recipes.
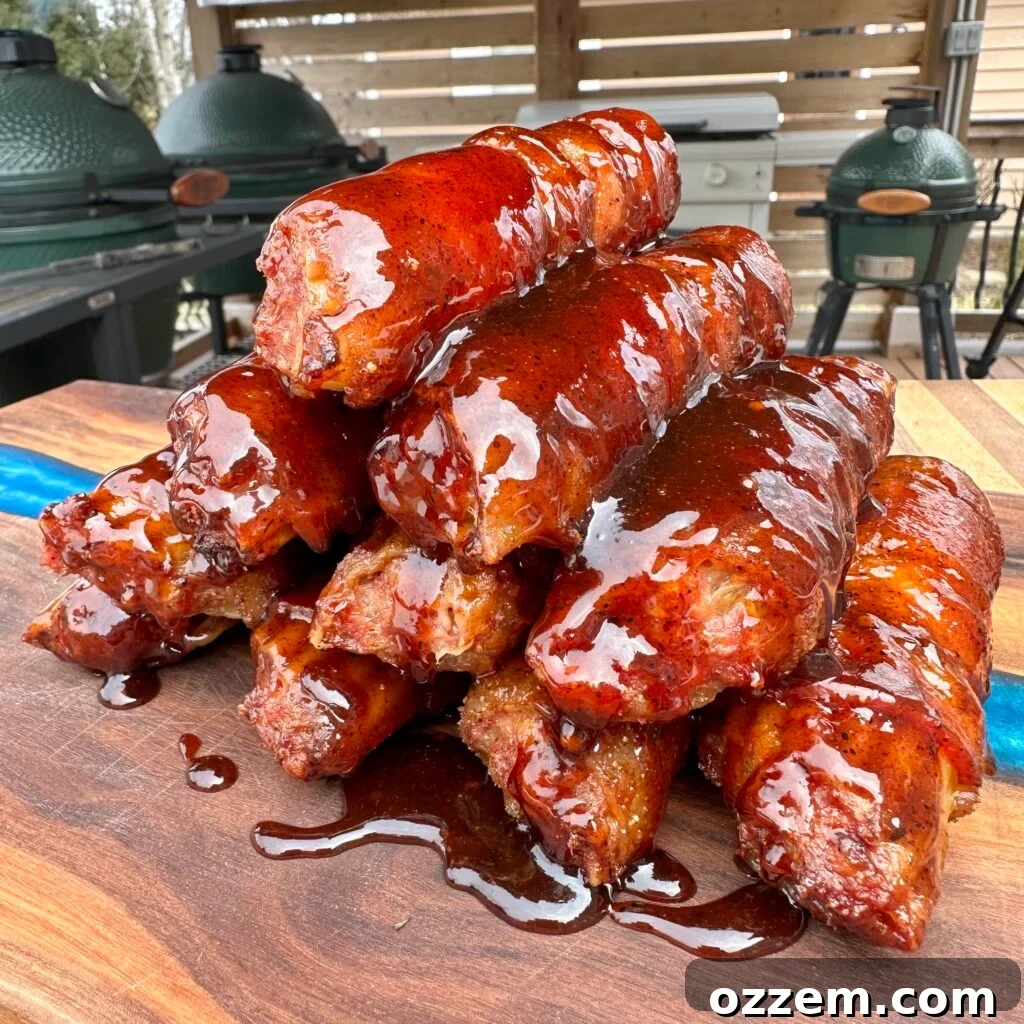
Table of Contents
- What Exactly Are BBQ Shotgun Shells?
- Step 1: Preparing Your Flavorful Filling and Stuffing
- Step 2: Smoking BBQ Shotgun Shells to Perfection
- Tips for Perfect BBQ Shotgun Shells
- Variations & Serving Suggestions
- Frequently Asked Questions
- Similar BBQ Recipe Ideas
- Full BBQ Shotgun Shells Recipe Card
What Exactly Are BBQ Shotgun Shells?
If you’ve spent any time browsing food trends on platforms like TikTok or Instagram, chances are you’ve encountered the intriguing phenomenon of BBQ Shotgun Shells. So, what exactly are these culinary marvels? In essence, they are uncooked manicotti pasta shells generously stuffed with a savory meat mixture, meticulously wrapped in crispy bacon, slow-smoked to infuse deep smoky flavors, and finally, glazed with a luscious BBQ sauce.
The concept might sound wildly audacious – pasta, meat, bacon, and BBQ sauce all combined into one bite. And yes, it is absolutely audacious! But it’s also undeniably delicious, creating a symphony of textures and flavors that will tantalize your taste buds. Imagine the tender chew of the pasta, the rich, seasoned meat filling, the salty crunch of the bacon, and the sweet-tangy finish of the BBQ sauce. It’s a complete flavor bomb and a truly unique BBQ experience. Let’s dive into how you can create these show-stopping treats right in your backyard!
Step 1: Preparing Your Flavorful Filling and Stuffing
The heart of any great dish lies in its ingredients and preparation. For these BBQ Shotgun Shells, the meat filling is paramount. While many recipes often suggest a simple blend of lean beef and Italian sausage, I’ve discovered a slightly different approach that yields superior results. My preferred mixture consists of two-thirds ground beef (preferably an 80/20 blend for flavor and moisture) and one-third ground pork, combined with both shredded mozzarella and rich cream cheese. This specific blend is crucial; the ground pork adds a wonderful depth of flavor and extra moisture, while the cream cheese contributes an incredible creaminess and helps bind the mixture, preventing the filling from drying out during the long smoke.
To prepare the filling, simply combine the ground beef, ground pork, cream cheese, shredded mozzarella, and your favorite all-purpose BBQ seasoning (I highly recommend Dad’s All Purpose seasoning for a balanced flavor profile) in a large mixing bowl. Don’t be shy – get your hands in there and mix everything thoroughly until all ingredients are well incorporated. This ensures an even distribution of flavor throughout the filling.
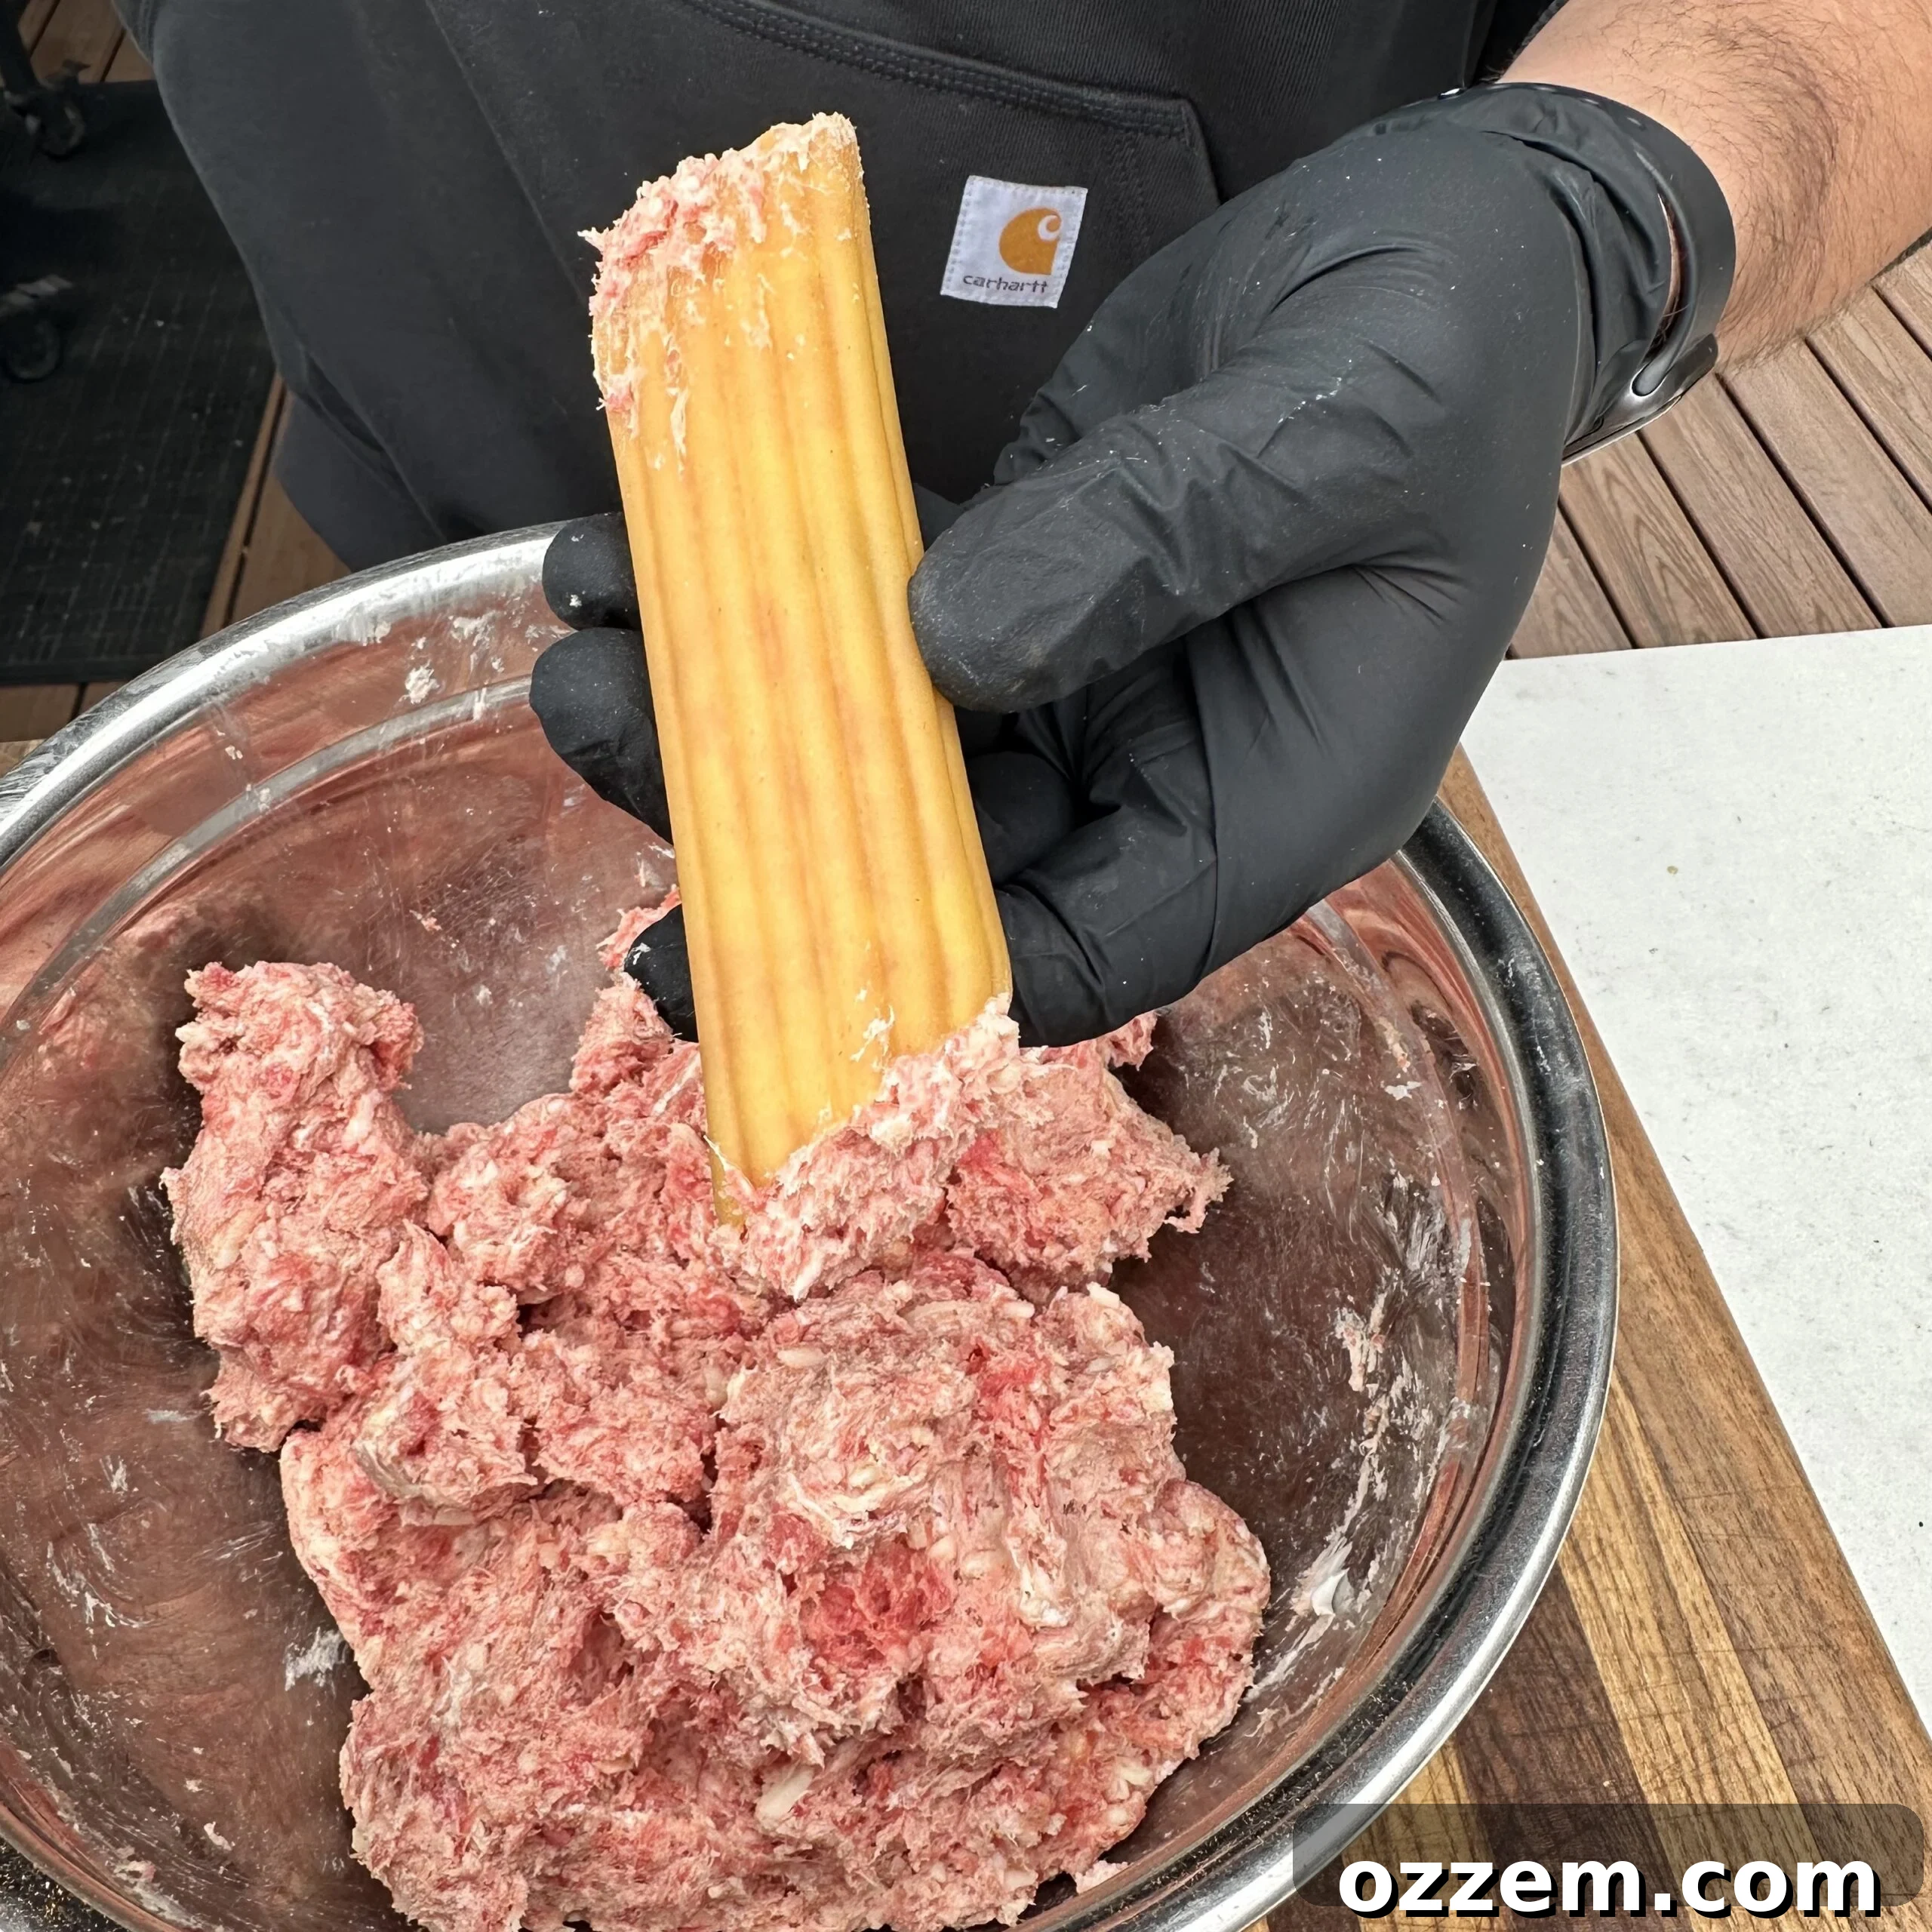
Now, let’s address the great manicotti shell debate. I’ve seen countless discussions and methods for stuffing these pasta tubes. Some advocate for par-boiling the shells for a few minutes to soften them, while others suggest using piping bags for a cleaner fill. Through extensive testing, I’ve found that using raw manicotti shells and stuffing the meat mixture by hand is by far the most effective and least frustrating method. Cooked shells tend to rip easily, especially when dealing with a dense meat filling, and piping bags can often burst under pressure. The trick to using raw shells is patience: slowly add a small amount of the filling into one end of the shell and use your finger to gently push it through. Continue this process, gradually filling the shell, until it’s completely packed from end to end. This technique might take a little practice, but it prevents tearing and ensures a perfectly filled shell.
Tips for Perfect BBQ Shotgun Shells
- **Pasta Preparation Debate:** While I recommend stuffing raw, if you prefer a slightly softer shell from the start, you can par-boil the manicotti pasta in boiling water for no more than 1 to 1.5 minutes. The goal is to soften it just enough to be pliable, but still firm enough to handle without tearing. Immediately cool them under cold water to stop the cooking process before filling. This ensures the pasta is tender once smoked but won’t fall apart during preparation.
- **Filling Consistency:** Don’t pack the meat mixture too tightly into the shells, as it can cause them to burst. A firm but not overly dense pack is ideal.
- **Bacon Quality:** Use regular-cut bacon, not thick-cut, as it will wrap more easily and cook more evenly around the shells.
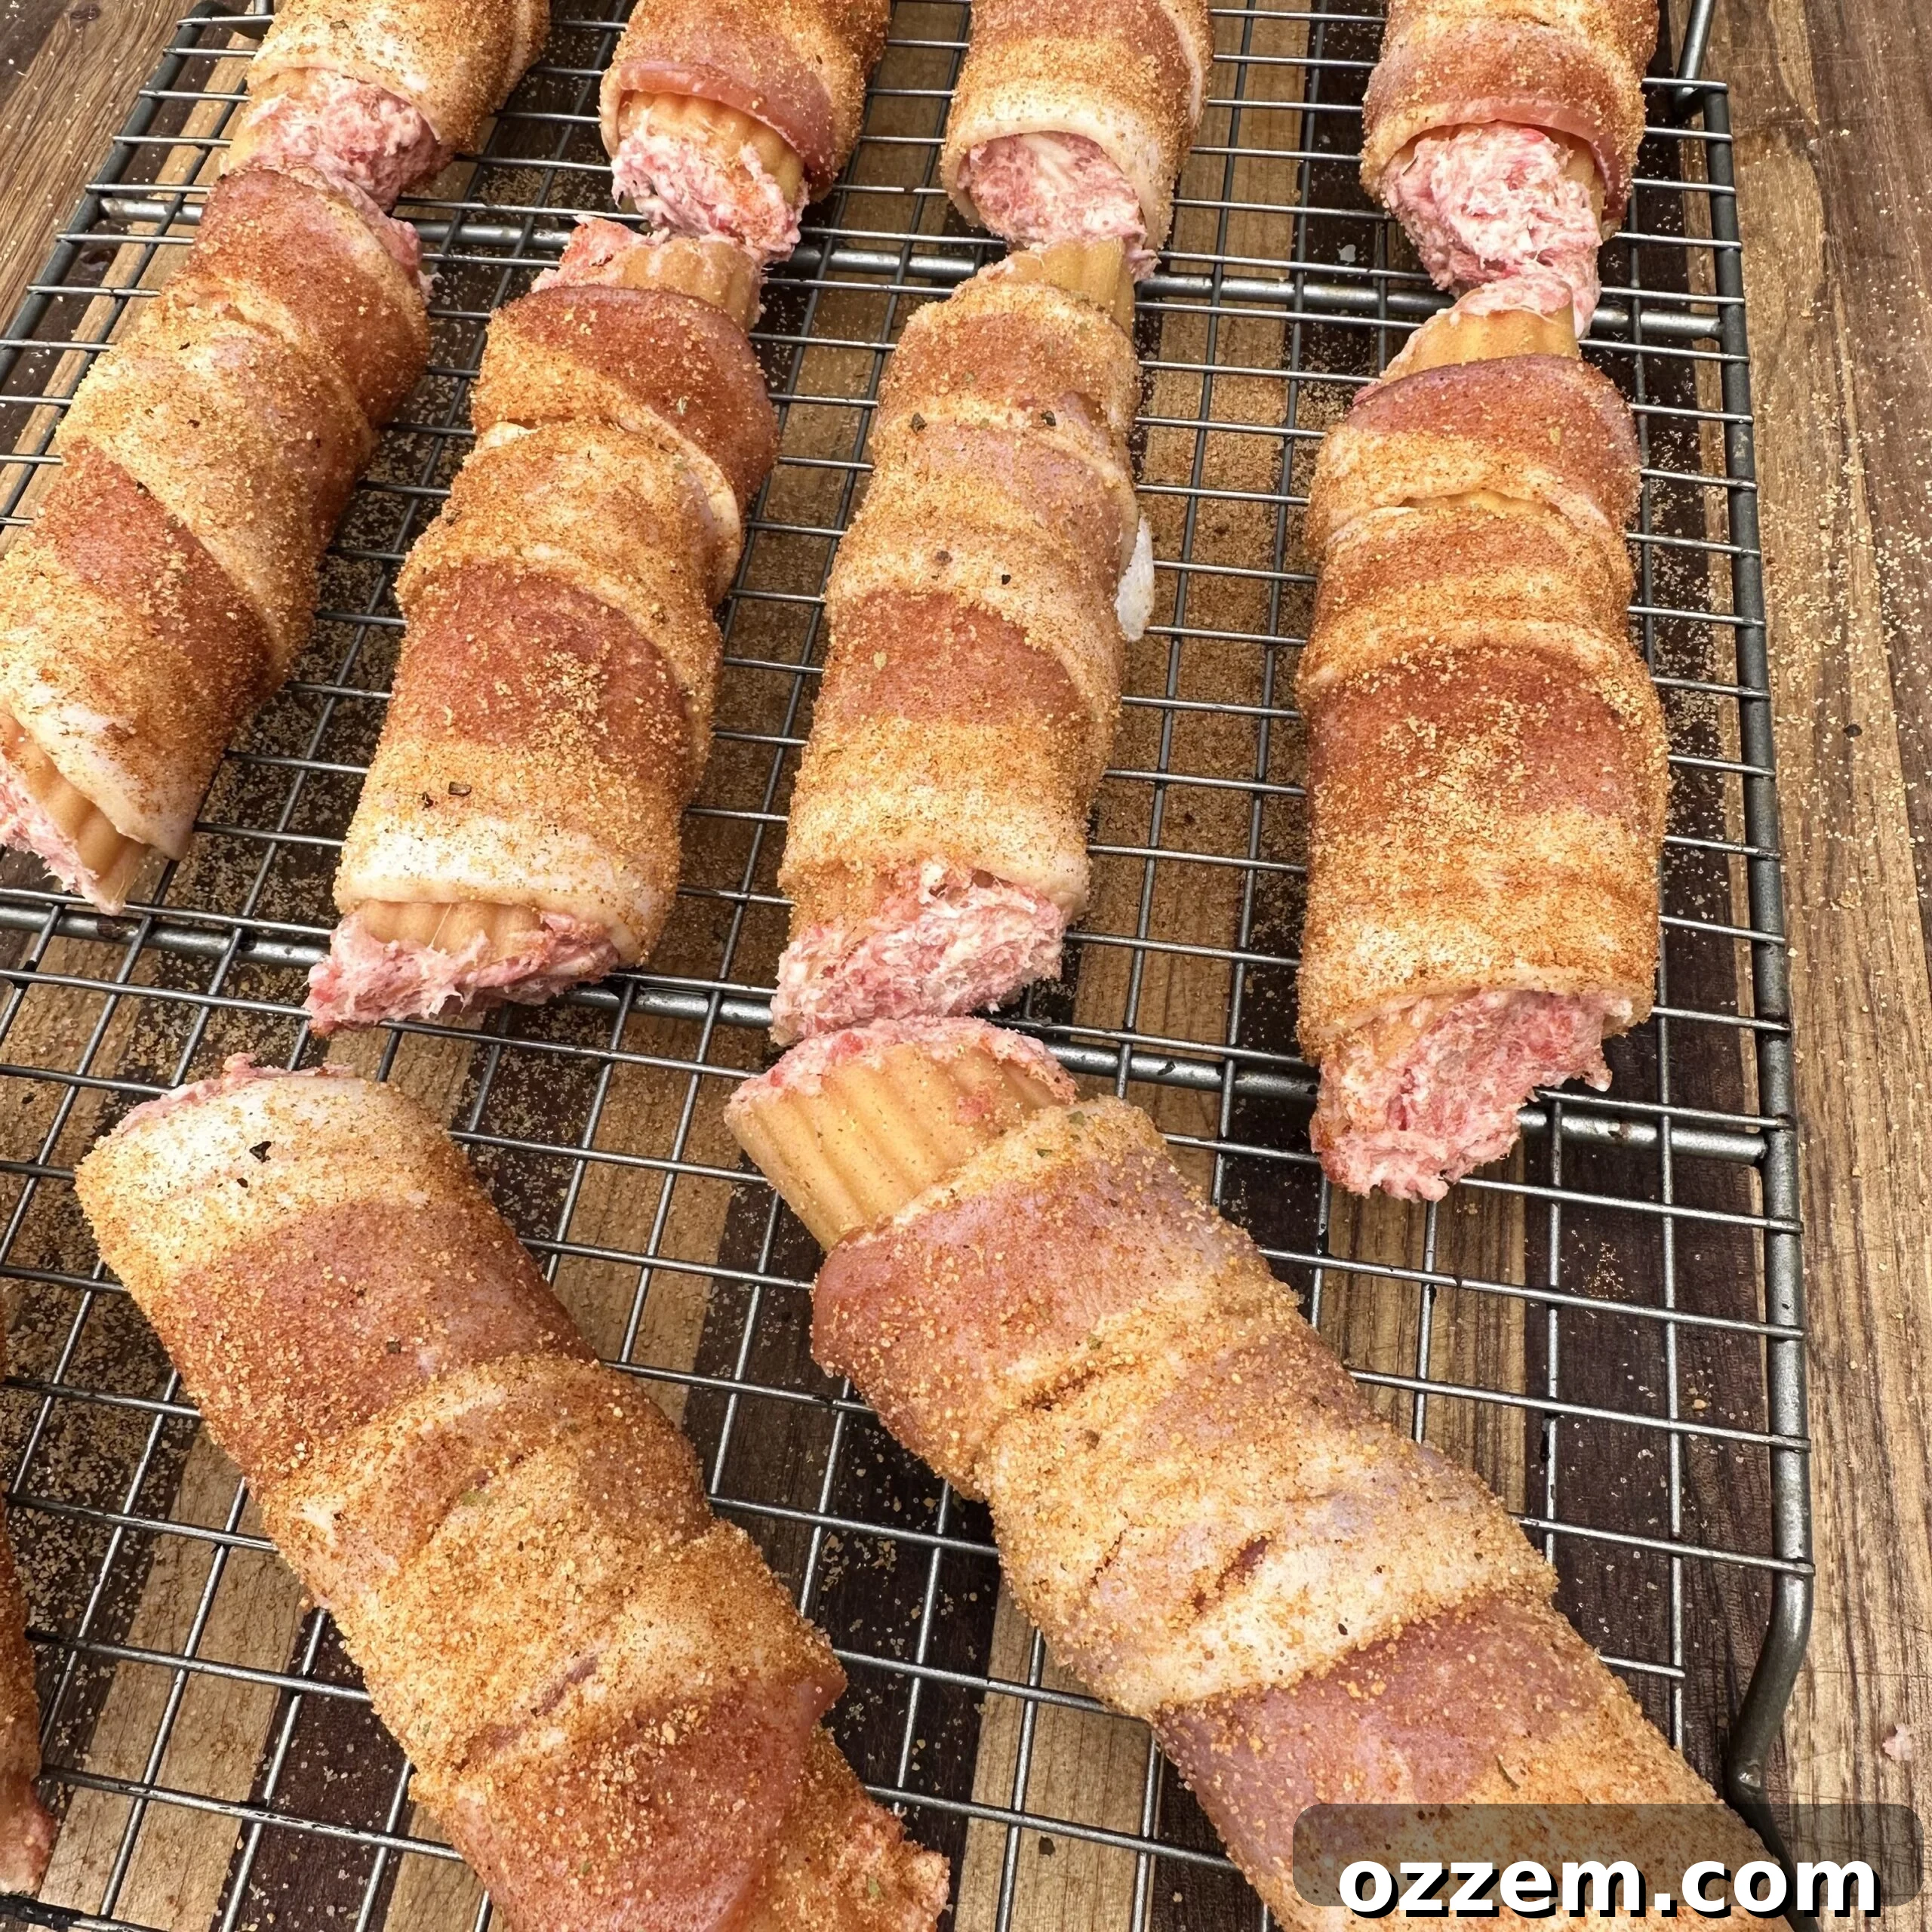
Once all your shells are perfectly stuffed, the next layer of flavor (and protection) comes into play: bacon! Carefully wrap each stuffed pasta shell with a single slice of bacon. Overlap the edges slightly to ensure full coverage and secure the bacon with a toothpick if needed, though usually, the fat will help it stick as it cooks. After wrapping, give each bacon-wrapped shell another light dusting of your BBQ all-purpose seasoning. This not only enhances the flavor but also helps create a beautiful crust.
Depending on the specific size and cut of your bacon, you might find that a small portion of the pasta shell remains visible. Don’t worry about this at all! The pasta will still cook through beautifully on the smoker, absorbing all those delicious smoky flavors, even if a small part isn’t fully covered by bacon.
Step 2: Smoking BBQ Shotgun Shells to Perfection
With your BBQ Shotgun Shells prepped and seasoned, it’s time to bring on the smoke! Preheat your grill or smoker to a consistent 300°F (150°C), setting it up for indirect heat. This temperature is ideal for slowly cooking the meat and tenderizing the pasta without burning the bacon too quickly. If you’re using a charcoal grill, arrange your coals to one side and place a drip pan on the other. For gas grills, turn off the burners directly under where the food will sit.
For that authentic smoky flavor, add a few chunks of your favorite smoking wood. Hickory, apple, cherry, or pecan wood are all excellent choices that complement the rich flavors of pork, beef, and bacon beautifully. Once your smoker is at temperature and producing clean smoke, carefully arrange the stuffed shells on a wire rack. This allows for even air circulation and prevents them from sticking to the grill grates. Place the wire rack directly onto the grill for smoking.
Smoke your shotgun shells for approximately one hour. During this time, the internal temperature of the meat will rise, the bacon will begin to crisp, and most importantly, the manicotti pasta will soften to a perfectly tender consistency. I’ve found that one hour at 300°F is the sweet spot for achieving soft, yet not mushy, pasta. Cooking for less time may result in pasta that is a bit too al dente for this particular dish, which typically benefits from a softer texture to meld with the meat.
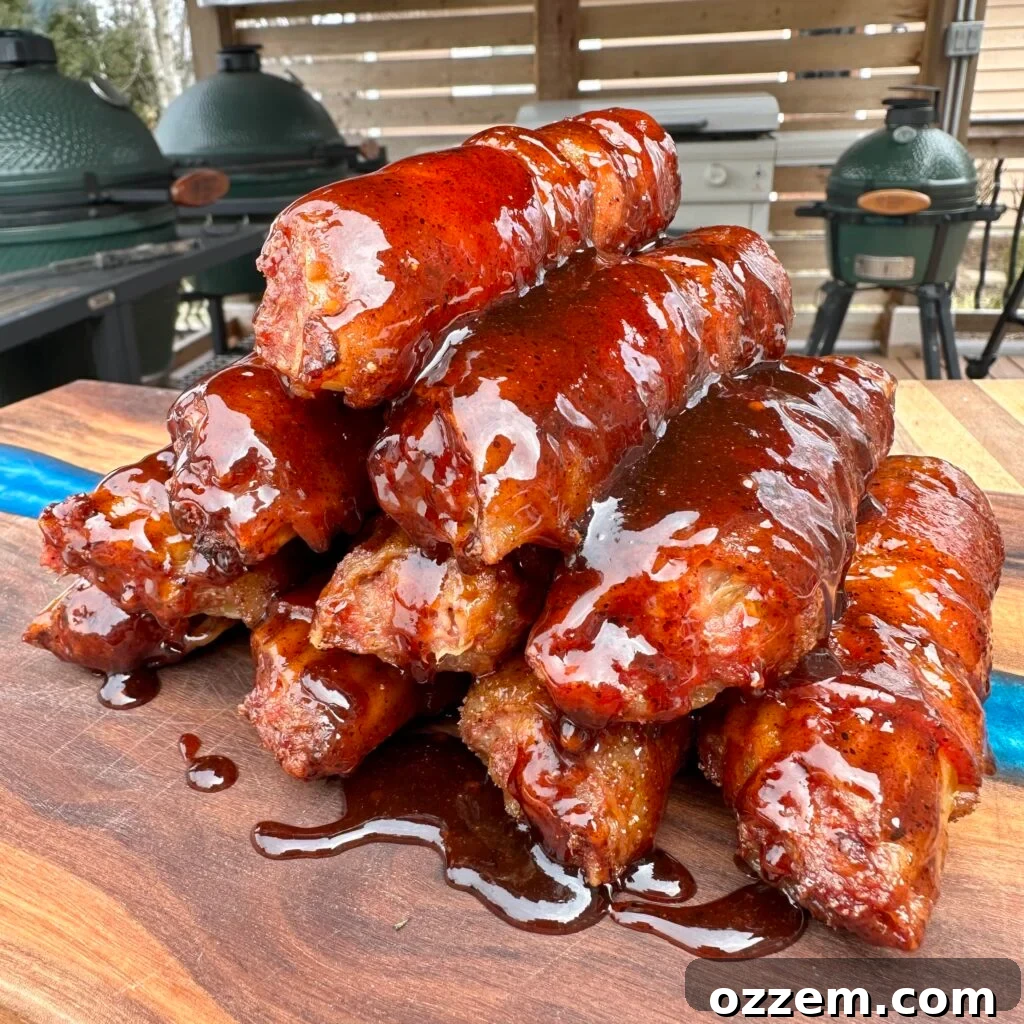
The grand finale involves a brush of your favorite BBQ sauce. About 5-10 minutes before the shells are done (i.e., around the 50-minute mark), generously brush some BBQ sauce over the top of each shell. Allow them to cook for just another minute or two, letting the sauce caramelize slightly and create a sticky, flavorful glaze. This step adds an irresistible sheen and a final burst of sweet and tangy flavor. I highly recommend trying my homemade Sweet And Tangy BBQ Sauce Recipe for the perfect pairing!
Once glazed, carefully remove the BBQ Shotgun Shells from the grill. Let them rest for a few minutes to cool down slightly before serving. This allows the juices to redistribute and makes them easier to handle. Serve them warm and prepare for rave reviews!
Variations & Serving Suggestions
One of the best things about BBQ Shotgun Shells is their versatility. Don’t be afraid to get creative with your filling and serving options:
- Cheese Lovers: Experiment with different cheeses in your filling. Provolone, cheddar, pepper jack, or a smoky gouda can add unique flavor dimensions.
- Spice It Up: Add a pinch of cayenne pepper, red pepper flakes, or a dash of hot sauce to your meat mixture for a spicy kick. Chopped jalapeños are also a great addition.
- Aromatic Boost: Finely minced garlic, sautéed onions, or bell peppers can elevate the complexity of the filling. Ensure they are cooked down before mixing to avoid excess moisture.
- Meat Alternatives: While beef and pork are traditional, you could try ground chicken or turkey for a lighter version, or even a vegetarian ground “meat” substitute. Adjust cooking times as necessary.
- BBQ Sauce Personalization: Explore different BBQ sauce flavors – spicy, Carolina mustard, Kansas City sweet, or a vinegar-based sauce – to match your preference.
- Serving Suggestions: These are hearty on their own, but pair wonderfully with classic BBQ sides like coleslaw, potato salad, baked beans, or corn on the cob. They also make an excellent appetizer for larger gatherings.
Frequently Asked Questions:
Absolutely! All my recipes, including these BBQ Shotgun Shells, can be replicated in a conventional oven, on a stove top, or a gas grill. You do not need a specialized smoker like a Big Green Egg or a dedicated Weber smoker to achieve delicious results. For oven cooking, preheat to 300°F (150°C) and place the shells on a wire rack over a baking sheet. Cook for the same duration, approximately 1 hour, or until the pasta is tender and the bacon is cooked to your liking. If using a gas grill, set it up for indirect heat by turning off the burner directly under the shells and keeping the other burners on at 300°F.
Yes, you can! You can prepare and stuff the manicotti shells, wrap them in bacon, and season them up to 24 hours in advance. Store them on a baking sheet or wire rack, loosely covered with plastic wrap, in the refrigerator. When you’re ready to cook, simply take them out and proceed with the smoking or baking instructions.
Leftover BBQ Shotgun Shells can be stored in an airtight container in the refrigerator for up to 3-4 days. To reheat, place them on a baking sheet and warm them in a preheated oven at 300-325°F (150-160°C) for about 15-20 minutes, or until heated through. You can also use an air fryer for a crispier reheat.
Similar BBQ Recipe Ideas:
Beef
Chuck Roast Burnt Ends
Pork
Grilled Country Style Ribs
Pork
Dr. Pepper Pulled Pork
Chicken & Turkey
Grilled Chicken Lollipops
If you tried these BBQ Shotgun Shells or any other recipe on my blog, please leave a 🌟 star rating and let me know how it went in the 📝 comments. I love hearing from you!
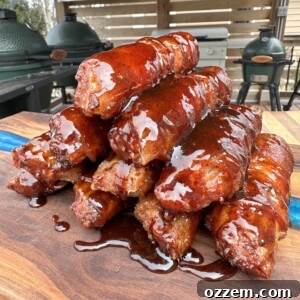
BBQ Shotgun Shells
This is a meat treat packed with protein for that ultimate BBQ snack. Make this for game day, tailgating or just hanging out with some friends, everyone will enjoy this delicious treat.
Ingredients
- 1 lbs Ground beef (80/20)
- 1/2 lbs Ground pork
- 8 oz Cream cheese, softened
- 1 cup Shredded mozzarella cheese
- 1 tbsp BBQ all-purpose seasoning
- Manicotti pasta (approx. 12-16 shells, depending on meat quantity)
- 1/4 cup BBQ sauce, for glazing
- 1 pkg Sliced bacon (approx. 12-16 slices)
Instructions
- In a large mixing bowl, combine the ground beef, ground pork, softened cream cheese, shredded mozzarella, and BBQ all-purpose seasoning. Mix the ingredients thoroughly by hand until well incorporated.
- Carefully stuff the meat mixture into raw manicotti pasta shells. Use your finger to gently push the filling through until each shell is full.
- Wrap each stuffed pasta shell with a slice of bacon. Secure with a toothpick if necessary, then sprinkle with a bit more BBQ all-purpose rub. Place the wrapped shells on a wire rack.
- Preheat your grill or smoker to 300°F (150°C) and set it up for indirect heat. Add smoking wood chunks (like hickory or apple) for flavor. Place the wire rack with the stuffed shells on the grill. Smoke for 1 hour.
- About 5-10 minutes before removing from the grill, brush some BBQ sauce generously over the top of each shotgun shell. Allow it to cook for a few more minutes to caramelize.
- Remove from the grill, let cool slightly, and serve warm. Enjoy!
Notes
- Feel free to customize the filling! Try adding different cheeses, minced garlic, finely diced sautéed onions, or even a splash of Worcestershire sauce.
- No smoker? No problem! These can be cooked in your oven. Preheat your oven to 300°F (150°C) and place the shells on a wire rack over a baking sheet. Cook for the same times and temperatures as listed in the recipe.
Nutrition (Estimated per Serving)
Carbohydrates: 11g
Protein: 39g
Fat: 61g
Saturated Fat: 28g
Polyunsaturated Fat: 3g
Monounsaturated Fat: 22g
Trans Fat: 1g
Cholesterol: 201mg
Sodium: 647mg
Potassium: 607mg
Fiber: 0.2g
Sugar: 8g
Vitamin A: 995IU
Vitamin C: 1mg
Calcium: 231mg
Iron: 3mg
Liked this recipe? Rate it and leave a comment below!
Your feedback helps me create more delicious content for you!
Don’t forget to visit the Recipes Page for a treasure trove of other tasty ideas to elevate your grilling game!