
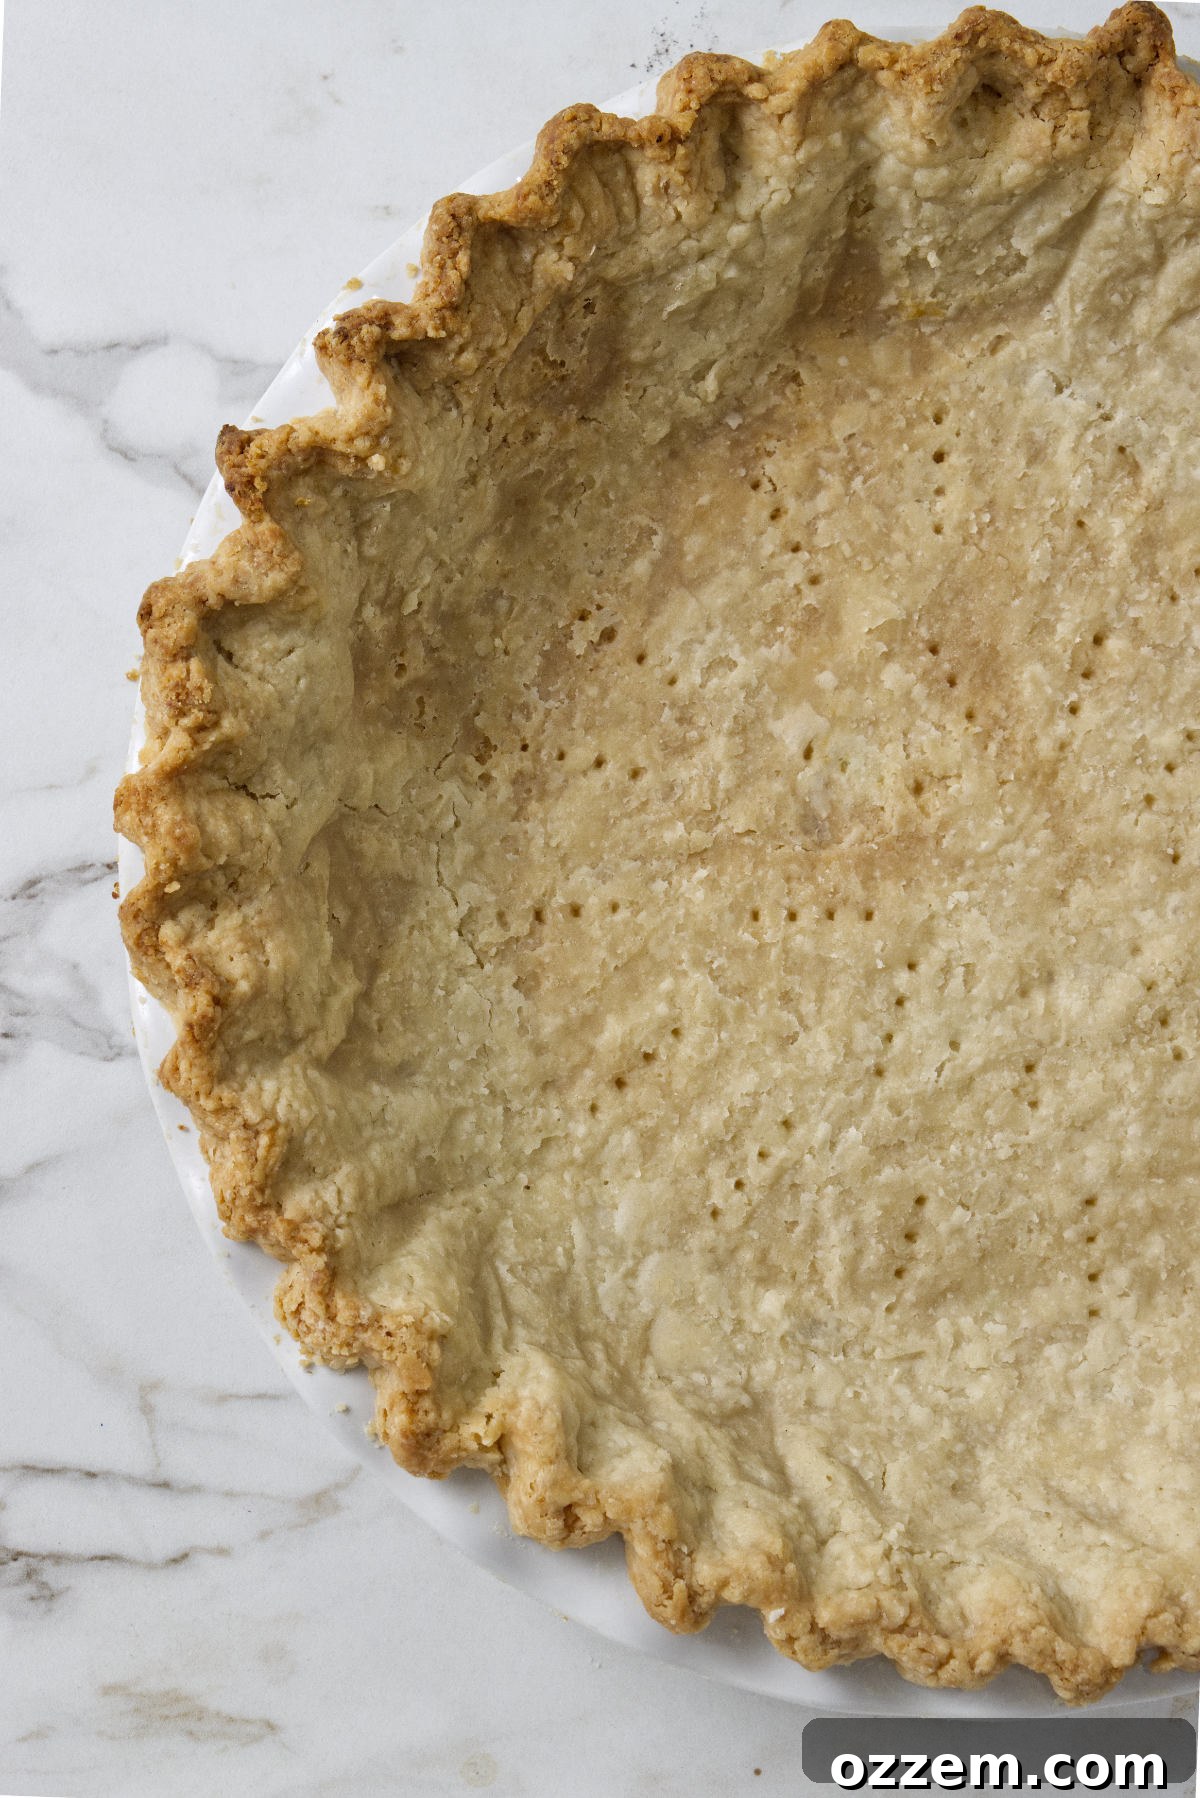
Have you ever dreamed of whipping up a perfect sweet or savory pie, complete with a tender, flaky crust, without the tedious effort of endless kneading and rolling? Your search ends here! This foolproof Crisco pie crust recipe is your ultimate solution. Crafted with just a handful of staple ingredients, this crust consistently delivers an irresistibly tender, wonderfully flaky, and utterly delicious result that will elevate any pie to gourmet status. The best part? The majority of the work is handled effortlessly by your food processor, meaning minimal cleanup and maximum efficiency as the powerful blades do all the heavy lifting for you.
This exceptional pie crust serves as the ideal foundation for an endless array of culinary creations. Imagine rich, bubbling fruit pies bursting with seasonal flavors, delectable savory pies perfect for a hearty meal, or cherished holiday favorites that are guaranteed to impress every member of your family and guests. For me, this simple yet extraordinary crust has become the secret behind my famous Traeger Smoked Apple Pie, giving it an unparalleled texture and depth of flavor. And let me tell you, the subtle hint of vodka is the secret ingredient that contributes to its distinctive moistness and incredible flakiness, making this recipe an indispensable tool in my culinary arsenal for every special occasion. It’s truly a game-changer!
Mark my words, you’ll find yourself turning to this versatile recipe countless times throughout the year. So, do yourself a favor: bookmark this page or pin it for future reference. That way, you can effortlessly whip up one of these magnificent crusts whenever the mood strikes or a last-minute baking emergency arises! While you’re at it, don’t forget to explore another holiday favorite, our mouthwatering Traeger Smoked Bourbon Pumpkin Pie – it’s a perfect companion for this crust and a Thanksgiving essential!
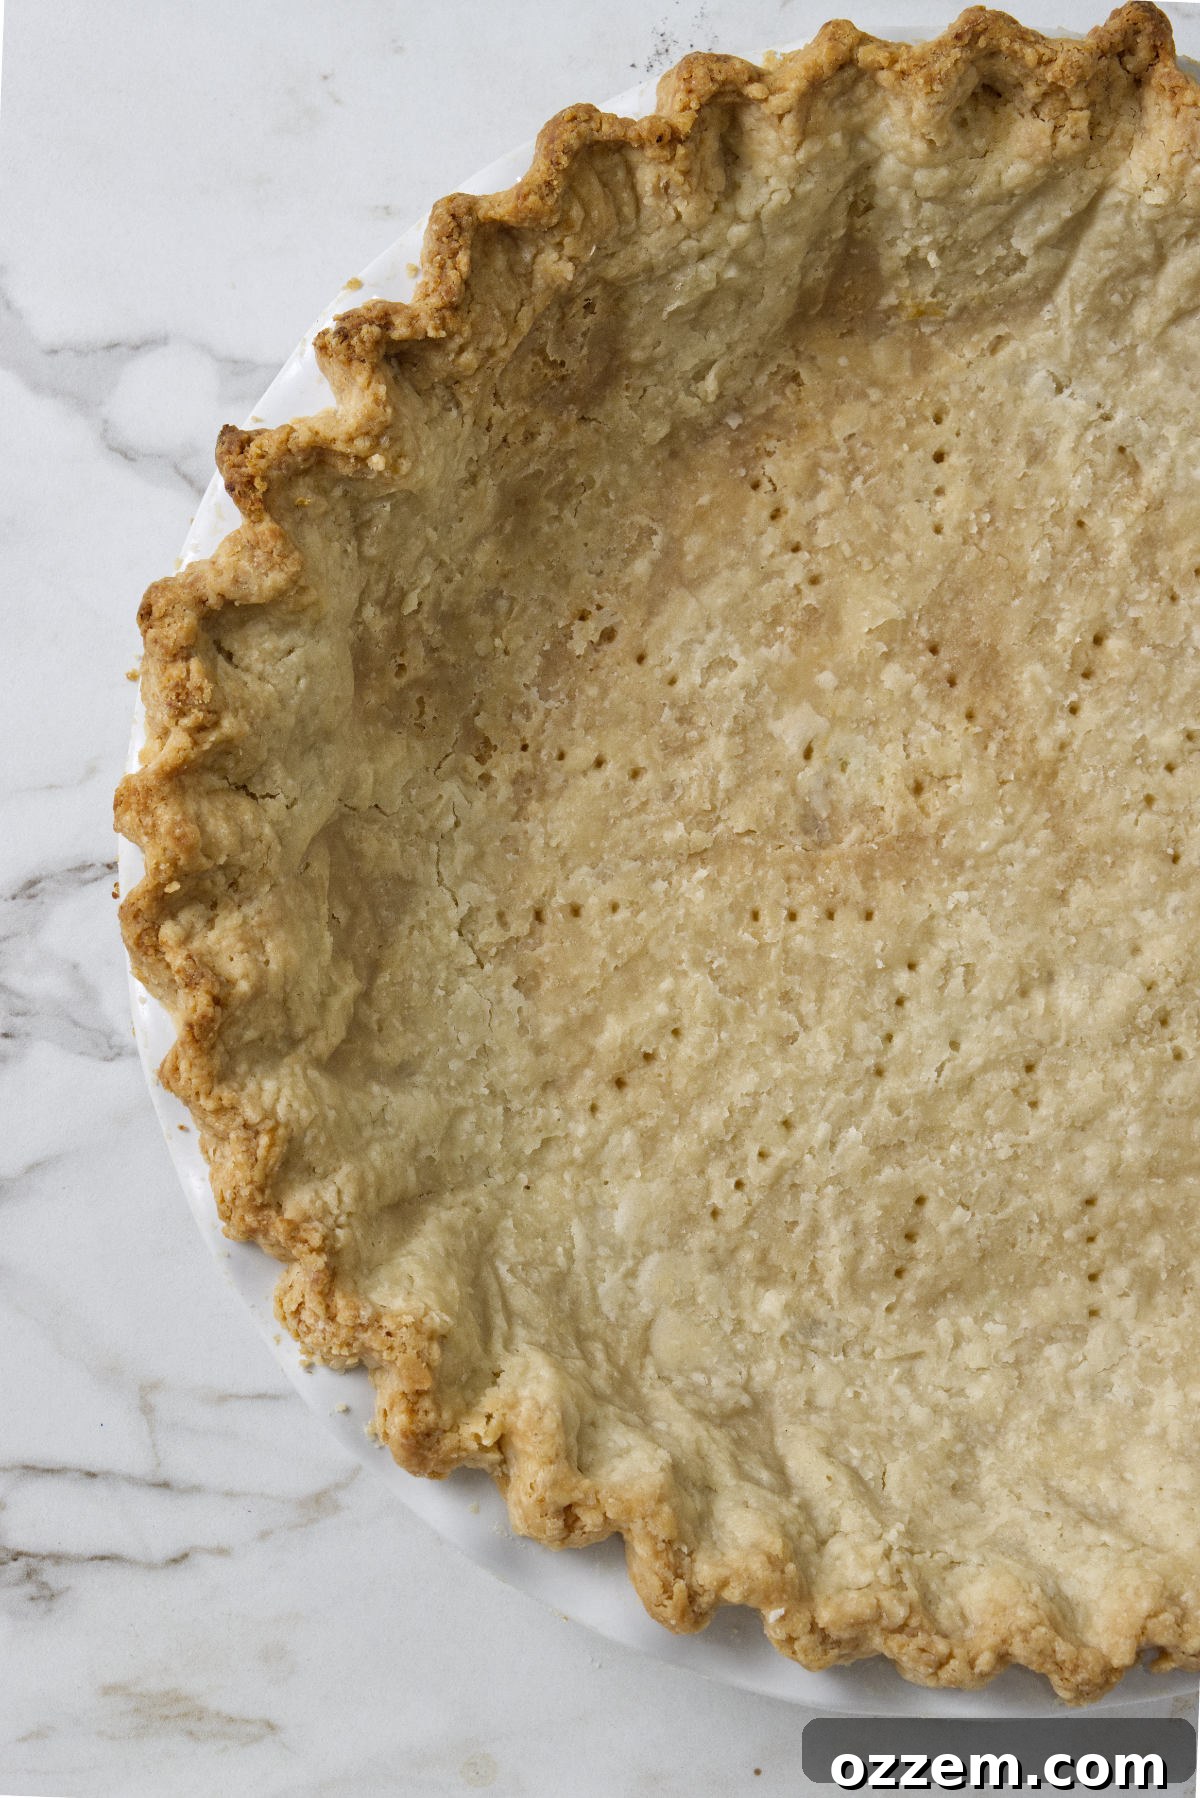
Why This Crisco Pie Crust Recipe Is Your New Go-To
Discovering the perfect pie crust can be a culinary quest, but this Crisco pie crust recipe consistently delivers outstanding results. Here’s a deeper look into why it stands out and guarantees success every time:
- The inclusion of vodka is a game-changer. Unlike water, the ethanol in vodka significantly inhibits gluten formation in the dough. This scientific marvel prevents the crust from becoming tough and instead promotes an exceptionally tender and exquisitely flaky texture that simply melts in your mouth. Rest assured, the alcohol evaporates completely during baking, leaving no residual flavor, only perfection.
- Using Crisco vegetable shortening makes this recipe incredibly accessible and easy to work with, even for absolute beginners. Crisco has a higher melting point than butter and contains no water, which means it’s less prone to overmixing and helps create those distinct layers crucial for flakiness. Its forgiving nature ensures a successful outcome without the intimidation often associated with pastry making.
- The food processor is your best friend in this recipe, making the mixing process remarkably easy and swift. It rapidly combines ingredients, ensuring consistent distribution of fat while minimizing contact with warm hands, which can prematurely melt the shortening. This ingenious method keeps the recipe relatively mess-free and saves you valuable time and effort in the kitchen.
- This recipe is designed for speed and reliability, making it practically foolproof. With just a few pulses in the food processor, you’ll have a dough that’s ready for chilling, dramatically cutting down on prep time. Its simple steps and predictable results mean less stress and more enjoyment from your baking.
- Requiring just a few common ingredients, this pie crust is also a fantastic option for baking on a budget. You likely already have most of these items in your pantry, proving that you don’t need exotic or expensive components to create something truly spectacular.
- It’s a wonderful opportunity to get the kids involved! The simple, hands-on steps, especially shaping the dough, are perfect for engaging younger helpers in the kitchen, fostering a love for baking from an early age.
Essential Ingredients for Your Flaky Crisco Pie Crust
Crafting the perfect pie crust begins with selecting the right ingredients. Each component in this recipe plays a crucial role in achieving that coveted tender and flaky texture. Below is a detailed list of what you’ll need to bring this incredible Crisco pie crust to life. For precise measurements and further details, make sure to scroll down to the comprehensive printable recipe card.
- Crisco Vegetable Shortening: This is the absolute star of our recipe. Crisco is a pure fat with a high melting point, which is essential for developing those signature flaky layers. Unlike butter, which contains water, Crisco’s solid fat content prevents excessive gluten development, resulting in a wonderfully tender crust that’s also exceptionally delicious and easy to handle.
- All-Purpose Flour: The structural backbone of our dough. Flour provides the necessary framework, allowing you to form a workable dough with a desirable bite. It also prevents the dough from sticking to your work surface and rolling pin as you prepare it. Using all-purpose flour strikes the perfect balance for texture and workability.
- Granulated Sugar: More than just for sweetness, sugar is a tenderizing agent in pie crusts. It interferes with gluten development, helping to keep the crust soft and preventing it from becoming tough. Additionally, sugar aids in moisture retention, contributing to a more tender finished product, and promotes a beautiful golden-brown color during baking.
- Salt: A crucial flavor enhancer that balances the richness of the shortening and brings out the best in your pie’s filling. Just a small amount of salt can transform the overall taste, adding depth and complexity to the crust.
- Cold Vodka: This is our secret weapon for ultimate flakiness. The ethanol in vodka is a superb gluten inhibitor. It provides the necessary moisture for the dough to come together without encouraging the formation of tough gluten strands that water would. The alcohol completely evaporates during the baking process, leaving behind no flavor, only an impossibly moist, tender, and incredibly flaky crust.
- Ice Water: Maintaining a low temperature throughout the dough-making process is paramount for flakiness. Ice water serves this purpose perfectly, keeping the Crisco shortening bits firm and distinct. This prevents the fat from melting prematurely, ensuring that those pockets of fat create steam during baking, which in turn leads to a truly flaky crust. It also helps achieve the right dough consistency without over-hydrating, which could lead to toughness.
Crafting Your Perfect Crisco Pie Crust: Step-by-Step Guide
Achieving a perfectly tender and flaky pie crust doesn’t have to be daunting. With this easy-to-follow method, especially when using a food processor, you’ll master it in no time. For a comprehensive list of ingredients and detailed instructions, remember to refer to the printable recipe card provided at the end of this article.
- Prepare Your Cold Ingredients: Begin by placing your Crisco shortening and the vodka in the freezer. Aim for about 15-20 minutes of chilling time. This crucial step ensures these ingredients are extra cold, which is vital for preventing gluten development and creating those desirable flaky layers in your finished crust.
- Combine Dry Ingredients: In the bowl of your food processor, fitted with the chopping blade, add the flour, sugar, and salt. Pulse these dry ingredients a few times until they are well combined. This ensures an even distribution of flavor and a consistent base for your dough.
- Incorporate the Crisco Shortening: Add the super-chilled Crisco shortening to the food processor. Pulse 4 to 5 times in short bursts. The goal here is to break down the shortening into pieces that resemble coarse cornmeal, with some pea-sized lumps still visible throughout the mixture. These small pockets of fat are what will create steam and those wonderful flaky layers when baked. Avoid over-processing at this stage.
- Add Cold Liquids Gradually: Sprinkle the cold vodka and two tablespoons of ice water over the shortening-flour mixture. Pulse the food processor 3 to 4 times. This gentle mixing incorporates the liquids without overworking the dough.
- Check Dough Consistency (and Add More Water if Needed): After the initial liquid addition, test the dough by squeezing a small handful in your hand. It should hold together easily, forming a cohesive mass. If it feels too dry and crumbly to stick together, add more ice water, one tablespoon at a time, pulsing briefly after each addition. Continue this process until the dough just comes together when squeezed. Remember, it’s critical not to add too much water; the dough should still appear somewhat loose and crumbly in the processor bowl, but cohesive when pressed.
- Form the Dough Ball: Carefully empty the dough mixture onto a clean, lightly floured counter. Gather all the loose crumbs and gently press them together, forming a single, cohesive ball. Work quickly to minimize handling, which can warm the dough.
- Shape and Chill: Divide the dough ball into two equal portions. Gently flatten each portion into a round disk, about an inch thick. Wrap each disk tightly in plastic wrap and place them in the refrigerator to chill for at least 30 minutes, or up to 2 days. Chilling allows the gluten to relax and the fat to firm up, making the dough much easier to roll out and contributing significantly to the final flaky texture.
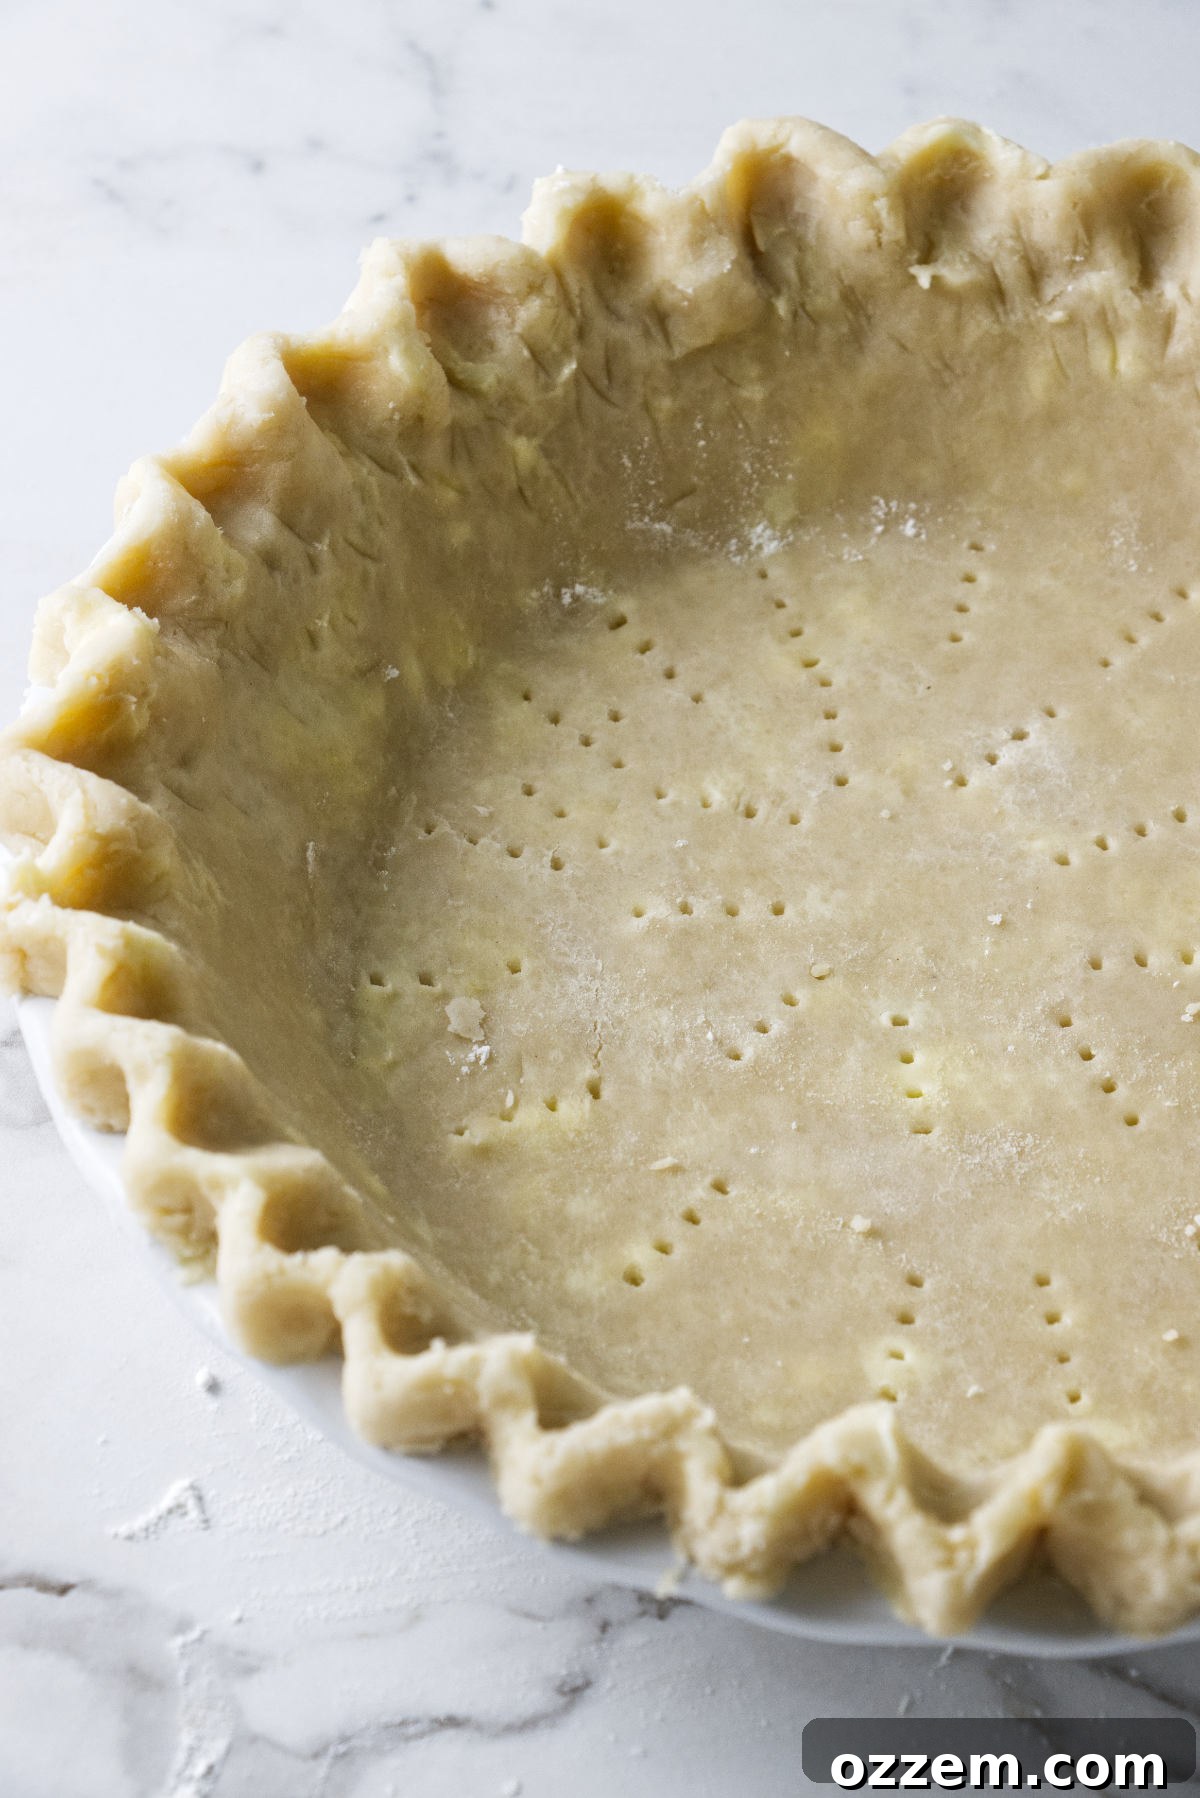
- Roll and Prepare for Baking: When you’re ready to bake, remove the dough disks from the fridge and let them sit at room temperature for 15-20 minutes to soften slightly, making them easier to roll. Lightly flour your work surface and rolling pin, then roll out one disk into a circle about 1/8-inch thick, larger than your pie plate. Carefully transfer the rolled dough to your pie plate. Trim and crimp the edges as desired. If blind baking (pre-baking) the crust, poke several holes in the bottom with a fork, line with parchment paper, and fill with pie weights before baking.
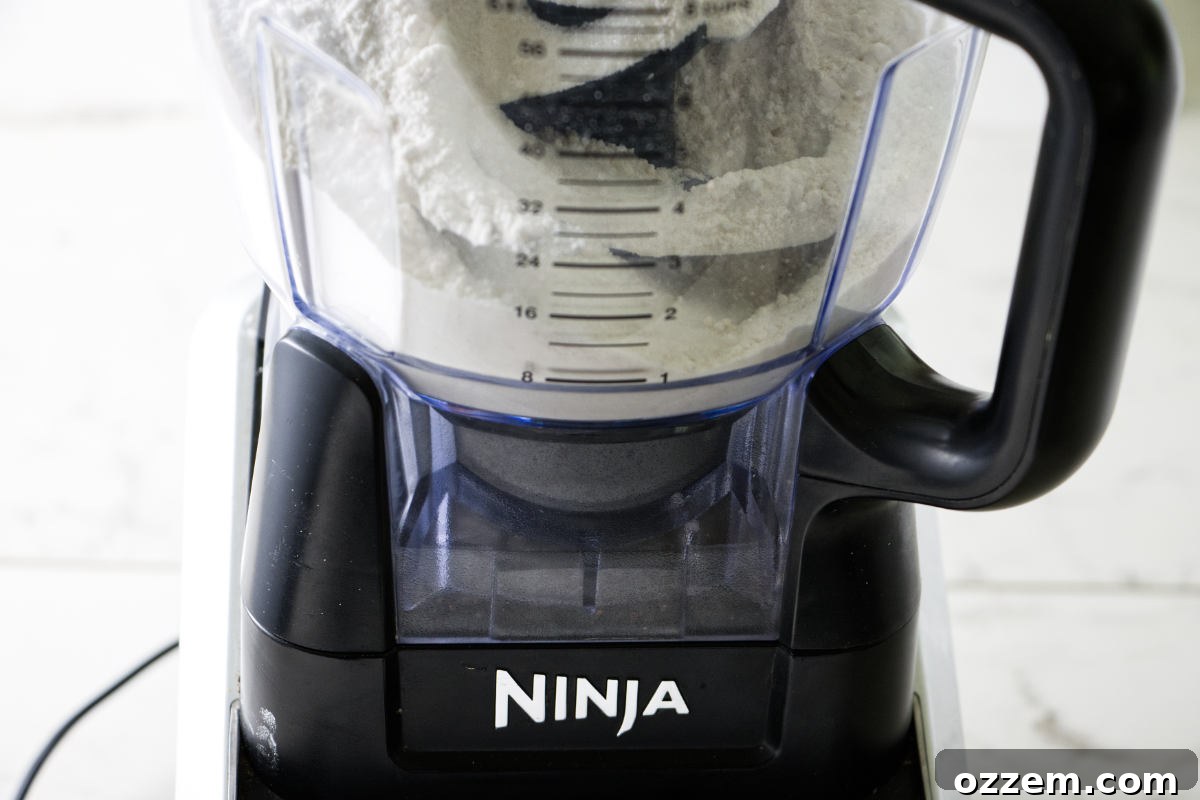
Begin by blending the flour, sugar, and salt together in your food processor, ensuring a consistent mixture for your pie crust base.
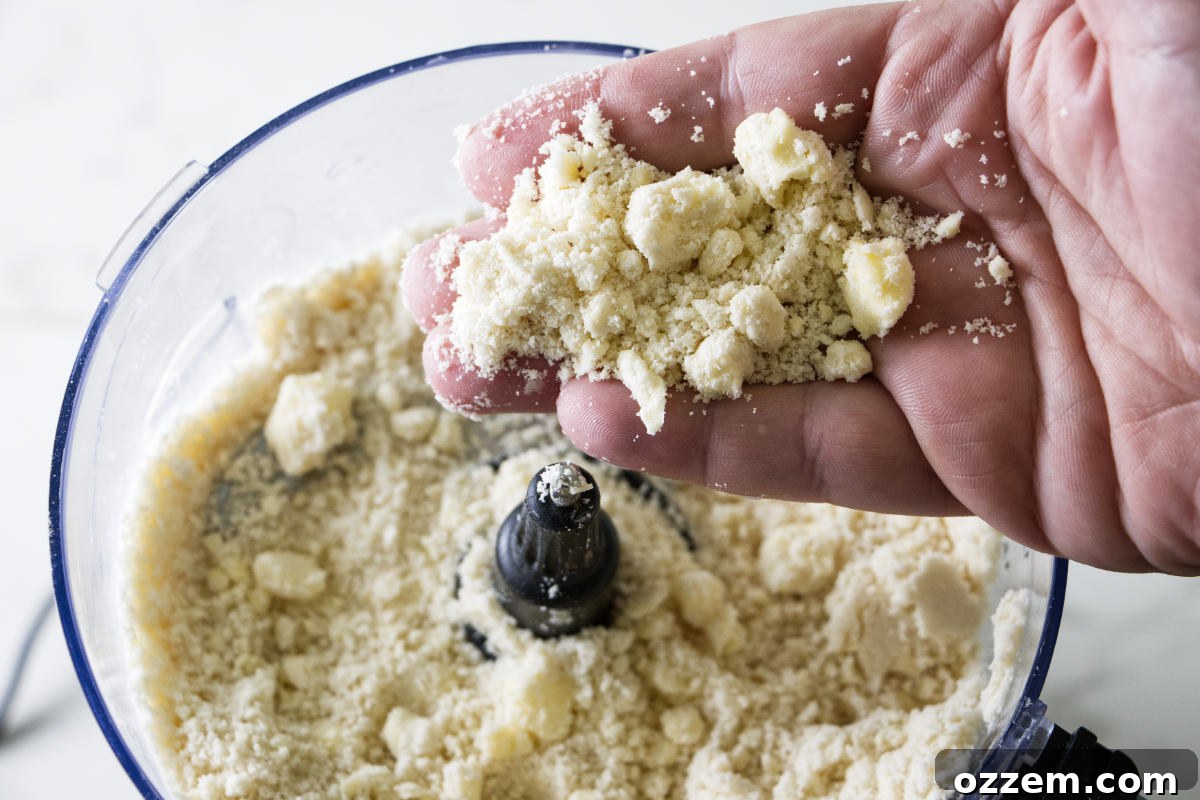
Next, add the cold Crisco vegetable shortening and pulse until the mixture resembles coarse cornmeal with distinct pea-sized lumps distributed throughout. This texture is key for a flaky crust.
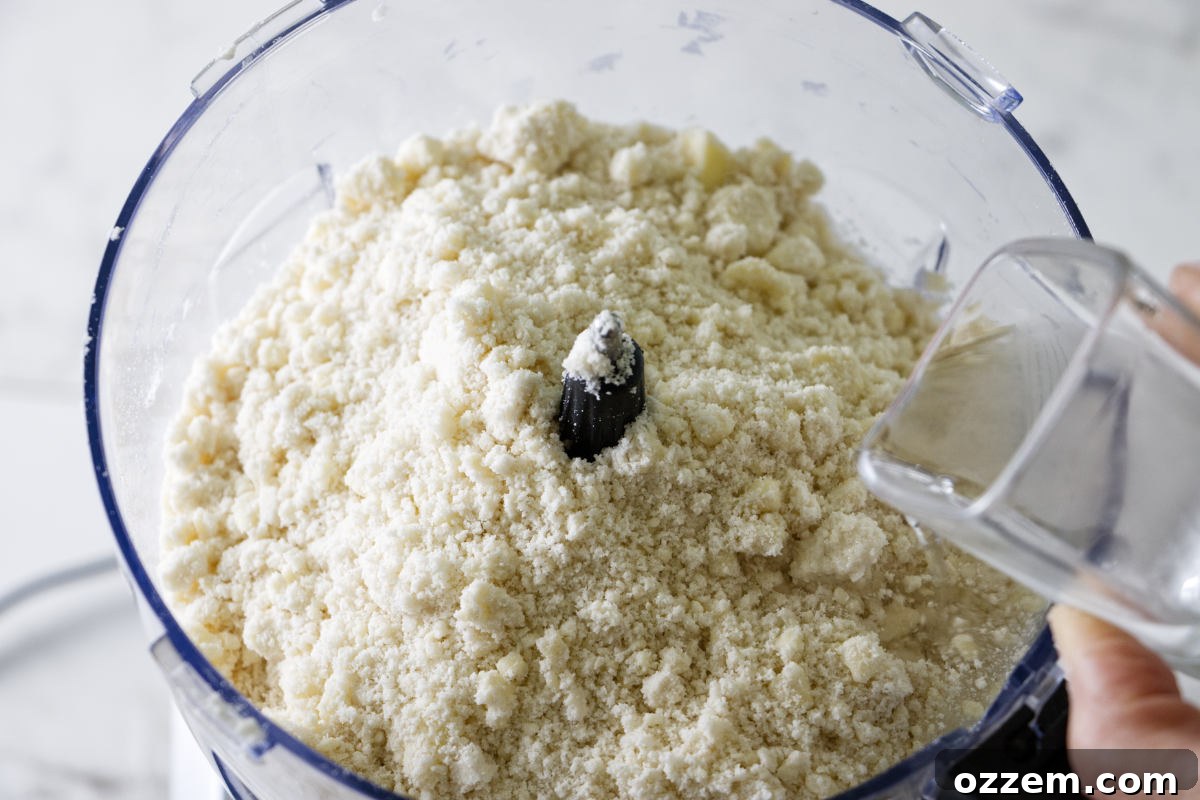
Evenly sprinkle the chilled vodka over the flour and shortening mixture, then pulse 3 to 4 times to just combine the liquids without overmixing.
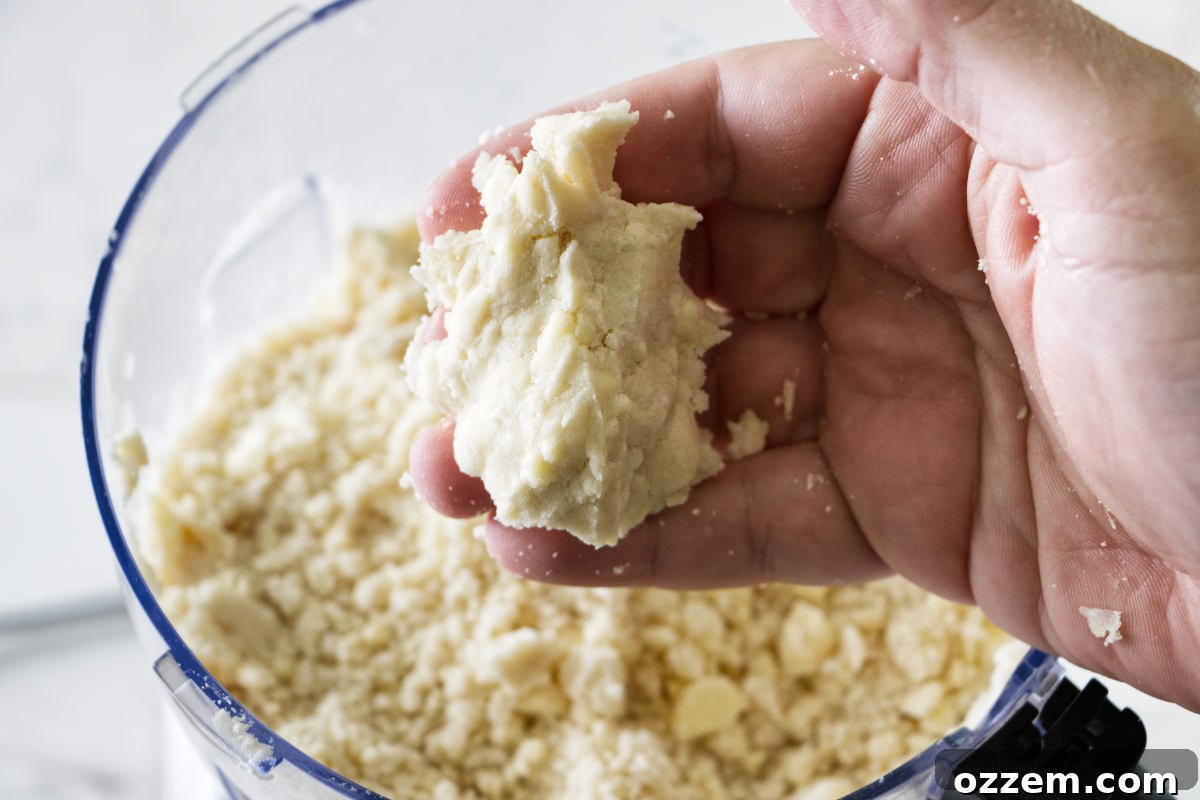
The dough should appear dry and crumbly, but when you gently squeeze a handful in your palm, it should cohere. If it doesn’t, add more ice water, one tablespoon at a time, pulsing until it just holds together when squeezed, careful not to add too much.
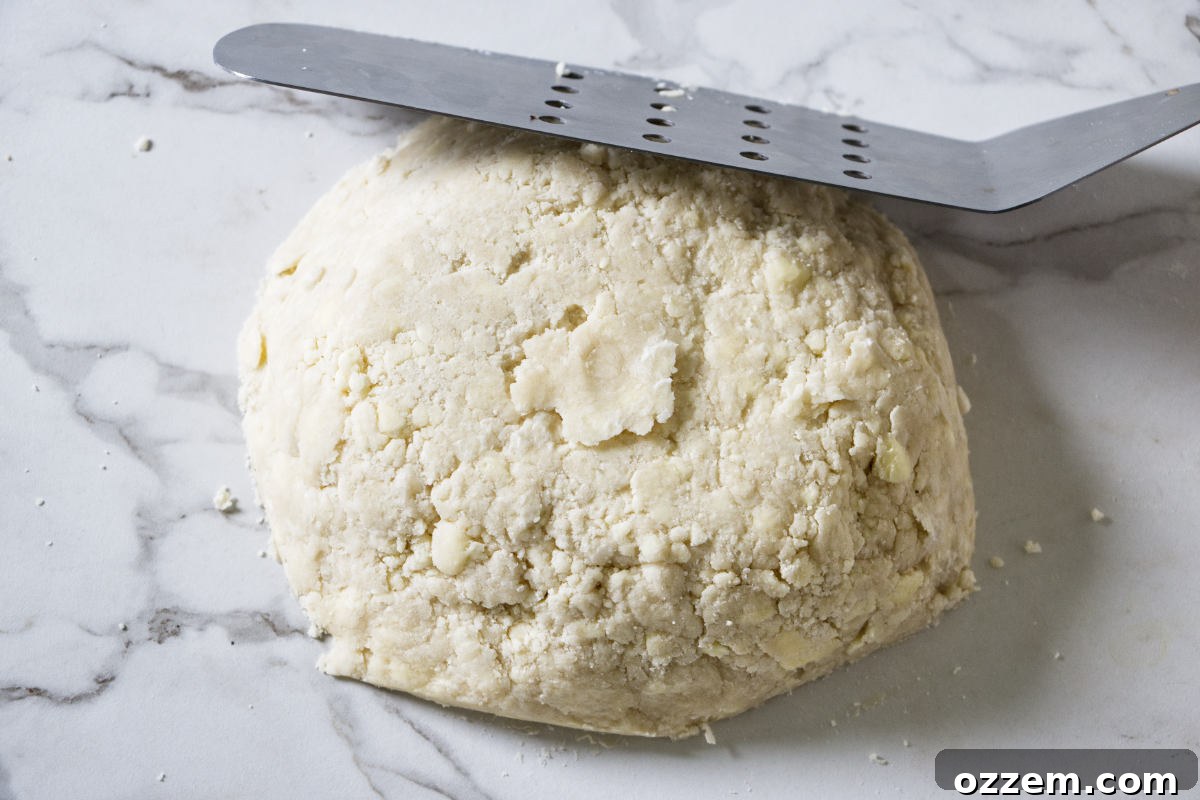
Transfer the dough mixture onto a clean counter, gathering all the crumbs. Gently press and work the loose crumbs together until they form a single, uniform dough ball.
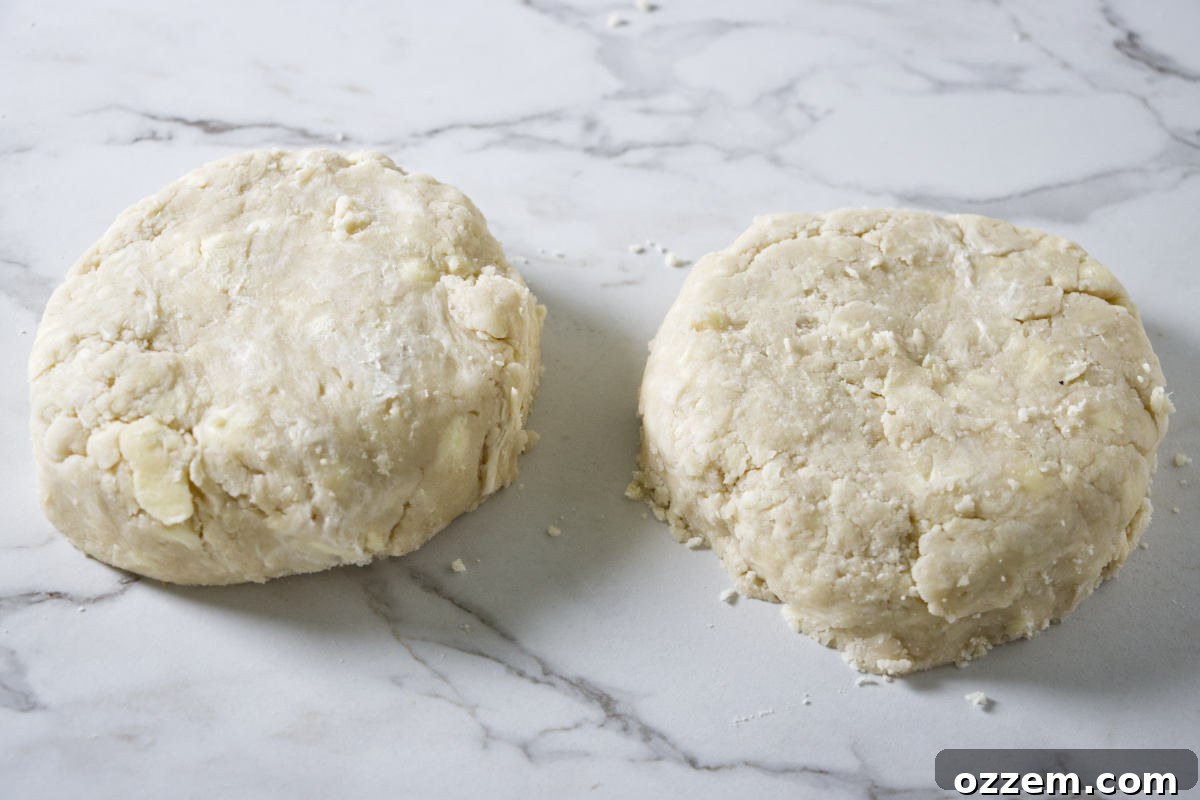
Divide the dough into two equal portions and flatten each into a neat, round disk. Wrap them securely in plastic wrap and refrigerate for at least 30 minutes to chill thoroughly.
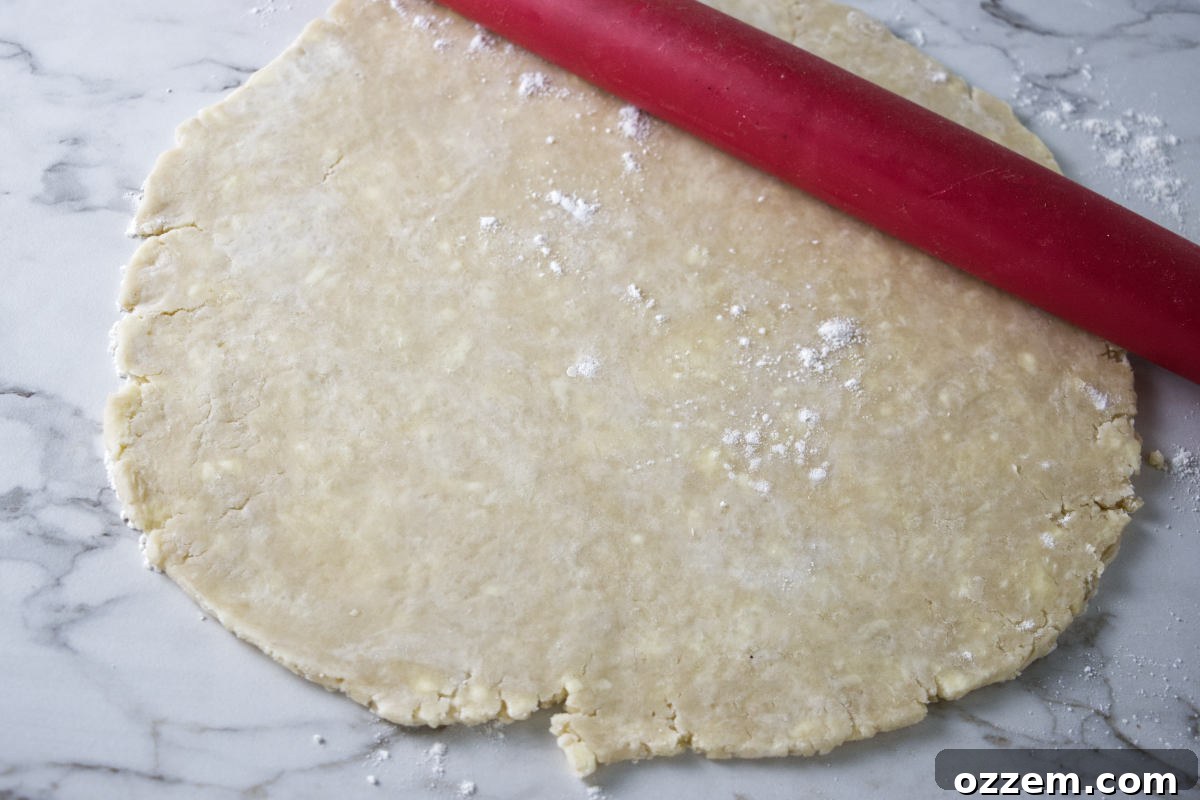
Once chilled, gently roll out the dough on a lightly floured surface to your desired thickness and carefully transfer it to your pie plate, ready for filling.
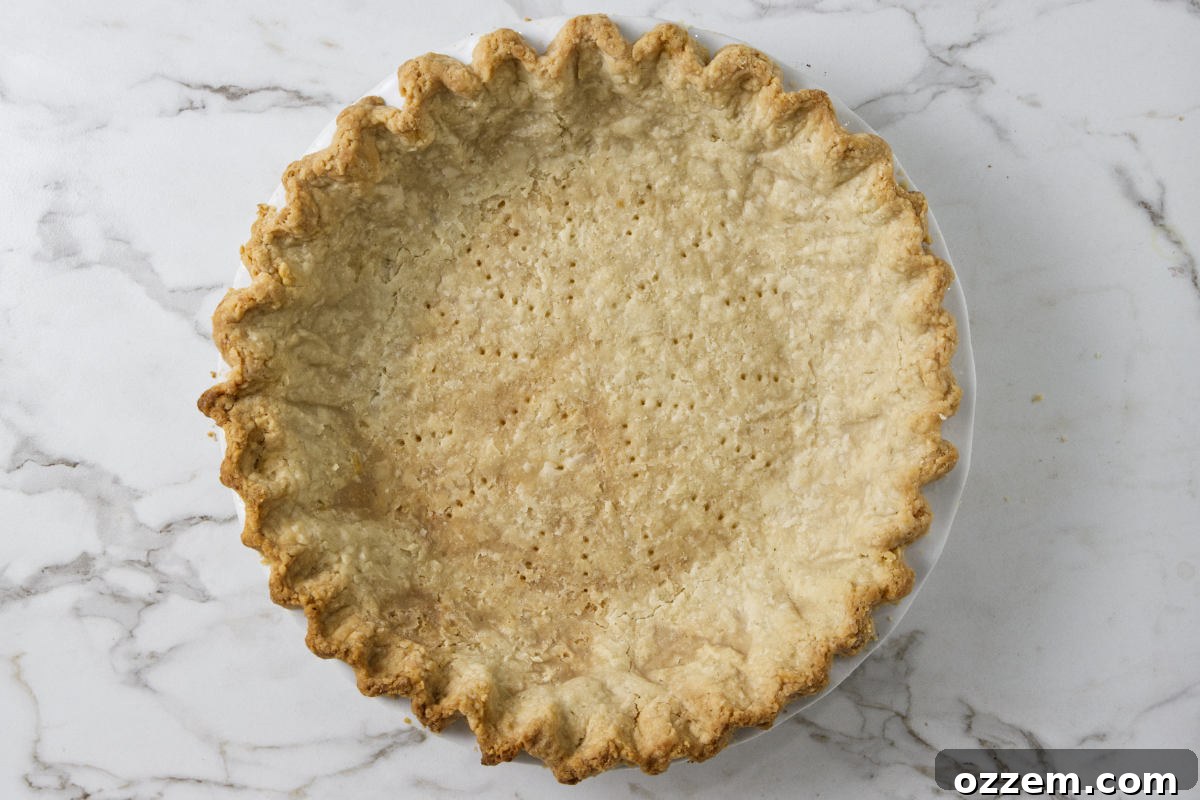
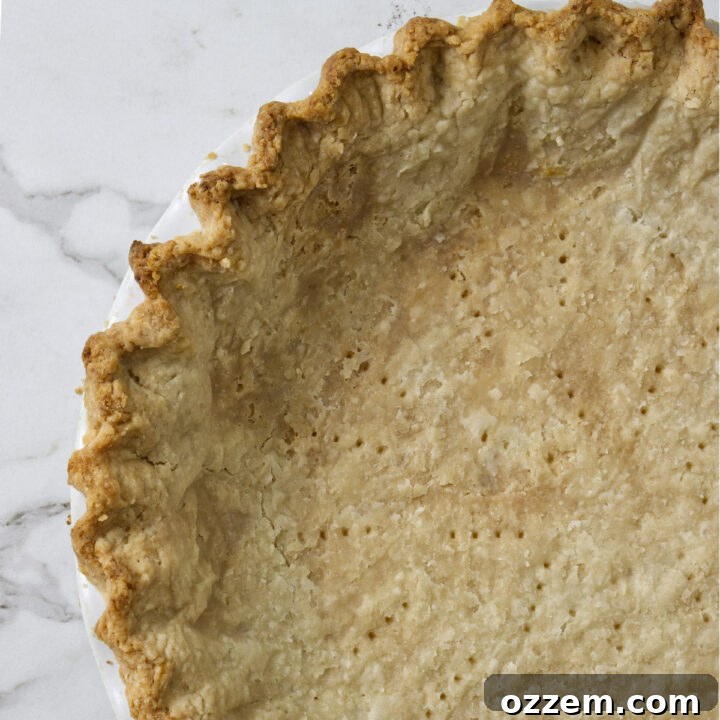
If you’re opting to pre-bake (blind bake) your pie crust, remember to gently prick the bottom with a fork. Then, line it with parchment paper and fill it generously with ceramic pie weights to prevent bubbling and shrinkage during baking.
Expert Tips for a Flawless Crisco Pie Crust Every Time
Achieving a pie crust that is consistently tender, flaky, and delicious is easier than you think with these expert tips. By following these guidelines, you’ll ensure your Crisco pie crust turns out perfect, ready to hold any sweet or savory filling imaginable.
- Master the Pulse Setting on Your Food Processor: The key to success when incorporating shortening is using the pulse function. Avoid continuously blending on a strong setting, as this can quickly overwork the dough and melt the fat. Short, intermittent pulses allow you to achieve the desired texture—coarse crumbs with pea-sized pieces of shortening—without developing too much gluten or warming the dough prematurely. Slow and steady really does win the race here for optimal flakiness.
- Maintain Extreme Cold for Shortening and Liquids: This is perhaps the most critical rule for a flaky crust. Cold Crisco shortening creates natural gaps and pockets within your pastry. When baked, the moisture trapped within these fat pockets turns into steam, which then pushes apart the layers of dough, resulting in those wonderfully distinct and airy flaky layers. This is precisely why we also use ice water and super-chilled vodka; they prevent the shortening from melting before it even reaches the oven, preserving its structure for maximum flakiness.
- Never Overwork the Dough: Overworking the dough is the nemesis of a tender pie crust. Even with vodka acting as a gluten inhibitor, excessive handling or mixing—especially with warm hands—will encourage gluten development. When gluten forms too strongly, it leads to a tough, chewy crust rather than a light, tender one. Aim to handle the dough as little as possible, just enough to bring it together.
- Don’t Forget to Prick and Use Pie Weights for Blind Baking: If you are pre-baking (also known as blind baking) your pie crust, it’s essential to prick the bottom liberally with a fork. These small holes allow steam to escape during baking, preventing the crust from puffing up unevenly and creating a flat, sturdy base. Additionally, always use ceramic pie weights (or dried beans) when blind-baking. They help weigh down the crust, keeping it from shrinking or sliding down the sides of the pie plate, ensuring a beautifully shaped and evenly baked shell.
- Adjust for Food Processor Size: Not all food processors are created equal. If you own a smaller food processor (less than a 6-cup capacity), it’s best to split the recipe in half. This allows you to make a single pie crust at a time, ensuring proper mixing and avoiding overloading your machine. Simply repeat the process if you need a double crust. This prevents uneven mixing and ensures consistency across all your pie crusts.
Crisco Pie Crust Frequently Asked Questions
Here are some of the most common questions bakers have when making pie crust, especially with Crisco and vodka. We’re here to provide clear, helpful answers to ensure your baking success.
Vodka is truly a culinary marvel when it comes to pie crusts! Its secret lies in its alcohol content, specifically ethanol, which is an excellent gluten inhibitor. While water encourages gluten formation, leading to a tough crust, vodka provides the necessary moisture for the dough to come together without developing those strong, elastic gluten strands. This results in an incredibly tender and exquisitely flaky crust. The best part? You won’t taste any alcohol whatsoever; it completely evaporates during the baking process, leaving behind only an unparalleled texture.
A tough bottom pie crust is typically the result of two common issues: overworking the dough or adding too much water. Both scenarios lead to excessive gluten development, making the crust chewy rather than tender. When handling the dough, work quickly and gently, and always add liquids sparingly, checking the dough’s consistency carefully. While not ideal, a slightly tough crust can often be salvaged with a generous pouring of rich cream or a scoop of melting ice cream over your sweet pie, offering a delicious distraction!
Absolutely, chilling the pie crust is a non-negotiable step for optimal results. Refrigeration serves multiple crucial purposes: it hardens the fat (Crisco) in your dough, which is essential for creating those distinct flaky layers during baking. It also allows the gluten, which may have developed slightly during mixing and rolling, to relax. A relaxed dough is much easier to roll out without shrinking, and it helps prevent the crust from becoming tough. Aim for at least 30 minutes of chilling time, or longer if possible.
Creating a beautiful, professional-looking crimped edge is all about technique and a little patience. First, ensure you’ve trimmed any excess pastry from around your pie dish, leaving about a half-inch overhang. Then, gently fold this overhang under itself to create a sturdy, slightly thicker edge that sits on the rim of the pie plate. To crimp, use the thumb and forefinger of one hand to pinch the dough from the inside, while simultaneously pressing your index finger from the other hand into the dough from the outside, creating a ‘V’ shape. Work your way around the entire circumference of the pie, repeating this motion. For extra support and to prevent the edges from collapsing, hold the edge of the pie dish firmly as you pinch and crimp.
The temperature of your water is just as important as the fat in pie crust making. Ice water is used specifically to keep the fat (Crisco) in the pastry incredibly cold and solid. If the water is too warm, it will cause the shortening to melt prematurely, leading to a greasy dough that won’t produce those distinct, desirable flaky layers. Cold fat melts slower in the oven, releasing steam gradually and creating pockets of air that give pie crust its characteristic flakiness and tender texture.
Absolutely! This Crisco pie crust recipe is fantastic for meal prepping and busy schedules. You can easily make the dough ahead of time. Simply wrap the dough disks tightly in plastic wrap and store them in the refrigerator for up to 2-3 days. For longer storage, the wrapped dough can be frozen for up to 3 months. Just remember to thaw it in the refrigerator overnight and then let it come to room temperature for about 15-20 minutes before rolling it out for optimal workability.
More Irresistible Recipes to Elevate Your Culinary Skills
Once you’ve mastered this incredible Crisco pie crust, you’ll be inspired to explore more delightful creations. Here are a few other fantastic recipes that are sure to satisfy your cravings and impress your family and friends:
- I always find myself craving something sweet, and this Traeger S’mores Dip never fails to hit the spot. It’s a wonderfully fun and interactive dessert that’s perfect for getting the kids involved. Imagine bringing the nostalgic campfire experience right to your patio with this gooey, chocolatey treat. Don’t forget to have your favorite dipping substrates on hand – I particularly enjoy dipping fresh strawberries and an assortment of cookies!
- For a quick and effortless breakfast or brunch treat, these Air Fryer Cinnamon Rolls are an absolute dream. They are super easy and incredibly fast to cook, making them ideal for busy mornings. Plus, cleanup is an absolute breeze since everything is prepared in a single pan right in your air fryer, minimizing mess and maximizing enjoyment.
- You definitely need to try these indulgent Air Fryer Deep Dish Cookie Bowls. Imagine warm, gooey chocolate chip cookies baked into individual bowls, perfectly crisp on the outside and soft in the center. Throw a generous scoop of vanilla ice cream on top, and you’ve got a dessert that’s pure bliss – a delightful and customizable treat for any occasion!
Essential Tools and Equipment for Perfect Pie Making
Having the right tools can make all the difference in your pie-making journey. From processing the dough to baking the perfect crust, these recommended items will ensure a smooth and enjoyable experience, helping you achieve professional-level results in your home kitchen.
- When preparing this impeccable pie crust, my go-to is the powerful Ninja XL Food Processor. Its robust motor and large capacity make quick work of combining ingredients. Alternatively, this reliable Cuisinart Food Processor is also an excellent option, known for its durability and consistent performance.
- For those who love to experiment with unique flavors, the Traeger Timberline 1300 is a monstrous and incredibly versatile smoker. You can easily fit your entire Thanksgiving feast, including your pies, into this beast. It’s the only smoker you’ll ever need, offering incredible versatility and lasting for many years. Baking your pie in a Traeger adds a unique, subtle smoky twist that is truly unforgettable!
- A good set of pie plates is indispensable. I primarily use these classic and durable Pyrex Pie Plates, which are perfect for everyday baking and consistent heat distribution. I also highly recommend these rugged and virtually indestructible USA Pan Pie Plates, especially when baking on the Traeger, for their superior performance and longevity.
- If you’re blind-baking your pie crust to ensure a crispy base, you will definitely want to use some ceramic pie weights. These are essential for keeping the crust flat and preventing shrinkage or bubbling during the pre-baking process, ensuring a perfectly shaped pie shell.
- Finally, for all your mixing and scraping needs, these OXO Good Grips Silicone Spatulas are my absolute go-to. They are incredibly heat resistant, durable, and flexible, making them perfect for handling dough and general kitchen tasks with ease.
The Ultimate Crisco Pie Crust: Your Secret to Baking Success
Whether your culinary ambitions lean towards a robust and glorious meat pie, bubbling with savory goodness, or a moreish fruit dessert, bursting with sweet, seasonal flavors, this Crisco pie crust recipe is guaranteed to have you covered. It’s an incredibly versatile and reliable foundation for any pie imaginable, promising to transform your baking from good to truly exceptional.
If you’re willing to embrace the gentle art of pulsing with your food processor and maintain the crucial chill of your ingredients, this recipe will generously reward you with an unbelievably flaky and exquisitely tender crust. The addition of vodka, our celebrated secret ingredient, plays a pivotal role in achieving this unmatched texture, ensuring your crust is not only moist but also boasts an ethereal flakiness. Prepare yourself; this crust is sure to impress even your most critical guests, leaving them clamoring for seconds and marveling at your baking prowess. Just don’t blame me when there are absolutely no leftovers!
💬 Tell Me What You Think!
Did you try out this amazing Crisco pie crust recipe? I’d absolutely love to hear about your experience! Please take a moment to leave a comment below and let me know how you liked it, what you baked with it, and any tips you discovered along the way. Also, don’t hesitate to snap a fantastic picture of your creation and post it to your favorite social platform. Be sure to tag me at @alicensetogrill and let me know how much you enjoyed it! Your feedback truly inspires me!
CONNECT WITH A LICENSE TO GRILL!
Stay updated with our latest recipes, grilling tips, and culinary adventures by following us on our social media accounts. Join our growing community of food lovers!
Did you make this recipe? Share your thoughts and culinary triumphs with us in the comments below!
Crisco Pie Crust: The Ultimate Easy & Flaky Recipe
2 pie crusts
20 minutes
20 minutes
30 minutes
1 hour 10 minutes
This recipe guides you through creating a perfect double-crust Crisco pie dough using a food processor. For best results, use a food processor with at least a 6-cup capacity. If your processor is smaller, simply halve the recipe to make a single crust, repeating the process if a double crust is needed.
An all-Crisco pie crust is renowned for being exceptionally easy to handle, ensuring a no-fail dough that bakes up beautifully every time. Its inherent properties make it forgiving for beginners and consistently reliable for seasoned bakers.
A touch of vodka replaces some of the traditional water in this recipe. This ingenious substitution is key to preventing excessive gluten formation, which results in a remarkably tender and flaky pie crust. The alcohol content of the vodka evaporates entirely during baking, leaving no flavor behind—only an impeccably delicate and crispy texture.
Ingredients
- 1 cup chilled Crisco vegetable shortening
- 2-2/3 cups all-purpose flour
- 1 tablespoon granulated sugar
- 1-1/4 teaspoons fine sea salt
- 1/4 cup very cold vodka
- 3 to 6 tablespoons ice water (as needed)
Instructions
- Chill Shortening and Vodka: Place the Crisco shortening in the freezer for 15 to 20 minutes to ensure it is extra cold. Similarly, put the vodka in the freezer to chill while you prepare other ingredients.
- Combine Dry Ingredients: Fit your food processor with the chopping blade. Add the flour, sugar, and salt into the bowl of the food processor. Pulse a few times to thoroughly combine these dry ingredients.
- Incorporate Shortening: Add the chilled shortening to the food processor. Pulse 4 to 5 times in short bursts, until the mixture resembles coarse cornmeal with scattered pea-sized lumps of shortening throughout. Be careful not to over-process.
- Add Liquids and Test Dough: Sprinkle the cold vodka and an initial 2 tablespoons of ice water over the mixture. Pulse 3 to 4 times. To test the dough, squeeze a small portion in your hands. If it holds together easily, proceed to the next step. If it remains too crumbly, add the remaining ice water 1 tablespoon at a time, pulsing briefly after each addition, until the dough just coheres when squeezed. Remember, it should still look loose and crumbly but stick together when pressed.
- Form Dough Ball: Once the dough reaches the correct consistency, dump the entire mixture, including any loose crumbs, onto a clean counter. Gently push and press all the crumbs together to form a cohesive dough ball.
- Shape and Chill Disks: Divide the dough into two equal pieces. Flatten each piece into a round disk, approximately 1-inch thick. Wrap each disk tightly in plastic wrap and chill them in the refrigerator for at least 30 minutes. This chilling period allows the gluten to relax and the fat to firm up.
- Prepare for Rolling: When you are ready to make your pie, remove the chilled dough disks from the refrigerator and let them sit on the counter at room temperature for 20 to 30 minutes. This will allow the dough to soften slightly, making it easier to roll without cracking.
- Blind Baking Instructions (Optional): If you plan to pre-bake (blind bake) your pie crust, once rolled and placed in the pie plate, poke several holes in the bottom with a fork to allow steam to escape. Line the pie crust with parchment paper and fill it with ceramic pie weights or dried beans. Place the pie shell in a 400°F (200°C) preheated oven and bake for 15 to 20 minutes, or until lightly golden.
Notes
- Avoid Over-Processing: Be sure not to over-pulse the dough in the food processor. Overworking the dough can lead to excessive gluten development, resulting in a tough and less flaky pie crust. Quick, short pulses are key.
- Dough Texture After Mixing: The dough should still appear crumbly after mixing it in the food processor. If you add too much water, the dough will become sticky and tough. To check for readiness, grab a handful of dough and try to form a ball. It should clump together cohesively when squeezed, but otherwise, maintain a crumbly texture. This indicates the perfect hydration level.
- Pricking for Blind-Baking: If you are blind-baking your pie crust (pre-baking it before adding the filling), it’s crucial to poke numerous holes with a fork or knife in the bottom of the crust. This allows steam to vent during baking, preventing the crust from puffing up and ensuring a flat, even base.
- Using Pie Weights: For successful blind-baking, always use ceramic pie weights to keep the pie crust flat and prevent it from shrinking or sliding down the sides of the pie plate. If you don’t have specialized pie weights, dried beans or rice can be used as an effective substitute.
Recommended Products
As an Amazon Associate and member of other affiliate programs, I earn from qualifying purchases.
- Pyrex Pie Plate Set
- USA Pan Bakeware Aluminized Steel Pie Pan, 9-Inch
- Cuisinart Food Processor
- Ceramic Pie Weights
Nutrition Information:
Yield: 18
Serving Size: 1
Amount Per Serving:
Calories: 264Total Fat: 12gSaturated Fat: 5gTrans Fat: 0gUnsaturated Fat: 7gCholesterol: 6mgSodium: 471mgCarbohydrates: 33gFiber: 1gSugar: 1gProtein: 4g
Nutrition information is a guideline only, is calculated automatically by third-party software, and absolute accuracy is not guaranteed. Please consult a qualified professional for precise dietary advice.
Did you make this recipe?
Please leave a comment on the blog or share a photo on Instagram