
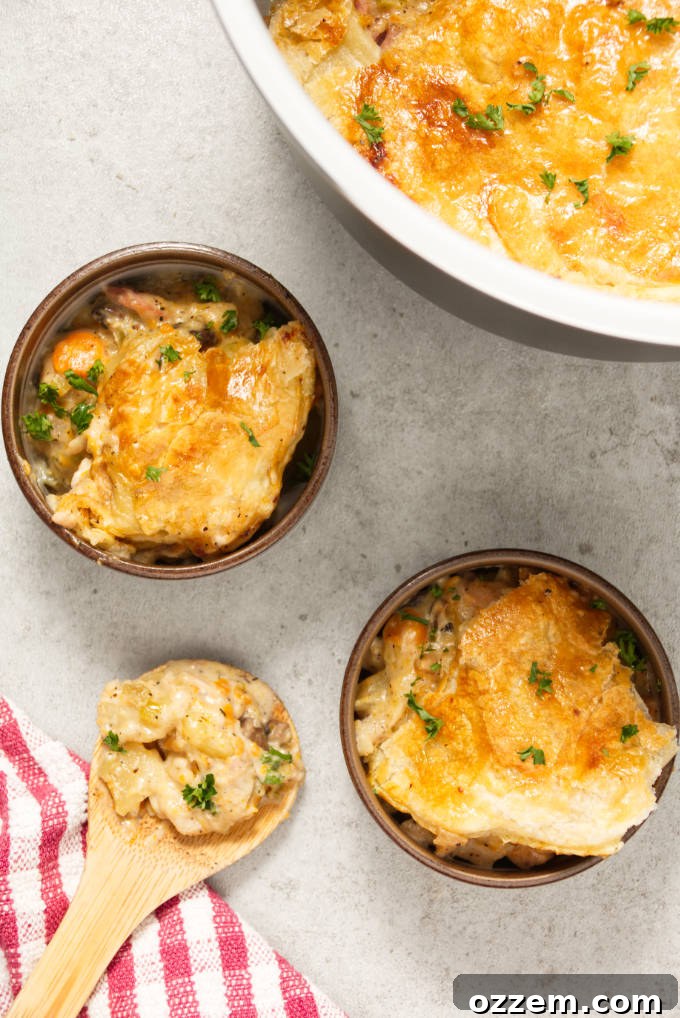
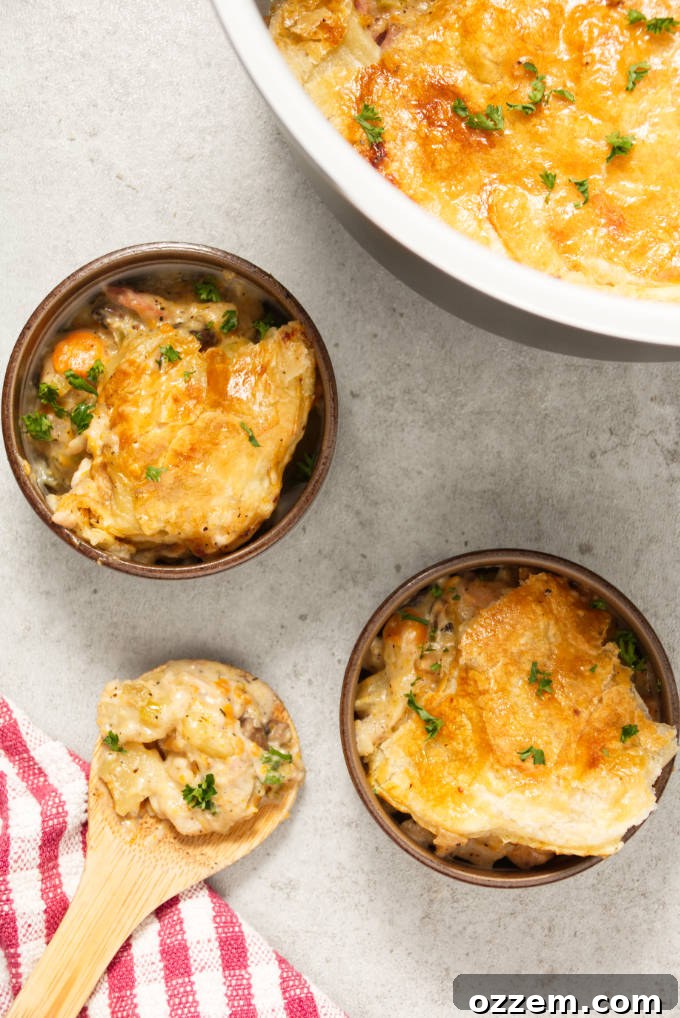
There’s nothing quite like a hearty, homemade pot pie to bring warmth and comfort, especially when the weather cools or after a big holiday feast. This classic dish, brimming with tender meat, fresh vegetables, and a rich, creamy sauce, is the epitome of culinary coziness. What if you could achieve this comforting masterpiece with surprising ease and speed? Enter the Ninja Foodi – your secret weapon for transforming leftover turkey into the most delicious, single-pot turkey pot pie you’ve ever tasted.
Traditional pot pie recipes often involve multiple pots, pans, and a significant time commitment. However, the Ninja Foodi revolutionizes the process, allowing you to build layers of flavor and cook your entire pot pie in one versatile appliance. Its unique pressure cooking function ensures the vegetables and turkey are perfectly tender, while the air fryer capability delivers a golden, flaky puff pastry crust that’s both tender and irresistibly crispy. Say goodbye to soggy bottoms and hello to a gourmet pot pie experience, made simple.
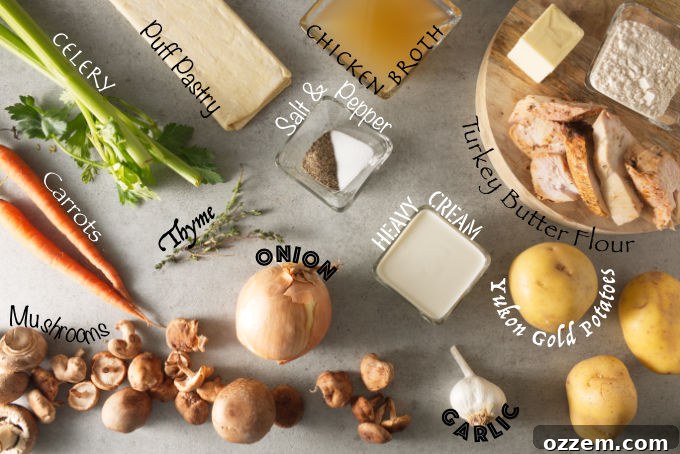
Essential Ingredients for a Mouthwatering Ninja Foodi Turkey Pot Pie
The foundation of any truly exceptional pot pie lies in the quality and abundance of its ingredients, particularly the fresh vegetables. For a truly hearty and flavor-packed turkey pot pie, we’re loading this recipe with a medley of garden-fresh goodness. Each component plays a crucial role in creating that rich, savory profile we all crave.
- Leftover Turkey (or Chicken): The star of the show, perfectly cooked and ready to absorb the creamy sauce.
- Unsalted Butter: Essential for sautéing vegetables and building a rich base without over-salting.
- Onion: Adds a foundational aromatic sweetness and depth of flavor.
- Mushrooms: Contributes an earthy umami, enhancing the overall savory profile.
- Garlic: Aromatic powerhouse, indispensable for almost any savory dish.
- Carrots: Sweet and vibrant, providing texture and a touch of color.
- Celery: Offers a subtle peppery note and crunchy texture.
- Yukon Gold Potatoes: Chosen for their creamy texture and buttery flavor, they become wonderfully tender without being starchy.
- Chicken Broth: Forms the liquid base of the filling, adding moisture and savory chicken essence.
- All-Purpose Flour: The key thickener, transforming the broth and cream into a luscious, gravy-like consistency.
- Heavy Cream: For unparalleled richness and a silky-smooth finish to the pot pie filling.
- Puff Pastry: The perfect shortcut to a light, airy, and incredibly crispy pie crust, easily achieved with the Ninja Foodi’s air fryer function.
- Salt & Freshly Ground Black Pepper: Basic seasonings to highlight and balance all the flavors.
- Fresh Thyme: Adds an earthy, aromatic herbaceousness that complements turkey beautifully.
Choosing the Perfect Potatoes for Your Pot Pie
When it comes to crafting the ideal pot pie, the choice of potato can significantly impact the texture and overall experience. While many recipes might call for various types, my absolute preference for pot pie is the humble Yukon Gold. These beloved spuds are truly an all-purpose potato, celebrated for their naturally buttery and slightly nutty flavor. Their flesh is wonderfully tender, far more yielding and less starchy than a Russet potato, ensuring they meld seamlessly into the creamy filling without becoming overly chewy or dense.
One of the best qualities of Yukon Gold potatoes for this recipe is their delicate, thin skin. Unlike thicker-skinned varieties, you don’t need to bother with peeling them, which saves precious prep time. This thin skin cooks down beautifully, becoming almost imperceptible in the final dish. By using Yukon Golds, you guarantee a pot pie filling that is both tender and luxuriously creamy, where every bite is a harmonious blend of flavors and textures, rather than being dominated by a dense chunk of starch.
However, if Yukon Golds aren’t available or if you’re looking for an alternative, other tender, all-purpose potato varieties can also work well. Red potatoes, for instance, have a similarly creamy texture and thin skin that doesn’t require peeling. Purple potatoes offer a vibrant color contrast, making your pot pie visually more appealing, and they also cook up tender. Whichever potato you choose, ensure they are cut into uniform, bite-sized pieces to promote even cooking. This attention to detail will ensure your pot pie filling achieves that desired melt-in-your-mouth consistency.
This post may contain affiliate links. Please read our disclosure policy.
Mastering the Ninja Foodi Turkey Pot Pie: A Step-by-Step Guide
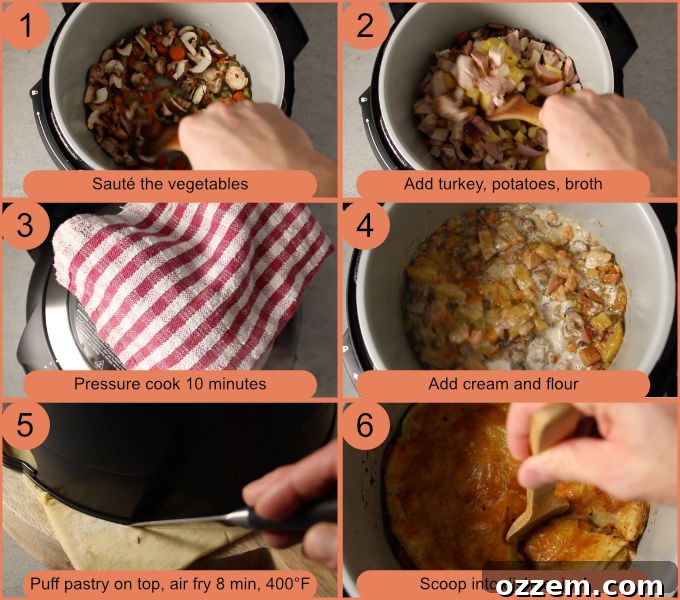
Creating this irresistible turkey pot pie in your Ninja Foodi is a straightforward process, thanks to its multi-functional capabilities. Follow these detailed steps to achieve a perfectly cooked, comforting meal with a golden, crispy crust.
Step 1: Sauté Your Aromatics and Vegetables
Begin by setting your Ninja Foodi to its sauté mode, using a medium to medium-high heat setting. This initial step is crucial for building a deep, rich flavor base for your pot pie. Add the unsalted butter to the inner pot and allow it to melt completely until shimmering. Once melted, add your diced onions, chopped carrots, sliced celery, fresh thyme, minced garlic, sliced mushrooms, salt, and freshly ground black pepper. Stir occasionally to ensure even cooking.
Sauté these vegetables for approximately 5 to 7 minutes. You’ll know they’re ready when the onions become translucent and soft, and the aroma of the garlic and thyme begins to fill your kitchen. This gentle caramelization of the vegetables extracts their natural sweetness and creates a foundation of savory goodness that will permeate the entire pot pie. Do not rush this step, as it contributes significantly to the final flavor profile.
Step 2: Incorporate the Turkey and Potatoes
After your vegetables have softened and become fragrant, it’s time to add the heartier components. Carefully dump the diced Yukon Gold potatoes and the cooked, leftover turkey (or chicken) into the Ninja Foodi pot. Pour in the chicken broth, ensuring all ingredients are mostly submerged or well mixed. Give everything a good stir to combine.
Continue to sauté for another 5 minutes or so, allowing the potatoes and turkey to warm through and begin to absorb some of the flavorful broth. While the potatoes will become fully tender later under pressure, this initial sauté helps them start to soften and integrate with the other ingredients. This step ensures that the flavors meld together beautifully before the pressure cooking phase.
Step 3: Pressure Cook for Perfect Tenderness
Now, switch your Ninja Foodi to pressure mode. Secure the pressure lid firmly in the locked position, making sure the pressure release valve is set to “seal.” This is vital for the appliance to build and maintain pressure. Cook on high pressure for 10 minutes. This high-pressure cooking time is precisely what’s needed to render the potatoes perfectly tender without turning them mushy, and to infuse all the ingredients with deep, harmonious flavors.
Once the 10-minute pressure cooking cycle is complete, carefully release the pressure. It’s important to do this safely to avoid burns from hot steam. I highly recommend placing a thick kitchen rag or towel over the pressure release valve to direct the steam away from your hands and face, and to catch any condensation droplets that might otherwise coat your cabinets. Once all the pressure has been released and the float valve has dropped, you can safely unlock and open the lid. Always tilt the lid away from you when opening, as there might be some residual steam that could escape. Directing it towards the back of the Ninja Foodi ensures your face is protected.
Step 4: Thicken the Rich and Creamy Filling
With the pressure released and the lid safely removed, it’s time to transform your flavorful medley into a thick, luxurious pot pie filling. Add the all-purpose flour and the heavy cream to the pot. Using a whisk or a wooden spoon, stir vigorously and continuously to fully incorporate the flour and cream. This action is crucial to prevent lumps and ensure a smooth, creamy sauce.
As you stir, the mixture should begin to thicken quite quickly, forming a rich gravy-like consistency. Remember, we are aiming for a pot pie, not a runny stew, so a good thick base is essential. If, after a couple of minutes of stirring, you notice the mixture is still too thin, don’t worry. Simply turn your Ninja Foodi back to sauté mode on medium heat and continue to cook and stir for an additional 5 minutes. If it remains too runny, you can add more flour, one tablespoon at a time, mixing well after each addition until your desired thickness is achieved. The goal is a velvety, robust filling that clings beautifully to the turkey and vegetables.
Step 5: Crown with Puff Pastry and Air Fry to Golden Perfection
Now for the pièce de résistance: the crispy, golden puff pastry crust! Take one sheet of thawed puff pastry and gently roll it out on a lightly floured surface. You want to ensure it’s large enough to completely cover the turkey pot pie mixture in the Ninja Foodi pot. A helpful trick is to use the inner air fryer basket from your Ninja Foodi as a template. Place the black air fryer basket on top of your rolled-out pastry and carefully cut a circular piece around its perimeter.
Keep in mind that the air fryer basket is typically about an inch smaller than the actual pot, so you might need to roll your pastry out a couple more times after cutting to make it just slightly larger than the basket’s diameter, ensuring it perfectly covers the filling. Once cut, carefully drape your puff pastry over the turkey pot pie mixture in the inner pot. You can gently crimp the edges against the pot’s rim if desired for a more traditional look and to help seal it.
For that beautiful, deep golden-brown color and an extra crispy finish, consider giving your puff pastry an egg wash. Simply whisk one egg with a tablespoon of water or milk, and then use a pastry brush or silicone brush to lightly coat the top of the puff pastry. This step adds gloss and promotes even browning, elevating the visual appeal of your pot pie.
Close the air fryer lid (the crisping lid) on your Ninja Foodi. Set the appliance to air fry mode and cook at 400°F (200°C) for approximately 8 to 10 minutes, or until the puff pastry crust is gloriously golden brown, visibly puffed, and wonderfully crispy. Keep an eye on it during the last few minutes to prevent over-browning.
Step 6: Serve and Savor Every Comforting Bite!
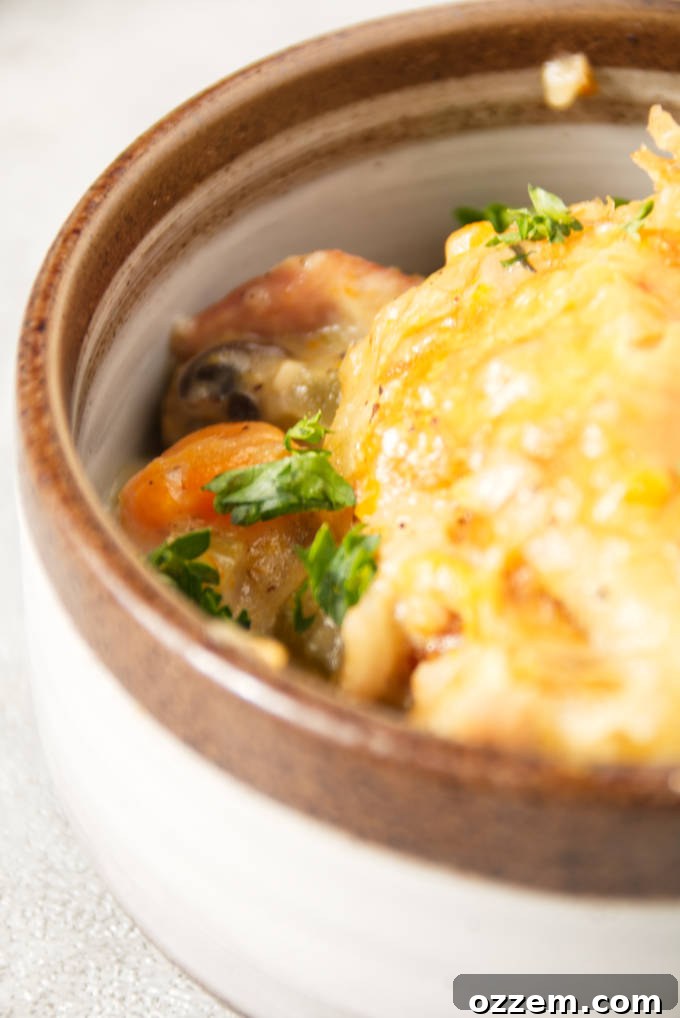
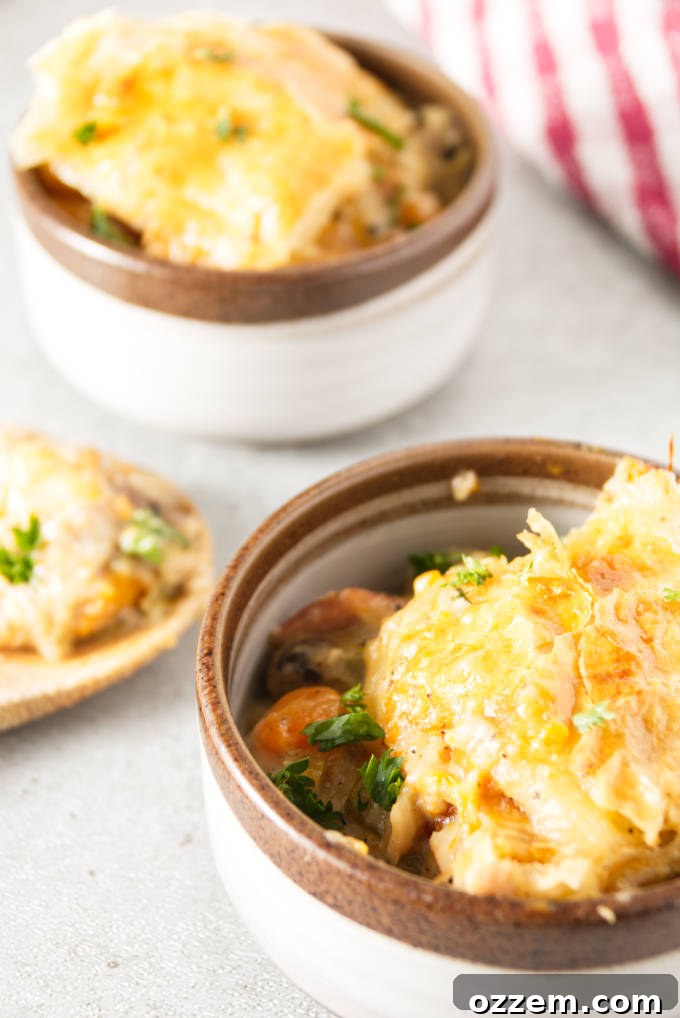
The moment you’ve been waiting for! Once your pot pie crust is perfectly golden and crisp, carefully open the air fryer lid. Using a sturdy wooden or silicone spoon (to protect the Ninja Foodi’s non-stick coating), gently scoop generous portions of the hot, bubbling turkey pot pie out of the Ninja Foodi and into individual bowls. The rich, creamy filling, tender vegetables, savory turkey, and flaky crust come together for an unforgettable meal.
Serve immediately and enjoy the comforting warmth and incredible flavors of your homemade Ninja Foodi Turkey Pot Pie. This dish is satisfying on its own, but also pairs wonderfully with a light side salad to balance the richness. Prepare to be delighted by how easy and delicious this one-pot wonder truly is!
What to Serve with Your Ninja Foodi Turkey Pot Pie
While this Ninja Foodi Turkey Pot Pie is incredibly satisfying on its own, pairing it with a simple side dish can elevate the meal and create a more balanced dining experience. Consider these complementary options:
- Fresh Green Salad: A crisp, light salad with a vinaigrette dressing provides a refreshing contrast to the rich pot pie.
- Cranberry Sauce: If you’re using holiday turkey leftovers, a dollop of leftover cranberry sauce on the side can add a delightful sweet and tart counterpoint.
- Steamed Green Beans or Asparagus: Lightly steamed or roasted vegetables offer a healthy and vibrant addition without overpowering the main dish.
- Crusty Bread: Perfect for soaking up any leftover creamy sauce, a warm slice of crusty bread or a dinner roll is always a welcome companion.
Frequently Asked Questions About Ninja Foodi Turkey Pot Pie
Can I use chicken instead of turkey for this pot pie recipe?
Absolutely! This recipe is incredibly versatile. If you don’t have leftover turkey, cooked chicken (shredded or diced) is a perfect substitute. Rotisserie chicken works wonderfully for an even quicker prep time. The cooking method and other ingredients remain the same, making it a delicious chicken pot pie.
Can I freeze leftover turkey pot pie?
Yes, you can! To freeze, allow the pot pie to cool completely. You can freeze individual portions or the entire pie (without the pastry crust, or with it if you don’t mind a slightly softer crust upon reheating). Store in an airtight, freezer-safe container for up to 2-3 months. Reheat thawed pot pie in the oven at 350°F (175°C) until warmed through, or in the Ninja Foodi on air fry mode to re-crisp the crust if it was frozen with it.
What if my pot pie filling is too thin or too thick?
If your filling is too thin after adding flour and cream, don’t despair! Simply switch your Ninja Foodi back to sauté mode on medium heat and let it simmer, stirring constantly, until it thickens to your desired consistency. For a thicker result, you can add an additional tablespoon of flour, mixed with a little cold broth or water to form a slurry, and then stir it into the pot pie filling. If it becomes too thick, you can thin it out by stirring in a small amount of extra chicken broth or cream, one tablespoon at a time, until it reaches the perfect consistency.
Do I need to thaw puff pastry before using it?
Yes, puff pastry must be thawed before use. It typically thaws in the refrigerator for several hours or at room temperature for about 30-40 minutes. Follow the package instructions for the best results. Attempting to roll or cut frozen puff pastry will result in it cracking and crumbling.
More Delicious Ideas for Your Leftover Turkey
This Ninja Foodi Turkey Pot Pie is an absolute game-changer for leftover turkey, but the culinary adventures don’t have to stop there! If you find yourself with an abundance of delicious turkey meat, here are a few more incredible recipes to ensure not a single shred goes to waste. Each one offers a unique way to enjoy that succulent bird, guaranteeing variety and flavor beyond the holiday meal.
Before you even get to the leftovers, make sure your initial turkey is cooked to perfection. For a truly unforgettable bird that ensures plenty of flavorful meat for pot pies and beyond, check out this brown sugar bourbon brined Traeger smoked turkey. The brine infuses the turkey with incredible moisture and tenderness, while the brown sugar bourbon glaze adds a delightful sweetness and a hint of smoky sophistication. You’ll be left with not just a show-stopping centerpiece, but also a generous supply of turkey for all your creative leftover recipes!
If you prefer a more classic approach to your holiday turkey but still crave that exceptional juiciness, then this wet brined Traeger smoked turkey is for you. Brining is the ultimate technique for ensuring your turkey remains incredibly moist and flavorful, and the Traeger grill adds that signature smoky depth that truly elevates the experience. It’s a foolproof method for producing an amazing bird every time, setting you up for the best pot pie leftovers.
And let’s not forget the crucial side dishes that make any turkey meal complete! If you’re looking for an effortless yet delicious accompaniment, try this air fryer baked potato. It’s quick, results in a perfectly fluffy interior and crispy skin, and provides the ideal canvas for loading up with all your favorite toppings – a fantastic complement to your pot pie or any turkey dinner.
Tell Us What You Think of the Ninja Foodi Turkey Pot Pie!
Did you try out this amazing recipe? We’d love to hear your thoughts! Please consider giving it a 5-star review below. And don’t forget to snap a picture of your culinary creation and share it with us on Instagram using the hashtag #alicensetogrill. Your feedback and photos inspire us!
CONNECT WITH A LICENSE TO GRILL!
Be sure to follow us on our social media accounts to stay updated with our latest recipes and grilling adventures.
- YouTube
- TikTok
Did you make this recipe? Tell us about it in the comments below!
Ninja Foodi Turkey Pot Pie
8 Servings
10 minutes
28 minutes
38 minutes
Pot pie is one of the most comforting foods, and the Ninja Foodi makes it incredibly easy to turn your heap of turkey leftovers into a delicious pot pie. It is packed with loads of vegetables and just enough turkey so that every bite is hearty and filling. You may find this to be your new favorite way to enjoy your holiday leftovers.
Ingredients
- 2 pounds leftover turkey (or chicken), cut into 1-inch cubes
- 4 tablespoons unsalted butter
- 1 onion, diced
- 1 cup mushrooms, sliced
- 4 garlic cloves, minced
- 1 cup chopped carrots
- 1 cup chopped celery
- 2 cups Yukon Gold potatoes, diced
- 1 cup chicken broth
- 1/4 cup all-purpose flour
- ½ cup heavy cream
- 1 sheet puff pastry, thawed
- ½ teaspoon salt
- ½ teaspoon ground black pepper
- 1 teaspoon fresh thyme, chopped
- 1 egg, beaten (for egg wash, optional)
Instructions
- Sauté the veggies: Turn your Ninja Foodi to sauté mode on medium to medium-high heat. Add butter and let it melt completely. Add the diced onions, chopped carrots, sliced celery, fresh thyme, minced garlic, sliced mushrooms, salt, and pepper. Sauté for 5-7 minutes, stirring occasionally, until onions are translucent and garlic is fragrant.
- Add the turkey and potatoes: Stir in the cubed turkey (or chicken), diced Yukon Gold potatoes, and chicken broth. Sauté for another 5 minutes, ensuring everything is well combined and starting to warm through.
- Pressure cook: Secure the pressure lid on your Ninja Foodi and set the pressure release valve to “seal.” Select pressure cook mode and cook on high pressure for 10 minutes. Once cooked, carefully perform a quick pressure release, shielding yourself from the steam with a rag or towel.
- Thicken the filling: With the pressure released and lid removed, stir in the all-purpose flour and heavy cream. Whisk continuously until the mixture thickens to a rich, gravy-like consistency, typically within a few minutes. If the mixture is too thin, switch back to sauté mode (medium heat) and cook for another 5 minutes, or add 1 tablespoon of flour mixed with a little cold water if still too runny.
- Prepare and add the crust: Roll out the thawed puff pastry on a lightly floured surface to be slightly larger than the Ninja Foodi pot’s diameter. You can use the Ninja Foodi’s air fryer basket as a template, then slightly enlarge the cut pastry. Carefully drape the puff pastry over the pot pie filling. For a golden crust, brush with an optional egg wash (one beaten egg mixed with a tablespoon of water).
- Air fry to crisp: Close the air fryer lid (crisping lid) on your Ninja Foodi. Set to air fry mode and cook at 400°F (200°C) for 8-10 minutes, or until the puff pastry is puffed, golden brown, and crispy. Monitor closely during the final minutes.
- Scoop and dish: Using a wooden or silicone spoon to protect the non-stick surface, carefully scoop out the hot turkey pot pie and serve immediately into bowls. Enjoy every comforting bite!
Recipe Notes
- After adding the cream and flour, the filling should thicken quickly. If it remains too runny, turn your Ninja Foodi to sauté mode at medium heat and cook for an additional 5 minutes, stirring. If still too thin, you can add more flour, 1 tablespoon at a time, mixing thoroughly after each addition.
- When releasing pressure from the Ninja Foodi, always open the lid away from you. This prevents any residual steam or hot water droplets from causing injury.
- Always use wooden or silicone utensils inside your Ninja Foodi to protect the delicate non-stick coating from damage.
Nutrition Information:
Yield: 8
Serving Size: 1
Amount Per Serving:
Calories: 414Total Fat: 21gSaturated Fat: 10gTrans Fat: 0gUnsaturated Fat: 10gCholesterol: 156mgSodium: 412mgCarbohydrates: 19gFiber: 3gSugar: 3gProtein: 36g
Nutrition information is a guideline only, is calculated automatically by third party software, and absolute accuracy is not guaranteed.
Did you make this recipe?
Please leave a comment on the blog or share a photo on Instagram!