
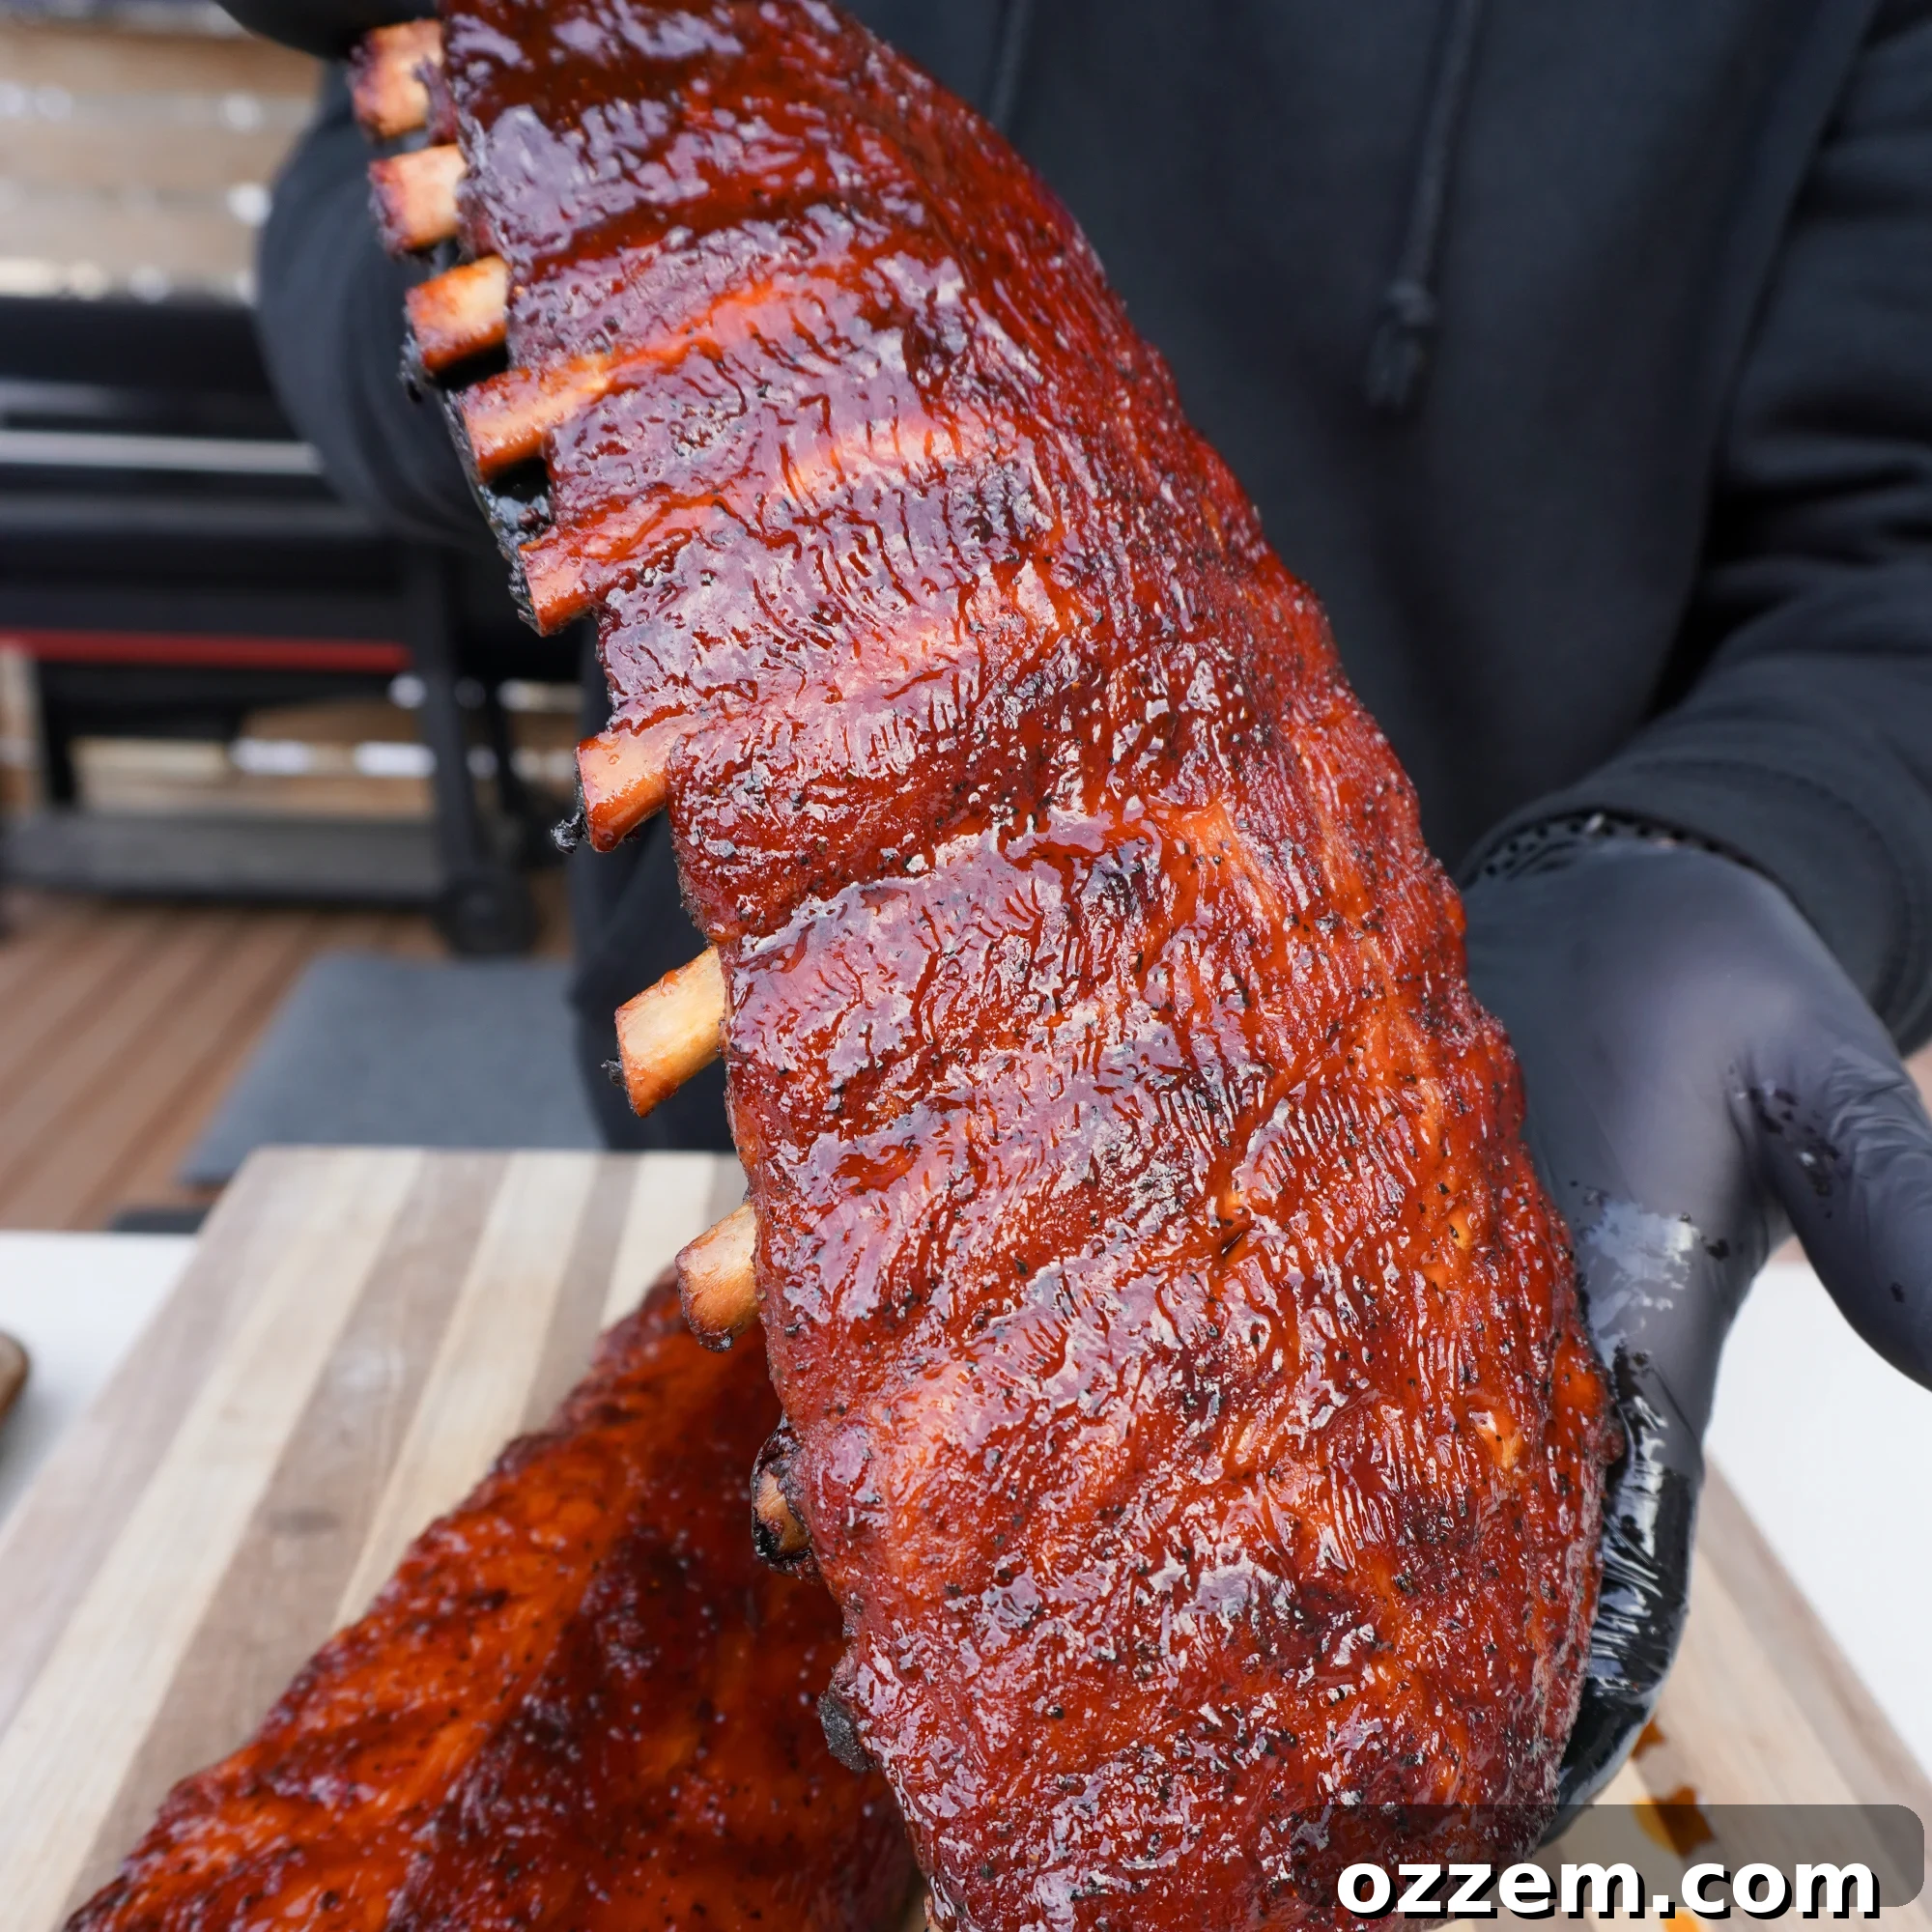
The Ultimate Guide to Classic Smoked Baby Back Ribs: Tender, Juicy & Flavorful BBQ Perfection
There’s nothing quite like biting into a perfectly cooked, tender, meaty, and flavorful rib, glistening with a rich BBQ sauce. For many, including myself, mastering Classic BBQ Baby Back Ribs is the quintessential backyard grilling achievement. It’s the dish that ignites a passion for low-and-slow cooking, turning a simple meal into an unforgettable culinary experience.
Over the years, I’ve experimented with countless preparations and cooking methods for ribs, from elaborate techniques to quick weeknight approaches. Yet, a streamlined 3-phase process has consistently proven to be my favorite, delivering exceptional results every time. With just a few key ingredients and a focus on essential techniques, you can create the best BBQ ribs you’ve ever tasted – so delicious, they’re truly finger-licking good!
If you’re eager to explore more mouth-watering rib recipes, be sure to check out my Smoked Maple Bourbon Ribs, Classic Kansas City Style Ribs, or a zesty Rack of Horseradish Mustard BBQ Ribs.
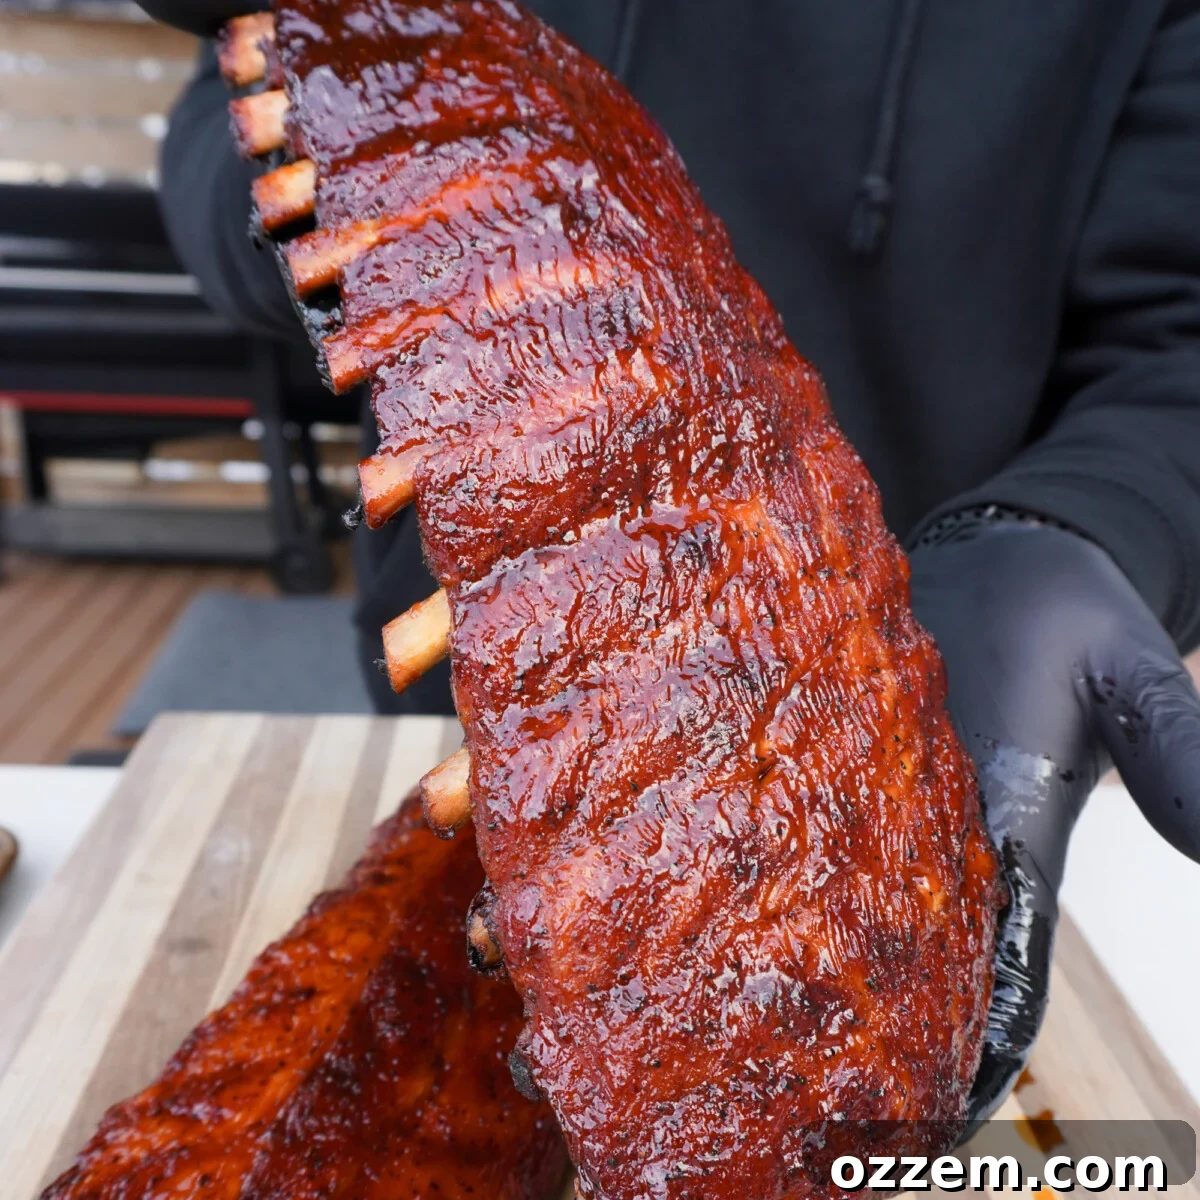
Table of Contents
- Baby Back vs. Spare Ribs: Understanding the Difference
- The 3-2-1 Method for Ribs (and My Preferred Approach)
- Essential Ingredients for Tender BBQ Baby Back Ribs
- Step 1: Preparing Your Baby Back Ribs for Perfection
- How to Easily Remove the Rib Membrane
- Selecting the Best Seasonings and Binder for Flavor
- Recipe Tip: Presentation Matters
- Step 2: Smoking Classic BBQ Baby Back Ribs to Perfection
- Phase 1: Initial Smoke on the Grates
- Recipe Tip: Maintaining Moisture
- Phase 2: The Foil Wrap for Ultimate Tenderness
- Recipe Tip: Competition-Style Wrap Variations
- Phase 3: Saucing and Setting the Glaze
- Frequently Asked Questions About BBQ Ribs
- Explore More Smoked Rib Recipes
- Classic BBQ Baby Back Ribs Recipe Card
Baby Back vs. Spare Ribs: Understanding the Difference
When it comes to pork ribs, two main cuts dominate the barbecue scene: spare ribs and baby back ribs. While both are delicious, understanding their differences is crucial for choosing the right cut for your desired outcome.
Spare ribs are cut from the belly section of the pig, closer to the stomach. This location makes them inherently fattier and, consequently, more flavorful. They are typically larger and flatter, featuring more bone and cartilage. While their richness is undeniable, the increased connective tissue can make spare ribs more challenging and time-consuming to cook to optimal tenderness, often requiring longer smoking times to break down those tougher parts.
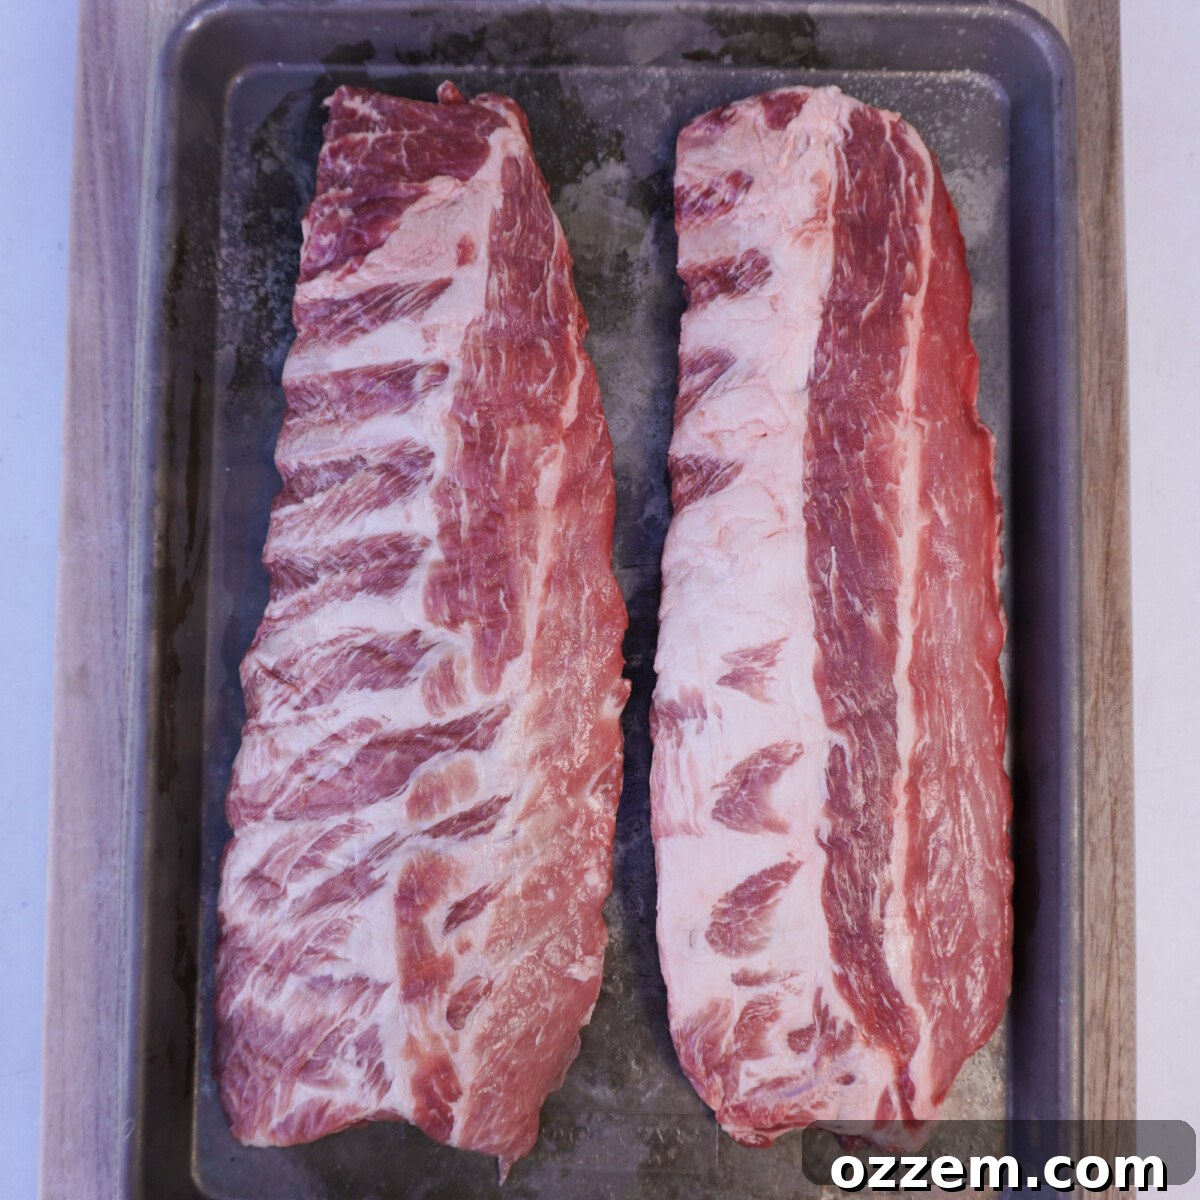
In contrast, Baby Back Ribs are trimmed from the upper portion of the rib cage, nestled against the spine. They get their “baby” moniker not because they come from piglets, but because they are shorter and smaller than spare ribs. This cut is generally leaner and significantly meatier, offering a more uniform and tender texture when cooked properly. Their ease of preparation and consistent results make them a popular choice for both novice and experienced grill masters alike.
The 3-2-1 Method for Ribs (and My Preferred Approach)
The 3-2-1 method is a widely recognized and fundamental technique for smoking ribs, particularly spare ribs, and is an excellent starting point for achieving incredibly tender, fall-off-the-bone results. It’s a structured three-step process:
- 3 hours: Initial smoking directly on the grates, allowing the ribs to absorb a deep smoky flavor and form a bark.
- 2 hours: Wrapping the ribs tightly in foil with a liquid (like apple juice or broth) and often some butter or sugar, which essentially steams and braises the ribs, making them incredibly tender.
- 1 hour: Unwrapping the ribs, brushing them with BBQ sauce, and returning them to the smoker to allow the sauce to caramelize and set.
While the 3-2-1 method is fantastic for producing extremely tender ribs, often resulting in meat that literally falls off the bone, it does require a significant time commitment of about 6 hours. Personally, I prefer my ribs to have a bit more texture – tender enough to easily pull from the bone, but still with a satisfying bite and chew. I don’t want the entire rack to disintegrate when I pick it up!
The method I use for my classic BBQ baby back ribs is an adaptation of the 3-2-1 method, focusing on efficiency without compromising flavor or tenderness. It delivers delicious, perfectly cooked ribs in roughly half the time. Trust me, you’ll be amazed at the results!
Essential Ingredients for Tender BBQ Baby Back Ribs
Crafting exceptional baby back ribs doesn’t require a complicated list of ingredients. Focusing on quality and balanced flavors is key. Here’s what you’ll need for this classic recipe:
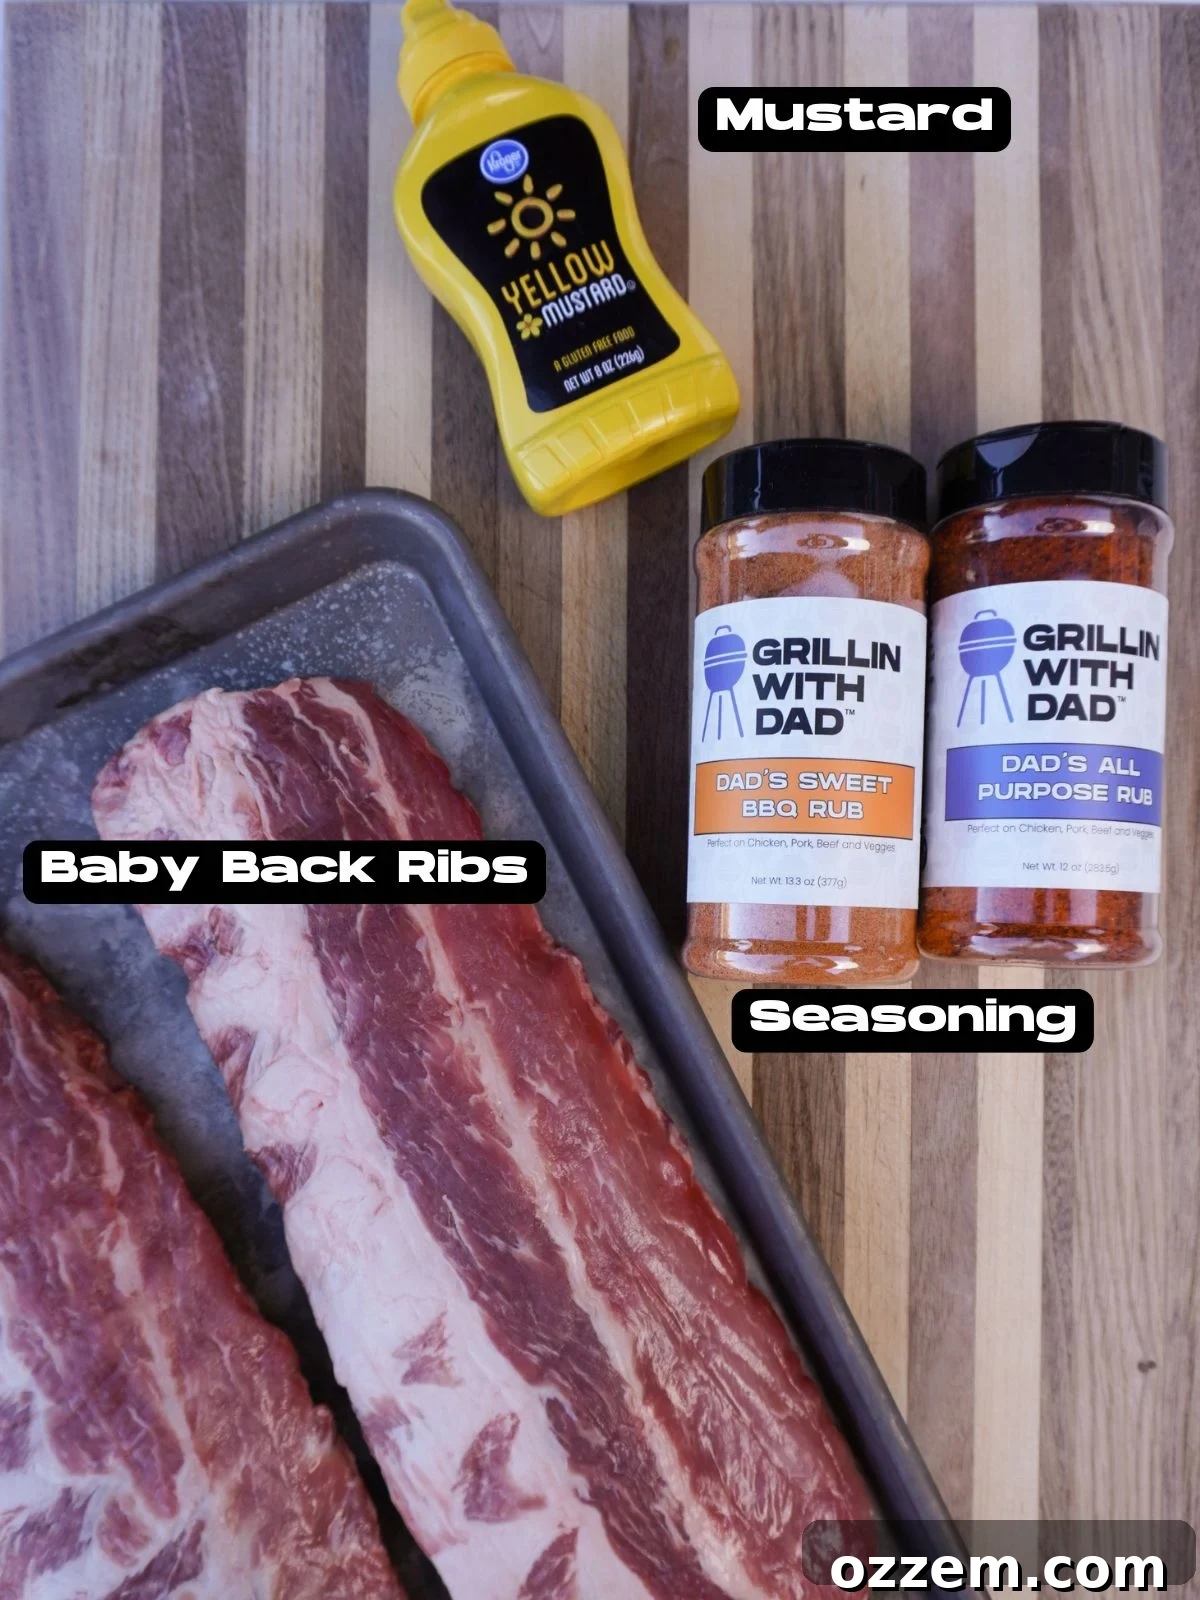
- Baby Back Ribs: This recipe specifically calls for baby back ribs, known for their lean meatiness and quicker cooking time. Look for racks that are well-marbled but not excessively fatty.
- Mustard (Binder): A thin layer of classic yellow mustard acts as the perfect binder, helping your dry rub adhere evenly to the ribs. Don’t worry, the mustard flavor cooks off, leaving behind only its binding power!
- Seasoning: We’ll use a balanced blend of an all-purpose savory rub and a sweet BBQ rub. This combination creates a complex flavor profile that is both rich and subtly sweet, enhancing the natural taste of the pork.
- BBQ Sauce: The grand finale! Whether you prefer to craft your own homemade BBQ sauce or use a high-quality store-bought option, ensure it complements the savory and sweet notes of your rub.
- Unsalted Butter: Essential for the wrapping phase, butter adds richness and moisture, contributing to that incredible tenderness.
- Apple Cider Vinegar (Optional Spritz): Used to keep the ribs moist during the initial smoking phase, preventing them from drying out and promoting an even smoke absorption.
Step 1: Preparing Your Baby Back Ribs for Perfection
Proper preparation is the foundation of amazing ribs. Starting with a clean, well-prepped canvas ensures your seasonings stick and the cooking process yields uniform results. Begin by removing the ribs from their packaging and thoroughly patting them dry with paper towels. This makes them much easier to handle and ensures your binder and seasoning adhere effectively.
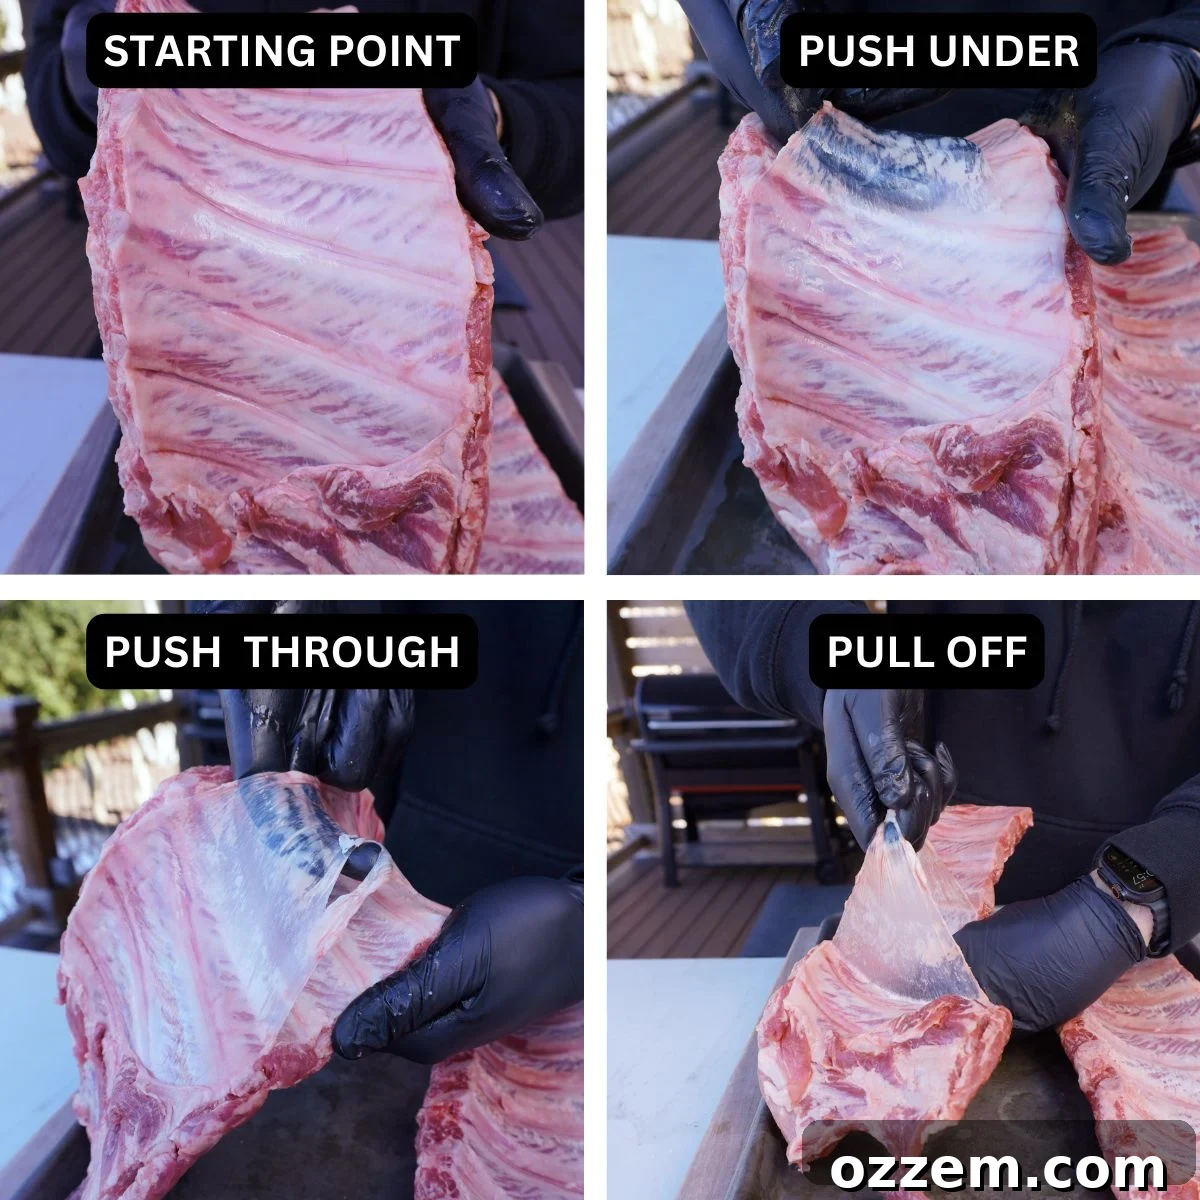
How to Easily Remove the Rib Membrane
The decision to remove or keep the membrane (also known as the silver skin) on ribs is a hot topic in the BBQ community. While some pitmasters swear by keeping it on for a chewier texture or to hold the rib together, I generally advocate for removing it when smoking, especially on a pellet grill.
The membrane is a thin, tough layer of connective tissue on the bone side of the ribs. If left on during a low-and-slow smoke (as in a pellet grill), it can become leathery and chewy, preventing the rub from fully penetrating the meat. If you’re grilling ribs over high, direct charcoal heat, scoring the membrane and leaving it on can sometimes lead to a crispy, enjoyable texture. However, for maximum tenderness and flavor penetration, removing it is usually the best approach.
Removing the membrane is surprisingly simple:
- Locate the membrane on the bone side of the rack.
- Using a butter knife or a sturdy spoon handle, gently work one or two fingers under the membrane, starting from one end of the rack, just above a bone.
- Carefully push your finger through until you can lift a small section of the membrane.
- Grab the loose membrane with a paper towel (for better grip) from both sides and pull it off in one swift, steady motion. If it tears, simply repeat the process from where it broke.
Once the membrane is gone, take a moment to trim off any excessively fatty or loose ends from the rack. This not only gives your ribs a cleaner, more appealing presentation but also helps prevent flare-ups during cooking and ensures more even rendering of fat.
Selecting the Best Seasonings and Binder for Flavor
Before applying your dry rub, a binding agent is essential. Since the ribs will be spending a considerable amount of time on the grill or smoker, a binder helps the seasoning adhere to the meat, creating a delicious bark and preventing the rub from falling off during cooking.
My go-to binder is traditional yellow mustard. Its tangy acidity works wonders without imparting any noticeable mustard flavor once the ribs are fully cooked. The mustard simply creates a sticky surface for the rub. Other popular binders include olive oil, hot sauce, or even plain water.
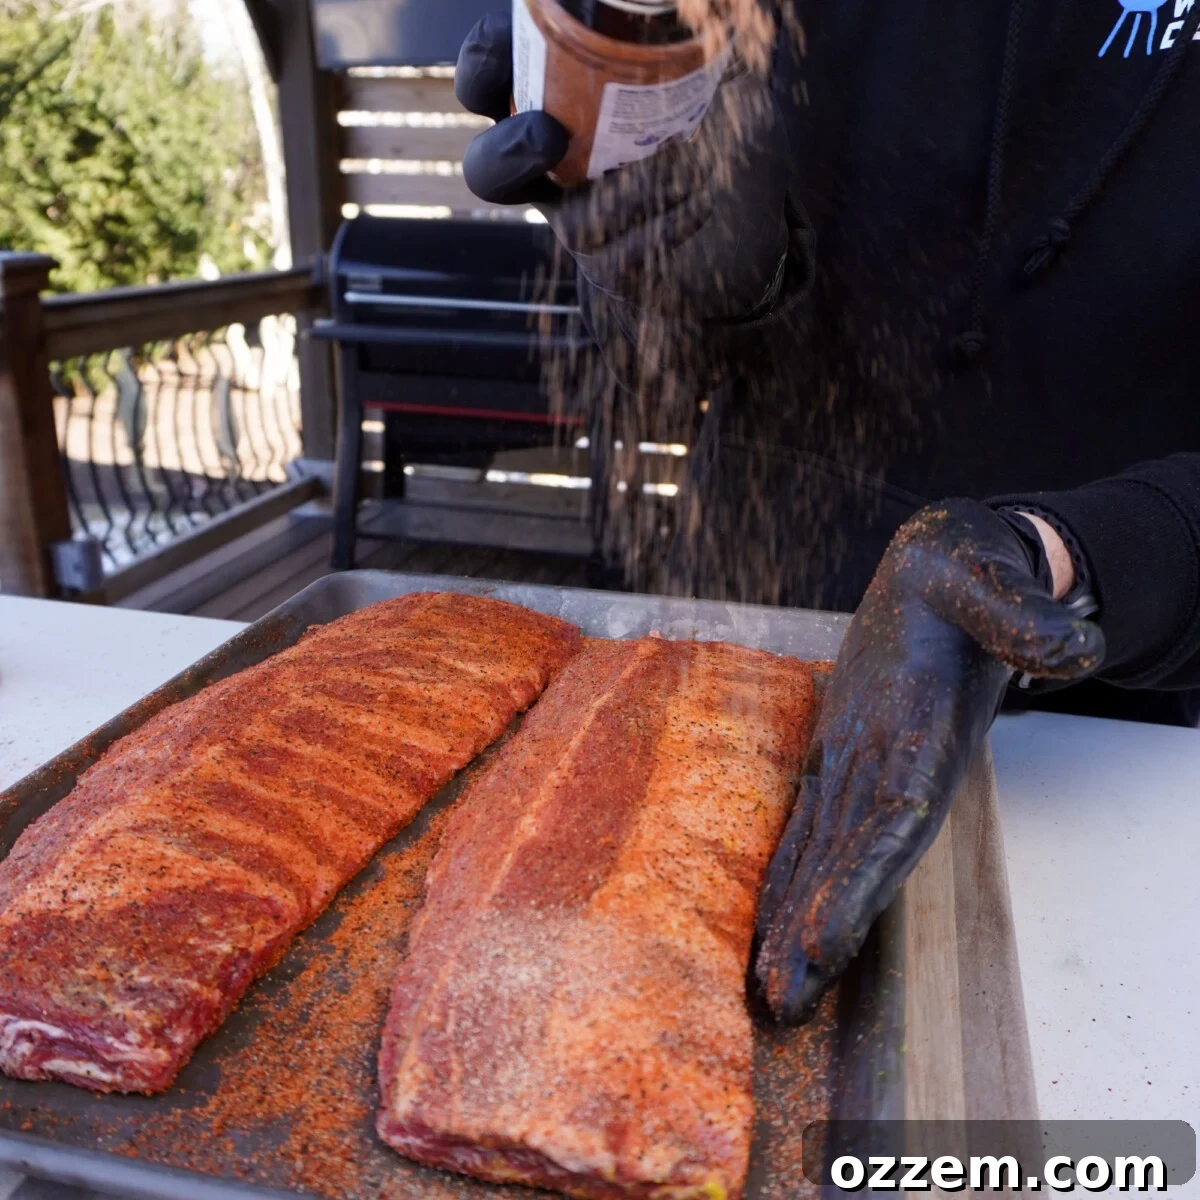
For seasoning, I prefer a balanced blend of savory and sweet flavors that complement the pork. I start by generously coating all sides of the ribs with a savory, all-purpose rub, which typically contains a robust blend of salt, black pepper, paprika, and garlic powder. This forms the foundational layer of flavor. Following that, I apply a sweet BBQ rub, often infused with brown sugar and honey, to add a delightful caramelization and a touch of sweetness that perfectly balances the savory notes.
Don’t be shy with your seasoning application! While some rub may fall or burn off during the smoking process, a generous coating ensures maximum flavor penetration and a beautiful crust. Remember to *pat* the seasoning onto the ribs rather than rubbing it. Rubbing can cause the seasoning to clump, smear, and create an uneven coating. Patting helps it adhere uniformly to the mustard binder.
Recipe Tip: Presentation Matters
Always season the bone side of the ribs first. Once complete, flip the rack and apply seasoning to the meatier “presentation” side. This ensures that the side facing up when serving has the most appealing, even coating of rub, making your ribs look as incredible as they taste. Remember, we eat with our eyes first!
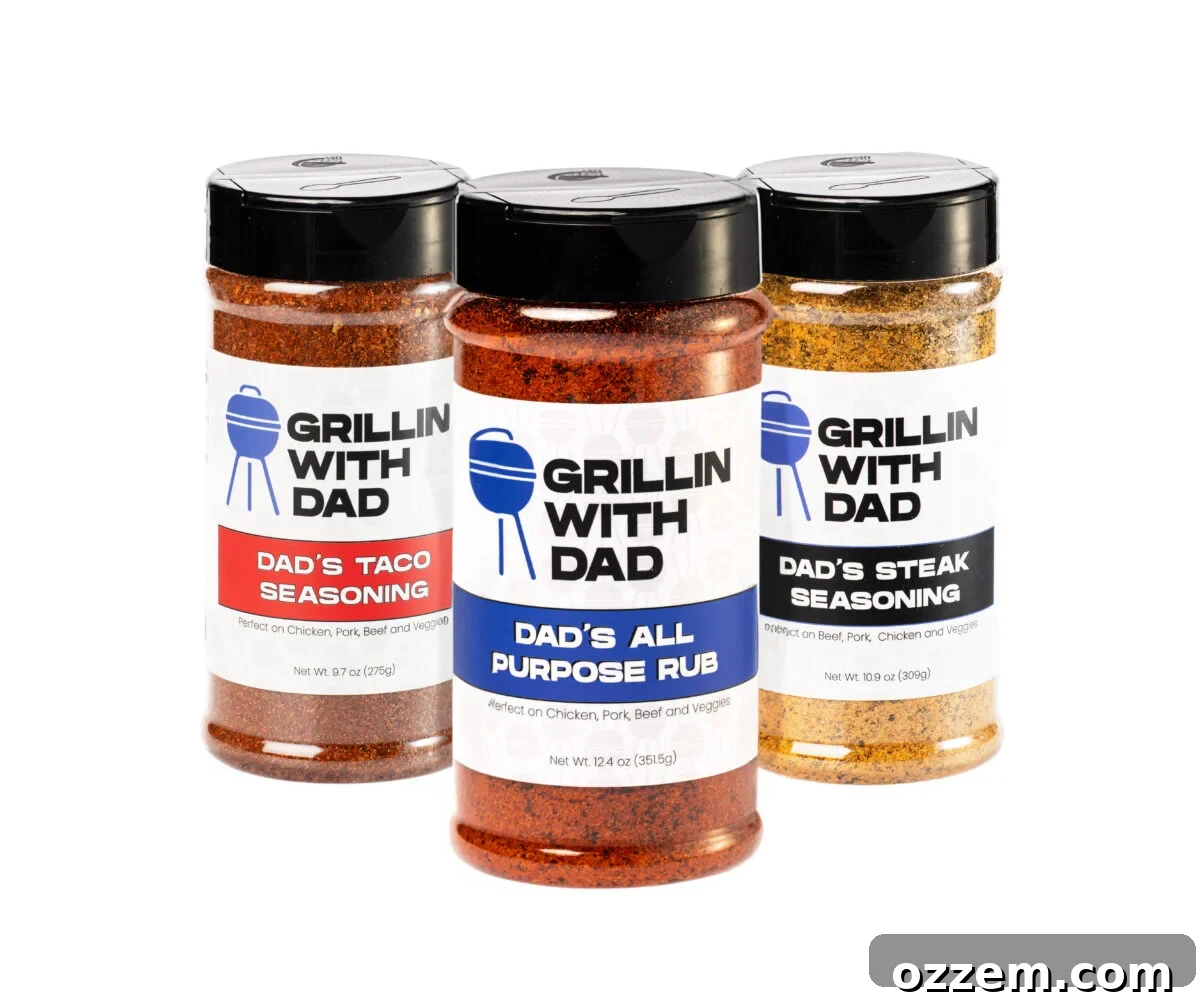
Dad’s Signature Seasonings
Elevate your grilling game with these must-have rubs!
Step 2: Smoking Classic BBQ Baby Back Ribs to Perfection
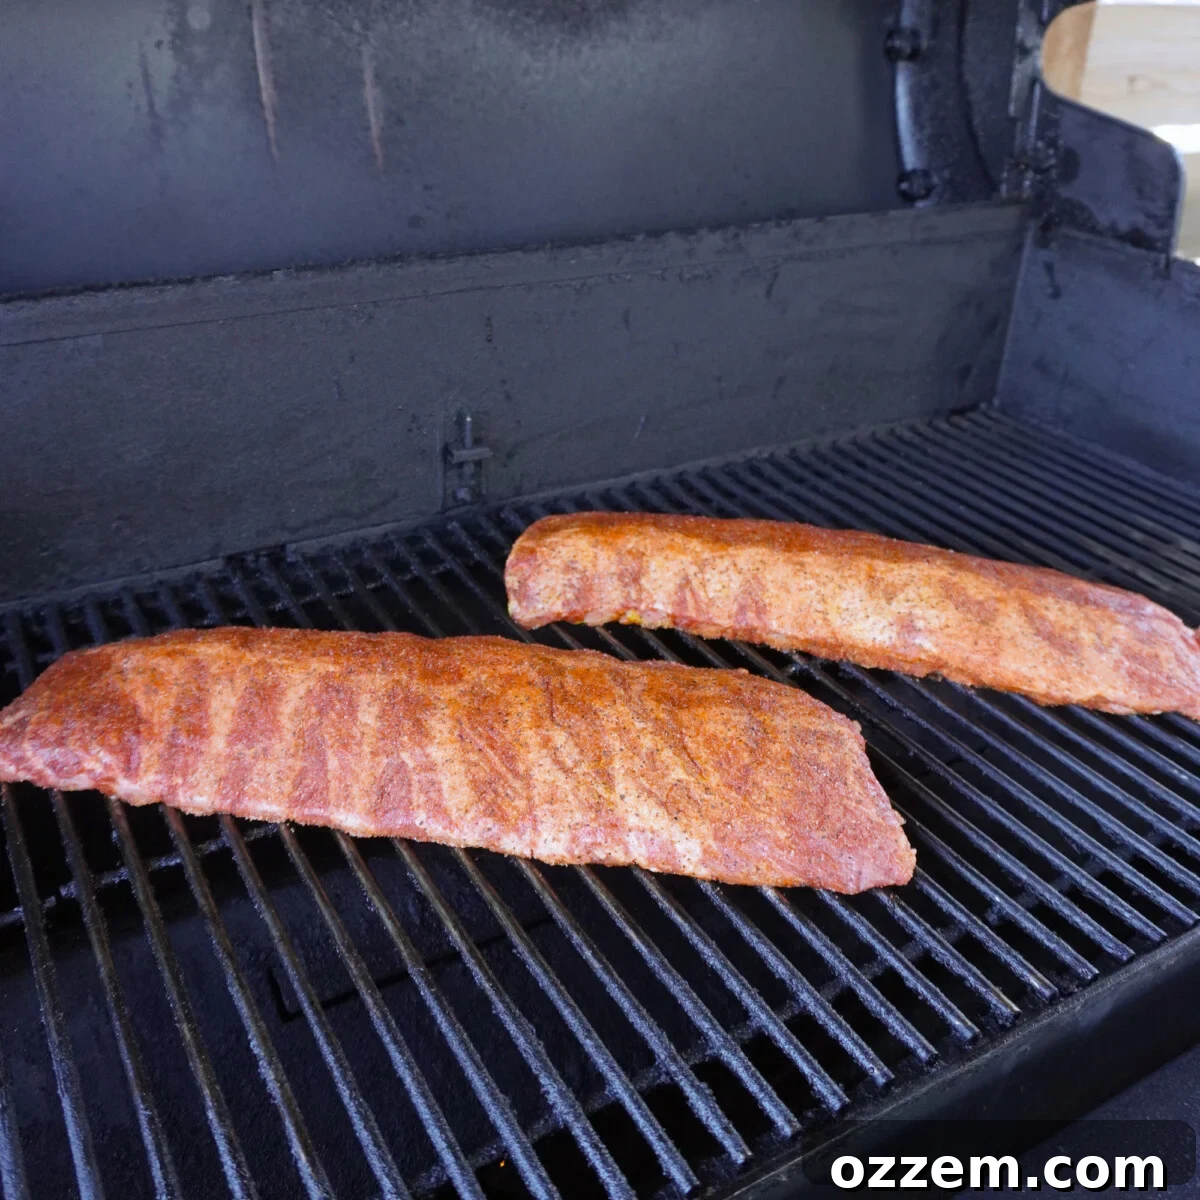
With your ribs perfectly prepped and seasoned, it’s time to introduce them to the magic of smoke. The key to tender ribs is a consistent, low, and indirect heat. Begin by preheating your smoker to 275 degrees Fahrenheit. I utilized my Weber Searwood Pellet Grill for this cook, which offers excellent temperature control and consistent smoke. If you’re using a different type of smoker (like an offset, kettle with a deflector, or even an oven), the cooking times and target temperatures will remain similar.
Phase 1: Initial Smoke on the Grates
The first phase is all about infusing that incredible smoky flavor and developing a beautiful bark. Place the seasoned baby back ribs directly on the preheated grates, meat side up. Close the lid and let them smoke undisturbed for approximately 2 hours. During this period, the low temperature and steady smoke will begin to tenderize the meat and build that desirable reddish-brown crust. Aim for an internal temperature of around 175 degrees Fahrenheit at the thickest part of the ribs by the end of this phase. You should also start to see the bones peeking out from the meat, indicating the cooking process is well underway.
Recipe Tip: Maintaining Moisture
After the first hour of smoking, it’s a good idea to check on your ribs. If they appear to be drying out on the surface, give them a light spritz with apple cider vinegar. This optional step helps to keep the exterior moist, encourages more smoke absorption, and prevents the bark from becoming too tough. The need for spritzing can vary depending on your specific smoker, the humidity, and the fat content of your ribs.
Phase 2: The Foil Wrap for Ultimate Tenderness
The wrapping phase is where the magic happens, transforming your ribs from firm to incredibly tender. Carefully remove the ribs from the grill and lay them meat side down on a large sheet of heavy-duty aluminum foil. For an extra layer of richness and moisture, melt a stick of unsalted butter and gently pour it over the ribs, ensuring some collects around the sides within the foil.
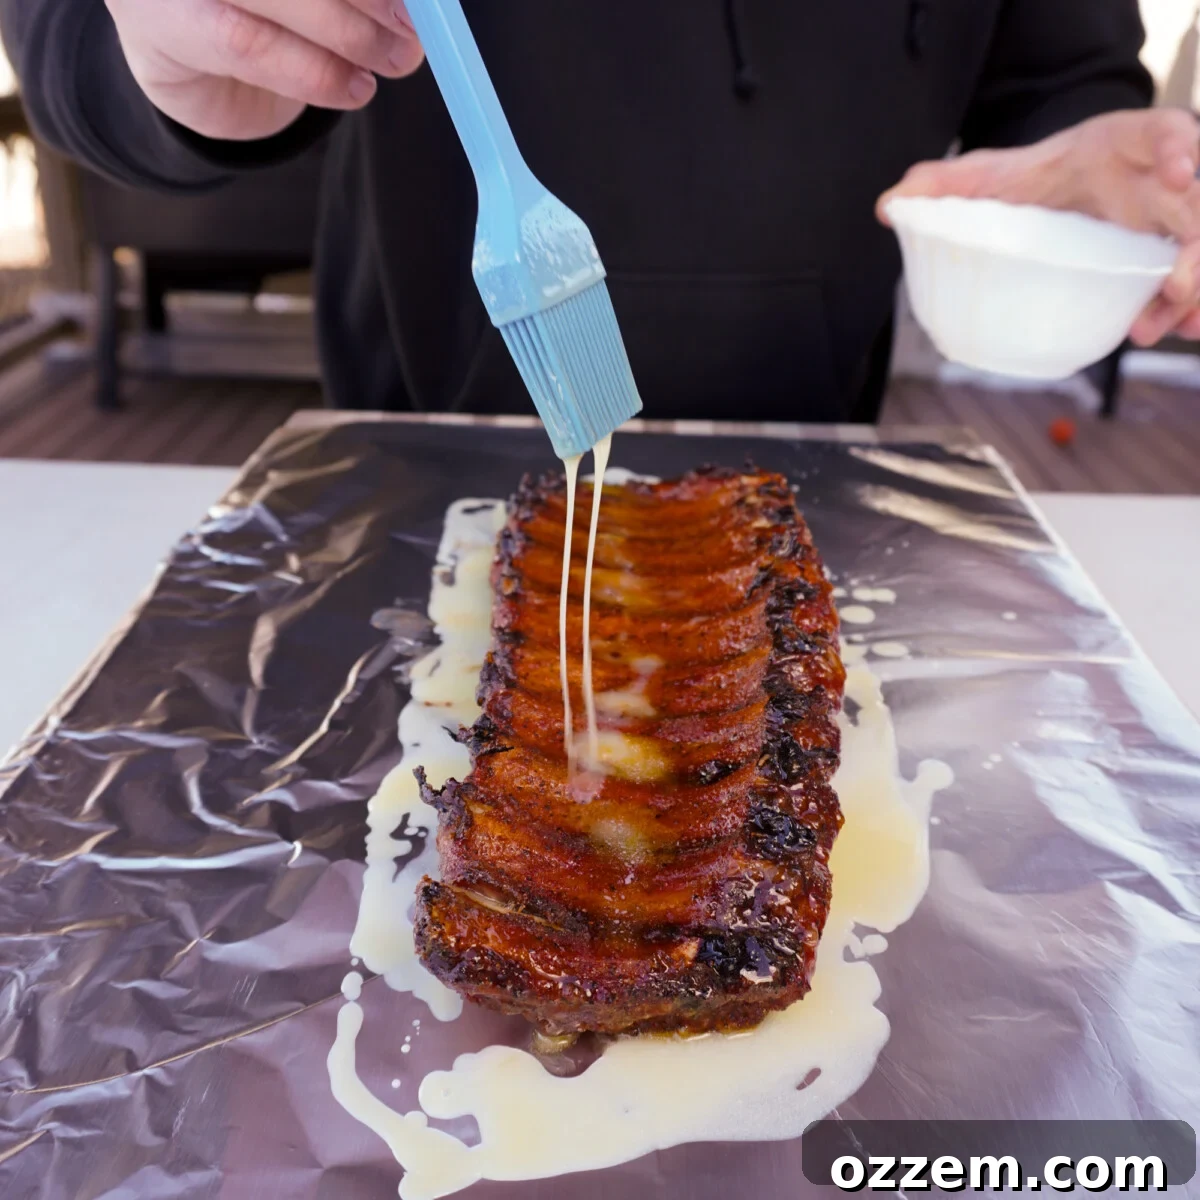
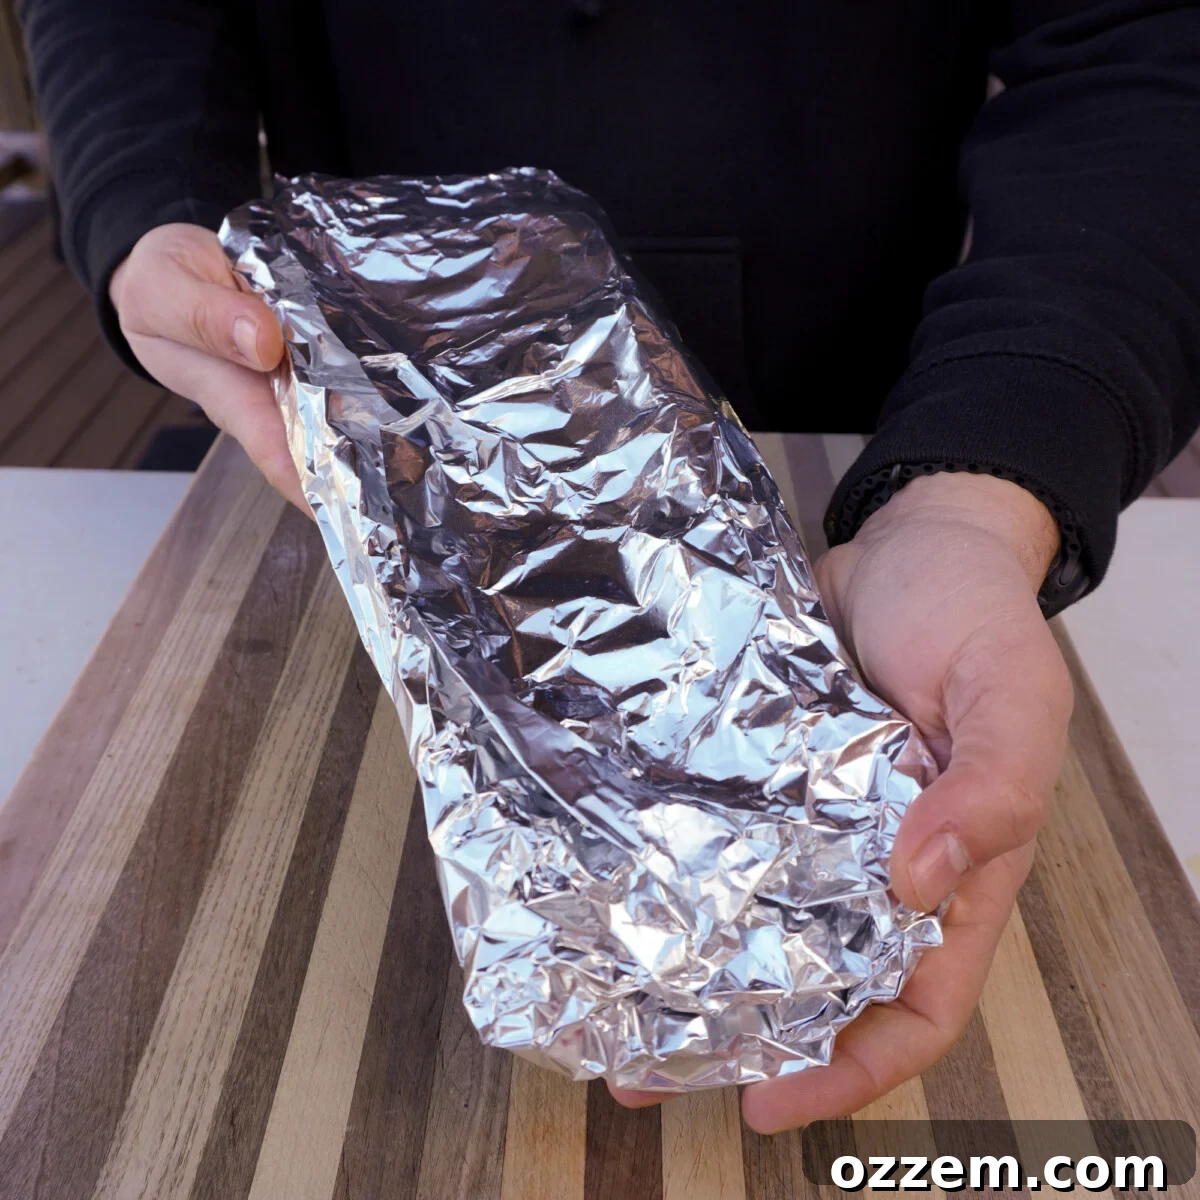
Now, carefully wrap the ribs tightly, creating an airtight pouch. It’s crucial to ensure the bones don’t tear through the foil, as this compromises the seal. This airtight environment allows the ribs to essentially braise in their own juices and the added butter, leading to unparalleled tenderness. Once wrapped, place the ribs back on the smoker, this time meat side down, and cook for an additional hour. At this stage, since they are fully encased in foil and won’t absorb any more smoke, you could even transfer them to an oven set at the same temperature if you need to free up your smoker.
Recipe Tip: Competition-Style Wrap Variations
For an even richer, sweeter profile often seen in competition barbecue, consider adding a sprinkle of brown sugar and a drizzle of honey to the melted butter before sealing the foil wrap. You can also experiment with other liquids like apple juice, beer, or even a splash of bourbon to introduce different flavor notes during this critical tenderizing phase.
Phase 3: Saucing and Setting the Glaze
The final phase brings it all together with a luscious BBQ sauce glaze. Once your ribs reach an internal temperature of approximately 190 degrees Fahrenheit, carefully remove them from the smoker. Gently open the foil wrap, flip the ribs meat side up, and then roll up the edges of the foil to create a makeshift “boat.” This clever trick keeps all the flavorful liquids contained, preventing a messy smoker cleanup.
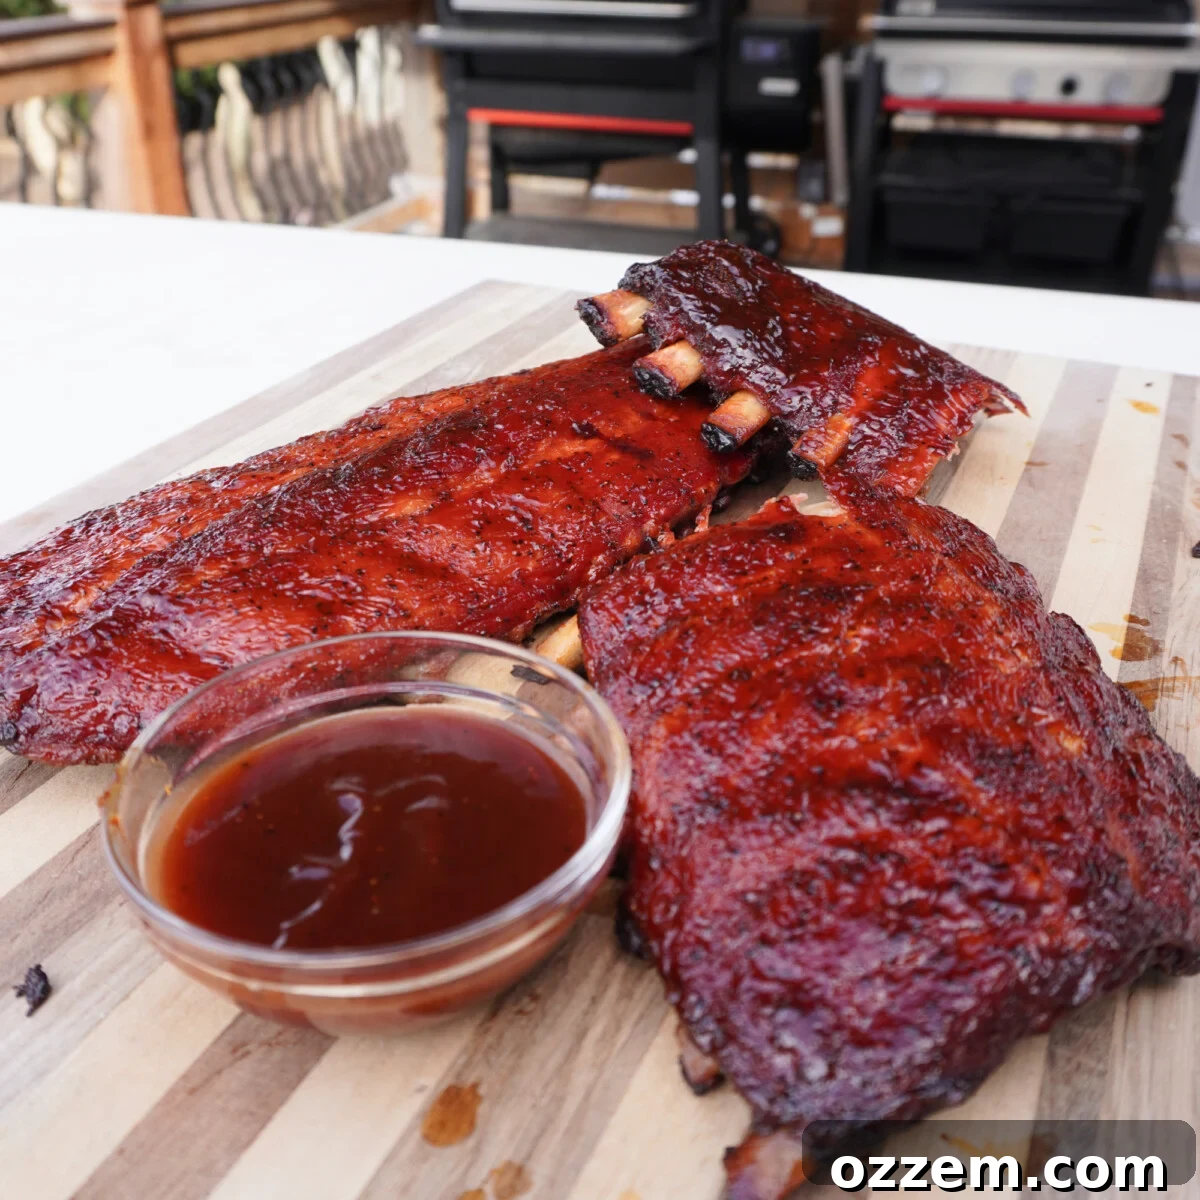
Generously brush your tender classic BBQ baby back ribs with your favorite BBQ sauce. You can use a high-quality store-bought option or get creative with a homemade recipe. After saucing, close the smoker lid and continue cooking for another 15-20 minutes. This allows the BBQ sauce to warm through, thicken slightly, and form a beautiful, sticky glaze that adheres perfectly to the ribs. The ribs should now have an internal temperature between 195-203°F, indicating they are optimally tender but still holding together.
If you’re looking for inspiration for a homemade BBQ sauce, I have several fantastic recipes to elevate your ribs: from a unique Dr. Pepper Rib Sauce, a sophisticated Savory Bourbon Sauce, to a timeless Classic Sweet and Tangy BBQ Sauce. You can’t go wrong with any of these flavor-packed options.
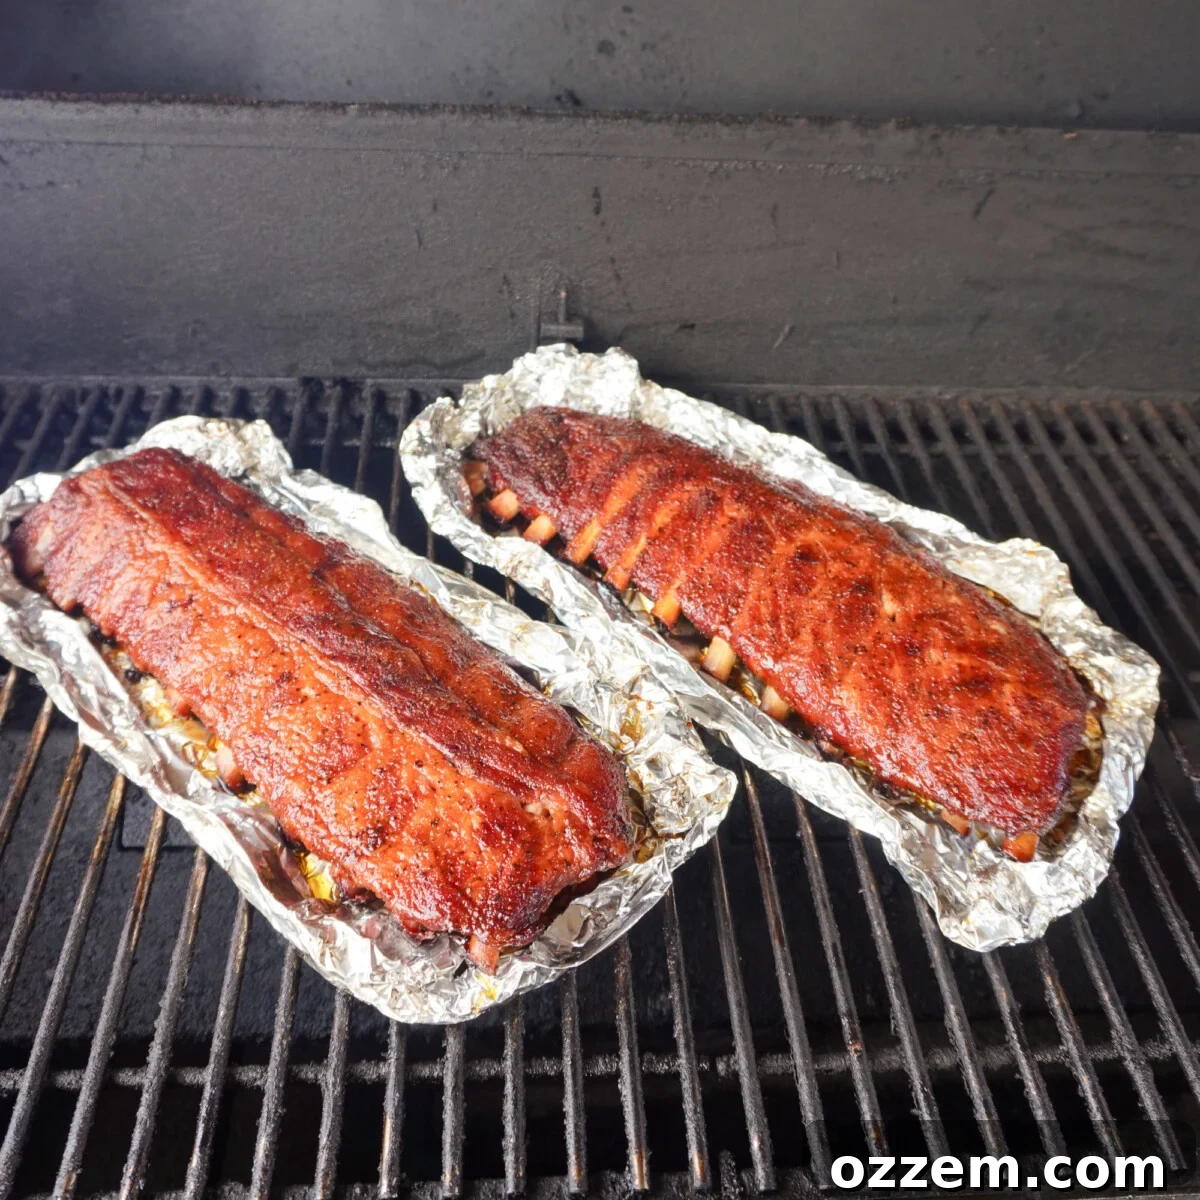
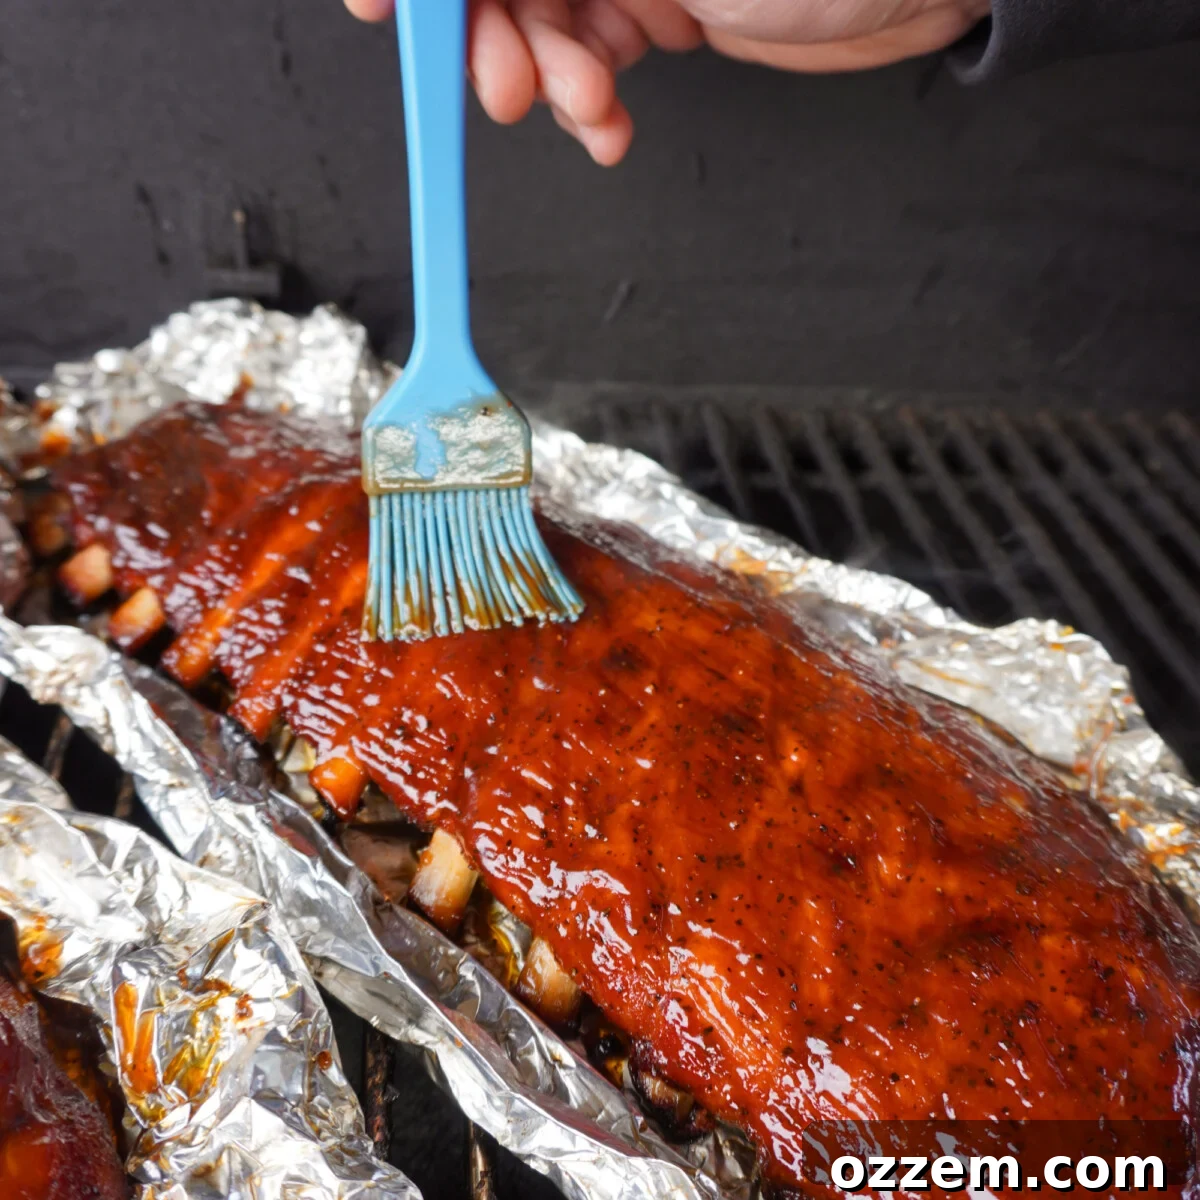
Once the sauce has set and the ribs have reached their perfect tenderness, remove them from the grill. Just like any other protein, allowing cooked meat to rest is crucial. Transfer the ribs to a cutting board and let them rest for 10-15 minutes before slicing. This resting period allows the juices to redistribute throughout the meat, ensuring a more succulent and flavorful final product.
Finally, slice the ribs between each bone, arrange them on a platter, and serve immediately. Don’t forget to offer extra BBQ sauce on the side and a generous stack of napkins – because these ribs are meant to be messy and enjoyed!
Products Featured in the Video
Click the image below to view the products mentioned in the recipe demonstration ⬇️
Frequently Asked Questions About BBQ Ribs
The ultimate secret lies in a combination of low-and-slow cooking and the strategic use of the “wrap” phase. Start by smoking your ribs directly on the grates for about 2 hours to build flavor and bark. Then, wrap them tightly in foil with a little liquid and butter, allowing them to braise and become incredibly tender. This two-step approach ensures both deep smoky flavor and fall-off-the-bone texture.
Absolutely! You can adapt this recipe for your oven. Follow the same preparation steps, including membrane removal and seasoning. For cooking, simply follow the prescribed times and temperatures, placing the ribs on a rack over a baking sheet (for the unwrapped phase) and then wrapping them in foil as directed. While oven-cooked ribs won’t have the smoky flavor of a smoker, they will still be exceptionally tender and delicious, especially with a great BBQ sauce.
For classic pork ribs, popular wood choices include hickory, apple, and cherry. Hickory provides a strong, traditional smoke flavor that pairs wonderfully with pork. Apple and cherry woods offer a milder, slightly sweet, and fruity smoke, which is excellent if you prefer a less intense smoky flavor or are new to smoking. A blend of these can also create a complex and delicious profile.
While internal temperature is a good guide (aim for 195-203°F at the end of cooking), the best indicator for ribs is tenderness. You can perform the “bend test”: pick up a rack of ribs with tongs in the middle. If they bend easily and the meat starts to crack, they are likely done. The meat should pull away from the bone with a gentle tug, but not fall completely off when lifted.
Explore More Smoked Rib Recipes
Beef
Smoked Short Ribs
Beef
Smoked Beef Ribs
Pork
Ribs in Dr. Pepper BBQ Sauce
Beef
Grilled Venison Rack in Blueberry Sauce
If you tried these Classic BBQ Baby Back Ribs or any other recipe on my blog, please leave a 🌟 star rating and let me know how it went in the📝 comments. I love hearing from you!
Print Recipe
Classic BBQ Baby Back Ribs
Ingredients
Rib Ingredients
- 2 Slabs of Baby Back ribs
- 1/4 cup All Purpose seasoning
- 1/4 cup Sweet BBQ seasoning.
- 4 tbsp Mustard
- 1 stick Unsalted butter
Homemade BBQ Sauce Ingredients (Optional)
- 1.5 cups Ketchup
- 1.5 cups Brown sugar
- 1/2 cup Honey
- 1/4 cup Apple cider vinegar
- 1/4 cup Molasses
- 1/4 cup Worcestershire sauce
- 2 tbsp Yellow mustard
- 1 tbsp Hot sauce
- 1 tbsp All purpose seasoning
Instructions
-
Remove the ribs from the packaging and pat them dry thoroughly.
-
Remove the membrane from the bone side by sliding a finger or butter knife under it, gripping with a paper towel, and pulling it off in one motion. Trim any excess fat or loose ends.
-
Coat the ribs generously on all sides with mustard as a binder. Then, season evenly with the all-purpose rub, followed by the sweet BBQ rub. Gently pat the seasoning into the meat to help it adhere.
-
Preheat your smoker or grill to 275°F for indirect heat. Place the seasoned ribs directly on the grates, bone side down. Close the lid and smoke for 2 hours, or until the internal temperature reaches 175°F in the thickest part. If ribs look dry, spritz with apple cider vinegar after 1 hour.
-
Remove the ribs from the smoker and place each rack on a large sheet of heavy-duty aluminum foil, bone side up. Pour the melted butter over the ribs and tightly wrap them in the foil, creating an airtight pouch.
-
Return the wrapped ribs to the smoker (or oven), meat side down, and cook for an additional 1 hour. During this phase, the internal temperature should rise to 190-195°F.
-
While the ribs are cooking in their wrap, prepare your homemade BBQ sauce (if using). In a small saucepan, combine all homemade BBQ sauce ingredients. Bring to a simmer over medium heat and cook for 10-15 minutes, stirring occasionally, until it thickens slightly.
-
Once the ribs reach temperature, carefully open the foil wrap, flip the ribs meat side up, and roll up the edges of the foil to form a boat. Generously brush the ribs with your chosen BBQ sauce, close the smoker lid, and continue cooking for 15-20 minutes to allow the sauce to set and create a beautiful glaze.
-
Remove the finished ribs from the smoker. Transfer them to a clean cutting board and let them rest for 10-15 minutes. Slice between each bone, serve, and savor your perfectly smoked baby back ribs!
Notes
- If you prefer not to use mustard as a binder, olive oil or even a thin layer of hot sauce can be used as alternatives.
- After seasoning, gently pat the rub into the meat rather than rubbing, to ensure even coverage without clumping.
- For a “competition style” wrap, consider adding a sprinkle of brown sugar and a drizzle of honey along with the butter inside the foil for extra sweetness and caramelization.
Nutrition
Calories: 626kcal
| Carbohydrates: 59g
| Protein: 30g
| Fat: 48g
| Saturated Fat: 24g
| Polyunsaturated Fat: 5g
| Monounsaturated Fat: 16g
| Trans Fat: 1g
| Cholesterol: 159mg
| Sodium: 289mg
| Potassium: 645mg
| Fiber: 4g
| Sugar: 2g
| Vitamin A: 1525IU
| Vitamin C: 5mg
| Calcium: 359mg
| Iron: 12mg
Like this recipe? Rate and comment below!
For more delicious grilling ideas and recipes, be sure to check out the full Recipes Page!