
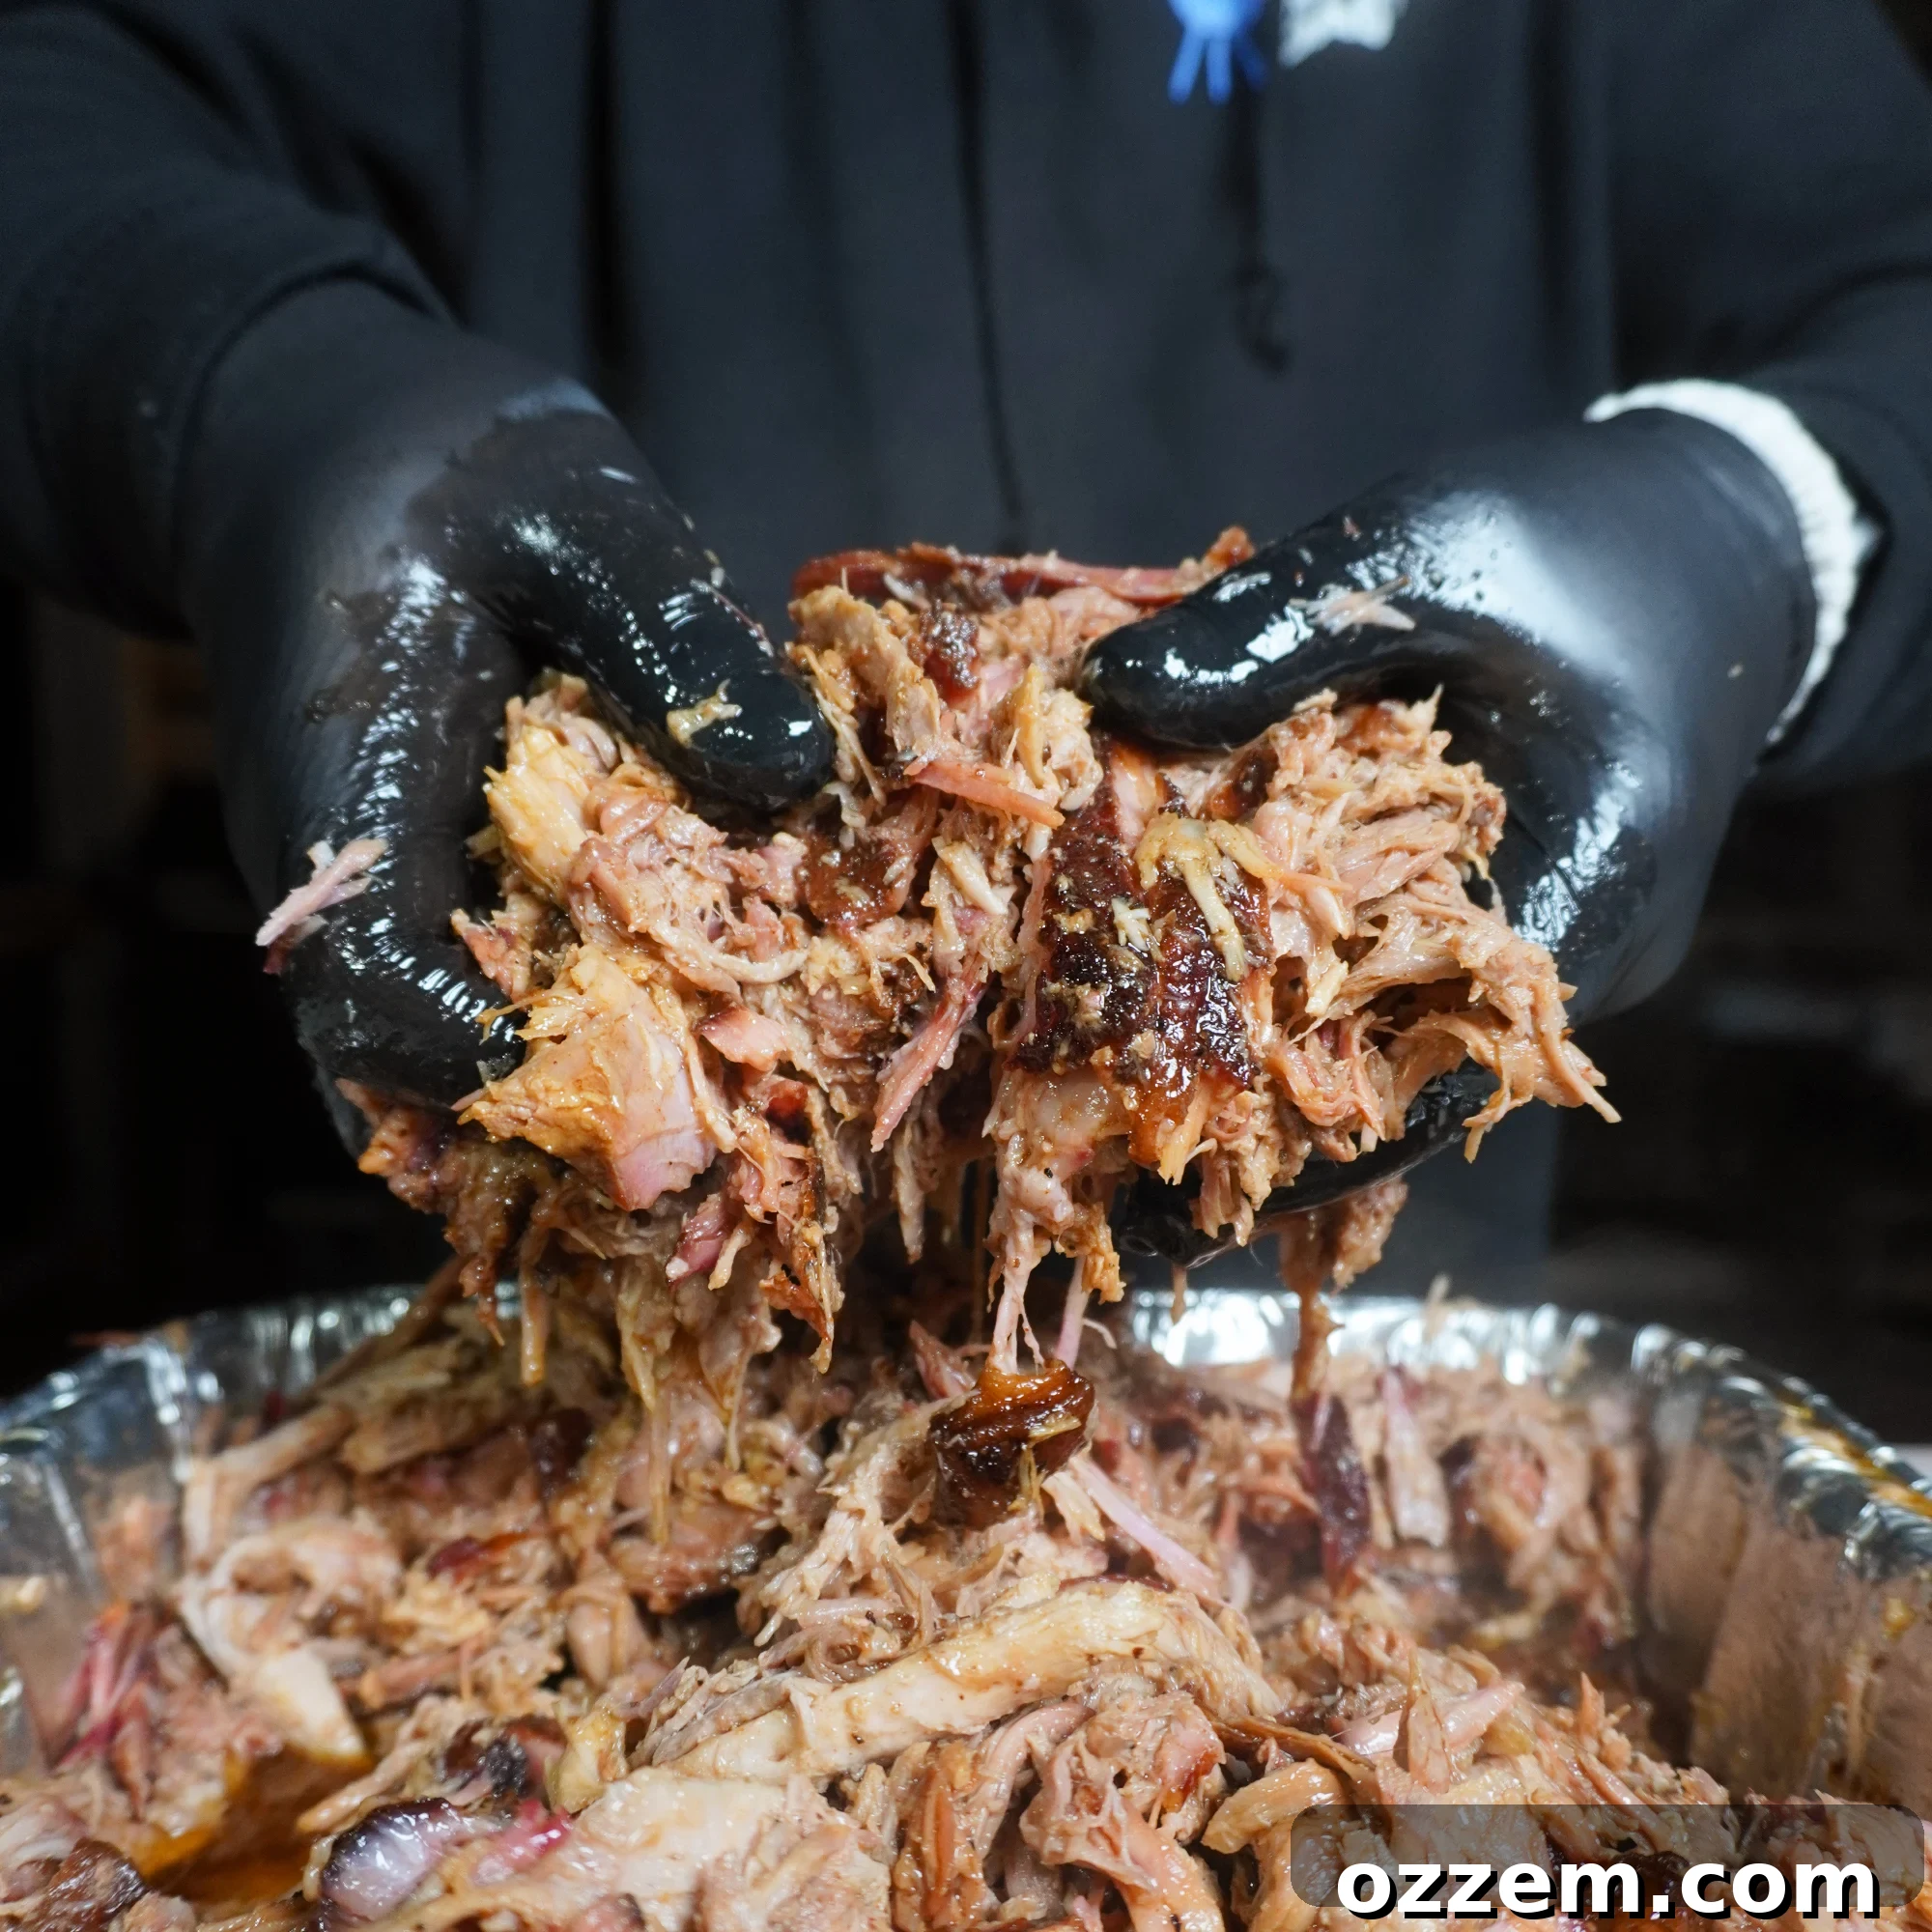
Embarking on a new BBQ journey, especially with a new smoker, calls for a foundational recipe – and nothing fits the bill quite like a perfectly cooked Classic Pulled Pork. This BBQ staple isn’t just a delicious meal; it’s a rite of passage, an excellent opportunity to truly test your new grill, master the nuanced art of fire management, and most importantly, perfect that melt-in-your-mouth tender meat that defines exceptional barbecue. Over the years, countless pork shoulders have graced my smoker grates, leading me to refine a simple yet highly effective 2-step method that consistently delivers incredibly tender, juicy, and flavorful classic pulled pork every single time.
Whether you’re new to smoking or a seasoned pitmaster looking to perfect your technique, this guide will walk you through every critical step, ensuring your pulled pork is a resounding success. If you’re eager to expand your BBQ repertoire with more how-to recipes, be sure to explore my simple and easy-to-follow guide for baby back ribs or learn how to grill the perfect chicken wings.
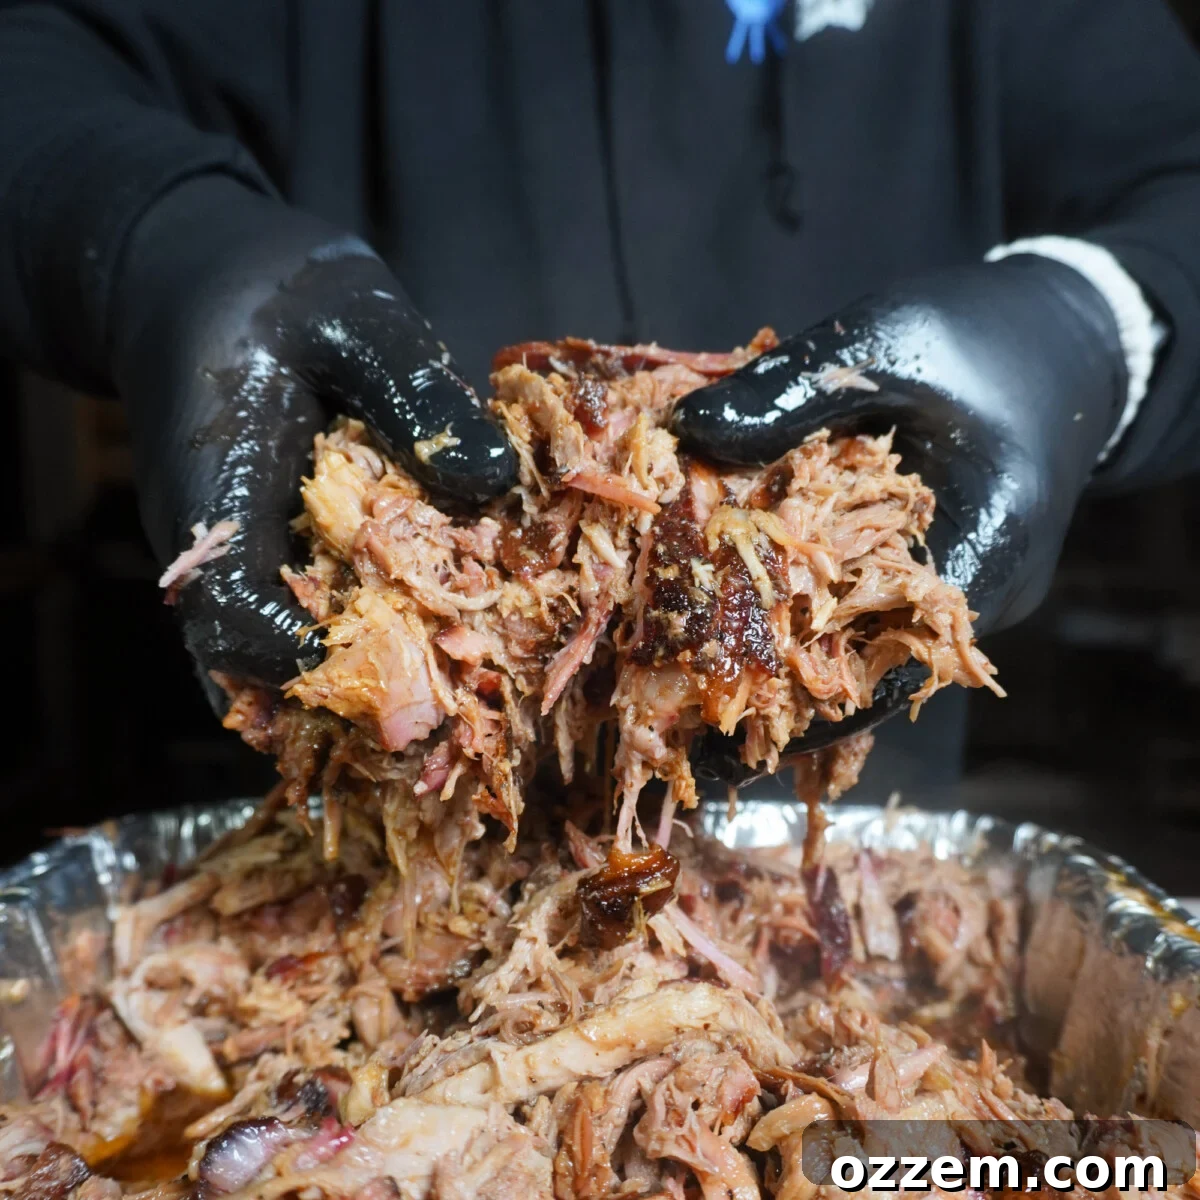
Table of Contents
- What Exactly is Classic Pulled Pork?
- Why Pulled Pork is the Perfect BBQ Dish
- Essential Ingredient List for Classic Pulled Pork
- Mastering Pork Shoulder Preparation
- Recipe Tip: Binder Alternatives
- The Foolproof 2-Step Method for the BEST Classic Pulled Pork
- Step 1: Smoke Low and Slow for Flavorful Bark
- Step 2: Wrapping for Unbelievable Tenderness
- Recipe Tip: Finishing in the Oven
- The Critical Resting Phase: Don’t Skip It!
- Serving Suggestions for Classic Pulled Pork
- Frequently Asked Questions About Pulled Pork
- Explore More Delicious Smoked Pork Recipes
- Classic Pulled Pork Recipe Card
What Exactly is Classic Pulled Pork?
At its heart, classic pulled pork is an iconic American barbecue dish featuring any pork meat, typically a pork shoulder, that has been smoked or cooked “low and slow” until it reaches an incredible tenderness, allowing it to be easily shredded into succulent strands. Often generously coated in a tangy or sweet BBQ sauce, this dish is a staple at gatherings, potlucks, and backyard cookouts across the country. When prepared correctly, the resulting meat is not only flavorful with a smoky crust (bark) but also incredibly moist, practically melting in your mouth with every bite.
Traditionally, pulled pork is made from the pork shoulder, which is also commonly referred to as a “pork butt” or “Boston butt.” These terms, while seemingly different, actually refer to the same cut of meat from the upper part of the pig’s front leg. The intriguing name “butt” harks back to the colonial era, when butchers in New England would pack less desirable cuts of pork, such as the shoulder, into large wooden barrels known as “butts” for storage and transport. This historical quirk gave us the lasting culinary term.
For the ultimate classic pulled pork experience, a bone-in pork shoulder is the ideal choice. Its shape, often a relatively even cube, allows for more consistent cooking over many hours on the grill or smoker. The bone itself acts as an internal thermometer and conductor, helping to distribute heat evenly and contributing additional flavor to the meat. While boneless options exist, they often cook less evenly and may lack some of the deep flavor imparted by the bone. Therefore, I highly recommend sticking with a bone-in cut.
The pork shoulder is a substantial cut of meat, typically weighing anywhere from 7 to 10 pounds. This generous size makes it an economical choice for feeding a crowd, as a single shoulder can comfortably serve 10 or more people and provide delicious leftovers for days. Due to its size and the high amount of connective tissue and fat that needs to render down, preparing pulled pork is not a last-minute endeavor. You should anticipate a cooking time of 8 to 10 hours, sometimes even longer, before it’s ready to shred. Therefore, meticulous planning is essential to ensure your pulled pork is ready when hunger strikes!
Why Pulled Pork is the Perfect BBQ Dish
Beyond its delicious taste, pulled pork holds a special place in the world of barbecue for several reasons. It’s incredibly forgiving, making it an excellent choice for beginners. The rich fat content and connective tissue of the pork shoulder mean it’s hard to dry out, and the “low and slow” cooking method allows for plenty of room for error. It’s also remarkably versatile, serving as the base for sandwiches, tacos, nachos, and more, adapting beautifully to various flavor profiles with different rubs and sauces.
Furthermore, the long cooking process, while requiring patience, is largely hands-off. Once the pork is on the smoker, it generally requires minimal intervention for several hours, freeing you up to enjoy your day or prepare other components of your meal. The aroma alone, filling your backyard with smoky goodness for hours, is an experience in itself, building anticipation for the tender, flavorful reward.
Essential Ingredient List for Classic Pulled Pork
Crafting the perfect classic pulled pork requires a selection of key ingredients, each playing a vital role in developing its signature flavor and texture. Here’s what you’ll need to gather:
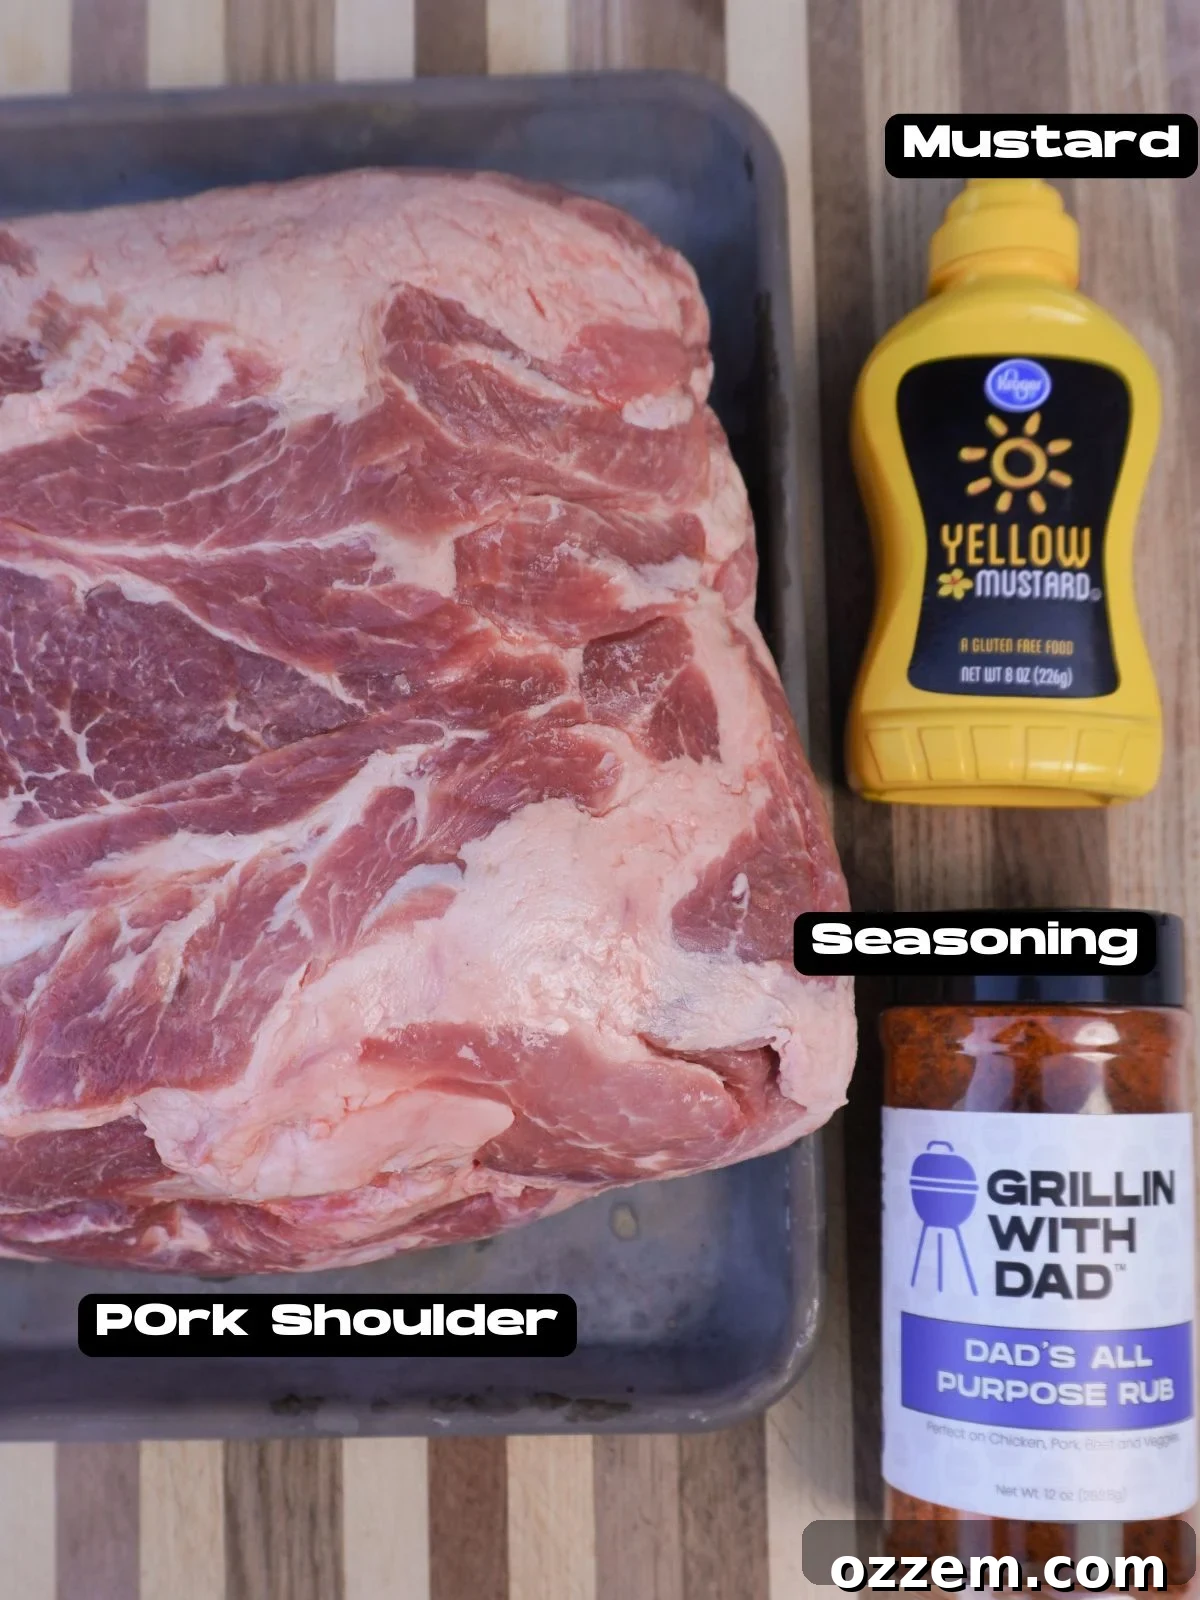
- Pork Shoulder (Bone-In): This is the star of our show. Aim for a bone-in pork shoulder, also known as a pork butt, weighing between 7-10 lbs. The bone aids in even cooking and adds depth of flavor. Look for a cut with a decent fat cap on one side, which will render and keep the meat moist.
- Seasoning (All-Purpose Rub & Sweet BBQ Rub): A robust rub is crucial for flavor. I prefer a two-part approach: a balanced all-purpose seasoning for savory depth and a sweet BBQ rub, which will be added during the wrapping phase to enhance the sweetness and develop a beautiful caramelized crust. Choose rubs that complement pork well, typically with notes of paprika, garlic, onion, and a touch of brown sugar.
- Mustard (Yellow): Used as a binder for the seasoning. Yellow mustard creates a thin, tacky layer on the pork’s surface, helping the dry rub adhere better without adding a noticeable mustard flavor to the finished product.
- Butter (Unsalted): Incorporated during the wrapping phase, unsalted butter adds richness, moisture, and helps create a luscious liquid bath for the pork to finish cooking in.
- Brown Sugar: A key component in the wrapping stage, brown sugar contributes sweetness and aids in caramelization, building a fantastic outer crust and infusing the meat with a subtly sweet profile.
- Honey: Like brown sugar, honey adds another layer of sweetness and moisture during the wrap, contributing to the tender, sticky exterior and enhancing the overall flavor.
- Apple Cider Vinegar: Diluted and used in a spray bottle, apple cider vinegar is crucial for spritzing the pork shoulder while it smokes. It helps keep the surface moist, prevents the bark from drying out too quickly, and adds a slight tanginess that complements the smoky flavor.
Mastering Pork Shoulder Preparation
Proper preparation is the first crucial step towards achieving BBQ perfection. Take your time with these initial stages; they lay the groundwork for a truly outstanding classic pulled pork.
To begin, carefully remove the large pork shoulder from its packaging. It’s important to note: do NOT wash the pork shoulder. Rinsing raw meat can spread bacteria around your kitchen. Instead, grab several paper towels and thoroughly pat the entire surface of the pork dry, including all sides. Patting it dry is essential as it makes the meat easier to handle and, more importantly, helps the rub adhere effectively, creating a better bark during smoking.
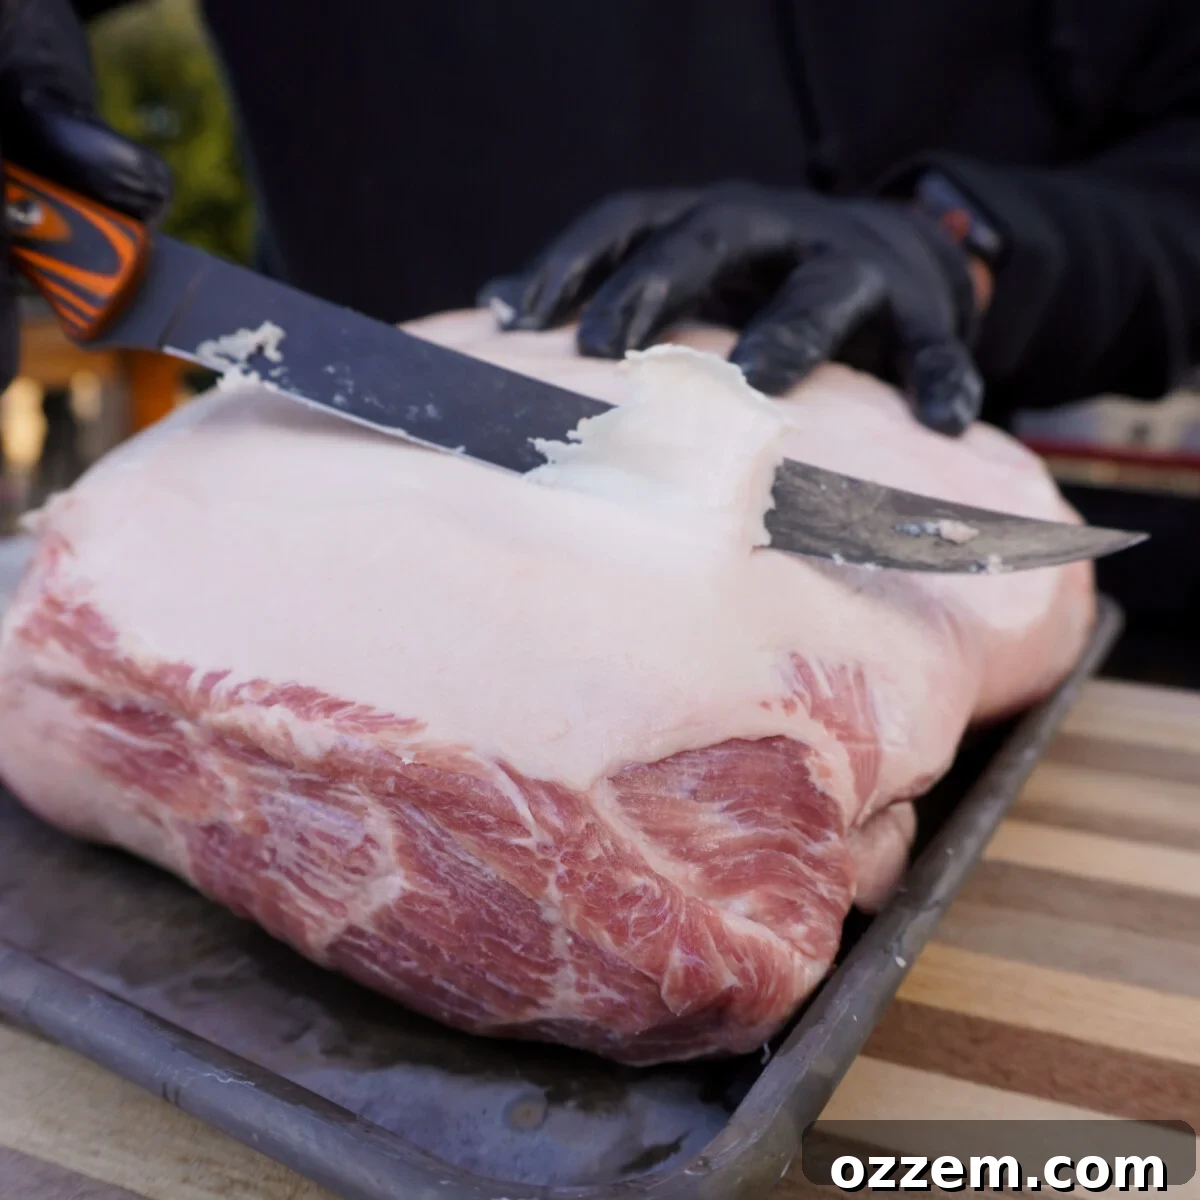
Next, turn your attention to the fat cap, the thick layer of fat on one side of the shoulder. While some fat is desirable for moisture and flavor, an overly thick fat cap won’t fully render down during cooking and can result in unpleasant, chewy bites. Your goal is to trim the fat cap down to no more than a 1/4 inch thickness. Using a sharp knife, slowly and carefully trim off any excess layers of fat, taking your time and removing small amounts at a time. This careful trimming ensures you leave enough fat to keep the meat moist without leaving excessive, unrendered pockets.
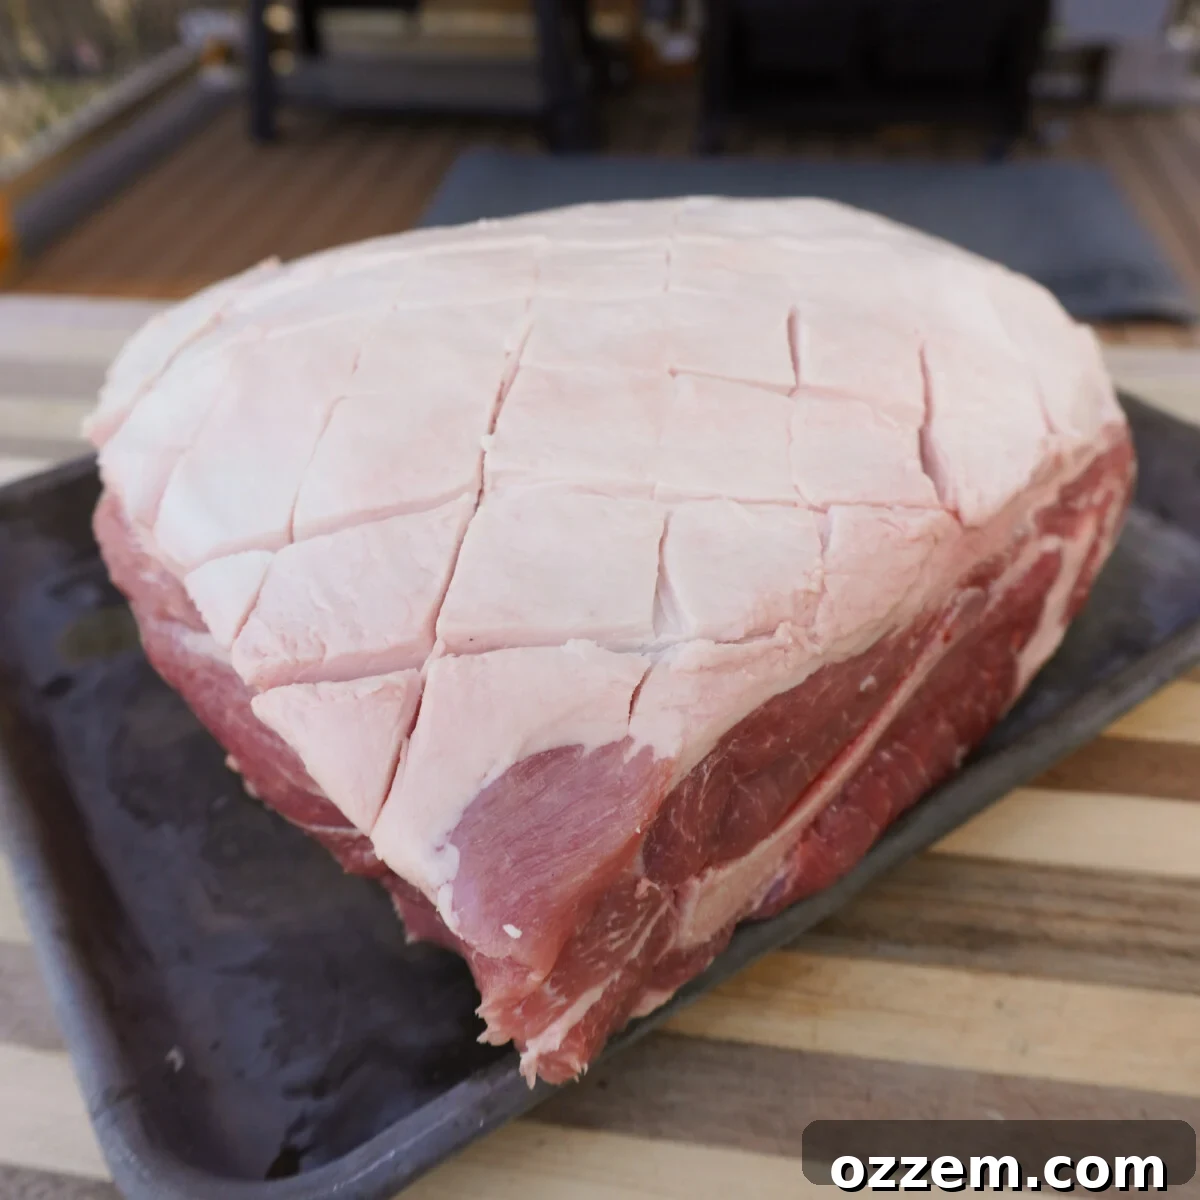
Once the fat cap is trimmed to the desired thickness, it’s time to score it. Using your knife, gently score the fat cap in a checkered or cross-hatch pattern. Be careful not to cut too deep – just enough to slice through the fat layer without penetrating deeply into the meat below. Scoring serves a dual purpose: it allows the seasoning and smoke to penetrate deeper into the pork shoulder, infusing it with those amazing BBQ flavors, and it helps the fat render more efficiently during the long cook.
Finally, generously coat the entire bone-in pork shoulder with yellow mustard. Don’t be shy; ensure every surface is covered. The mustard acts as an excellent binding agent, creating a sticky base that helps your dry rub adhere beautifully. Rest assured, you won’t taste any discernible mustard flavor in the finished product; it simply serves its purpose as a flavor delivery system.
Recipe Tip: Binder Alternatives
If yellow mustard isn’t your preference, or if you simply want to experiment, you can use hot sauce or Worcestershire sauce as alternative binding agents. These will also help the rub stick and can add their own subtle layer of flavor.
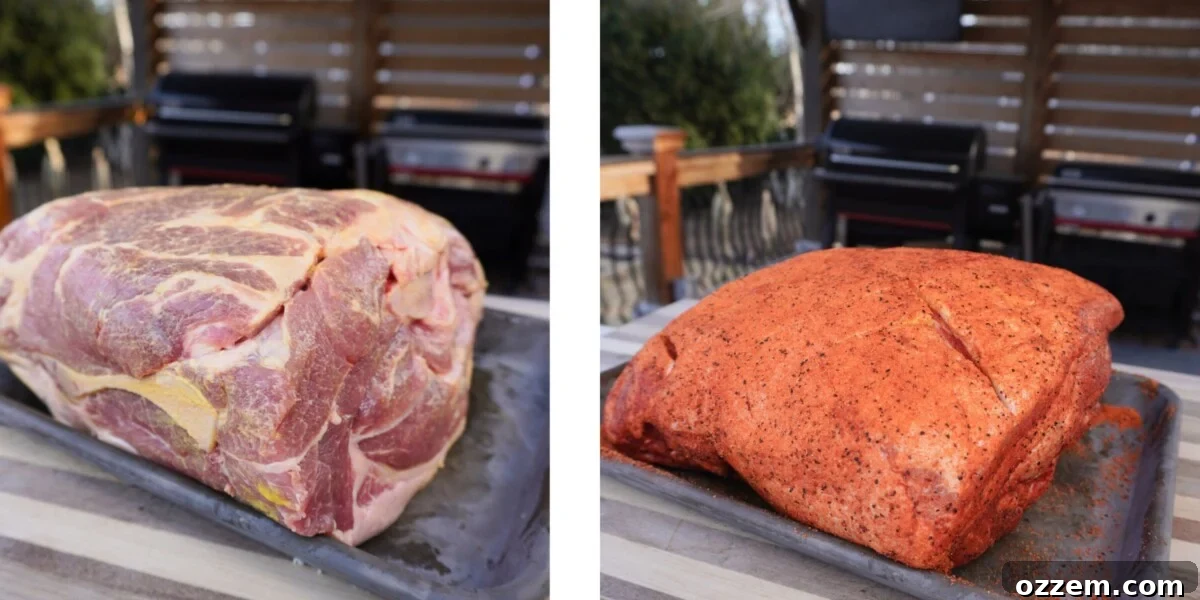
Now for the seasoning! For this recipe, I highly recommend using a high-quality all-purpose rub, such as Dad’s All Purpose Rub. It’s crafted with a perfect balance of classic savory BBQ flavors that wonderfully complement the natural richness of pork. This is a very large piece of meat, so do NOT be shy with the seasoning. You need a generous layer to ensure a flavorful bark and to prevent your pulled pork from being bland. Apply the rub heavily to all sides of the pork shoulder, ensuring every crevice is covered.
When applying the seasoning, gently pat it down rather than rubbing it vigorously. Patting helps the spices adhere firmly to the mustard binder, preventing them from falling off during transfer or the initial stages of smoking.
After seasoning, set the pork shoulder aside at room temperature for approximately 30 minutes. This short rest allows the meat to “sweat” slightly, opening up its pores and enabling it to absorb all those wonderful spices more effectively, creating a deeper flavor penetration.
Dad’s Seasonings
Your must-have grillin’ seasonings!
The Foolproof 2-Step Method for the BEST Classic Pulled Pork
Achieving truly exceptional classic pulled pork – that perfect balance of smoky bark, juicy interior, and fall-apart tenderness – demands a thoughtful cooking process that unfolds over most of the day. My proven 2-step method is designed to maximize both flavor and texture. The first step focuses on infusing the pork with irresistible smoke and developing that coveted dark, crispy “bark.” The second step, often referred to as “the Texas Crutch,” ensures the meat becomes unbelievably tender and moist, allowing it to easily shred.
The pork shoulder, with its abundant fat and tough connective tissues, requires significant time at a low temperature for these components to slowly render and break down. This transformation is what creates the tender, gelatinous texture characteristic of great pulled pork. Patience, therefore, is not just a virtue here; it’s the absolute key to success. Resist the urge to rush the process, and trust in the magic of low and slow cooking.
Step 1 – Smoke Low and Slow for Flavorful Bark
This initial phase is where the pork absorbs its signature smoky flavor and begins to form that delicious, crusty bark.
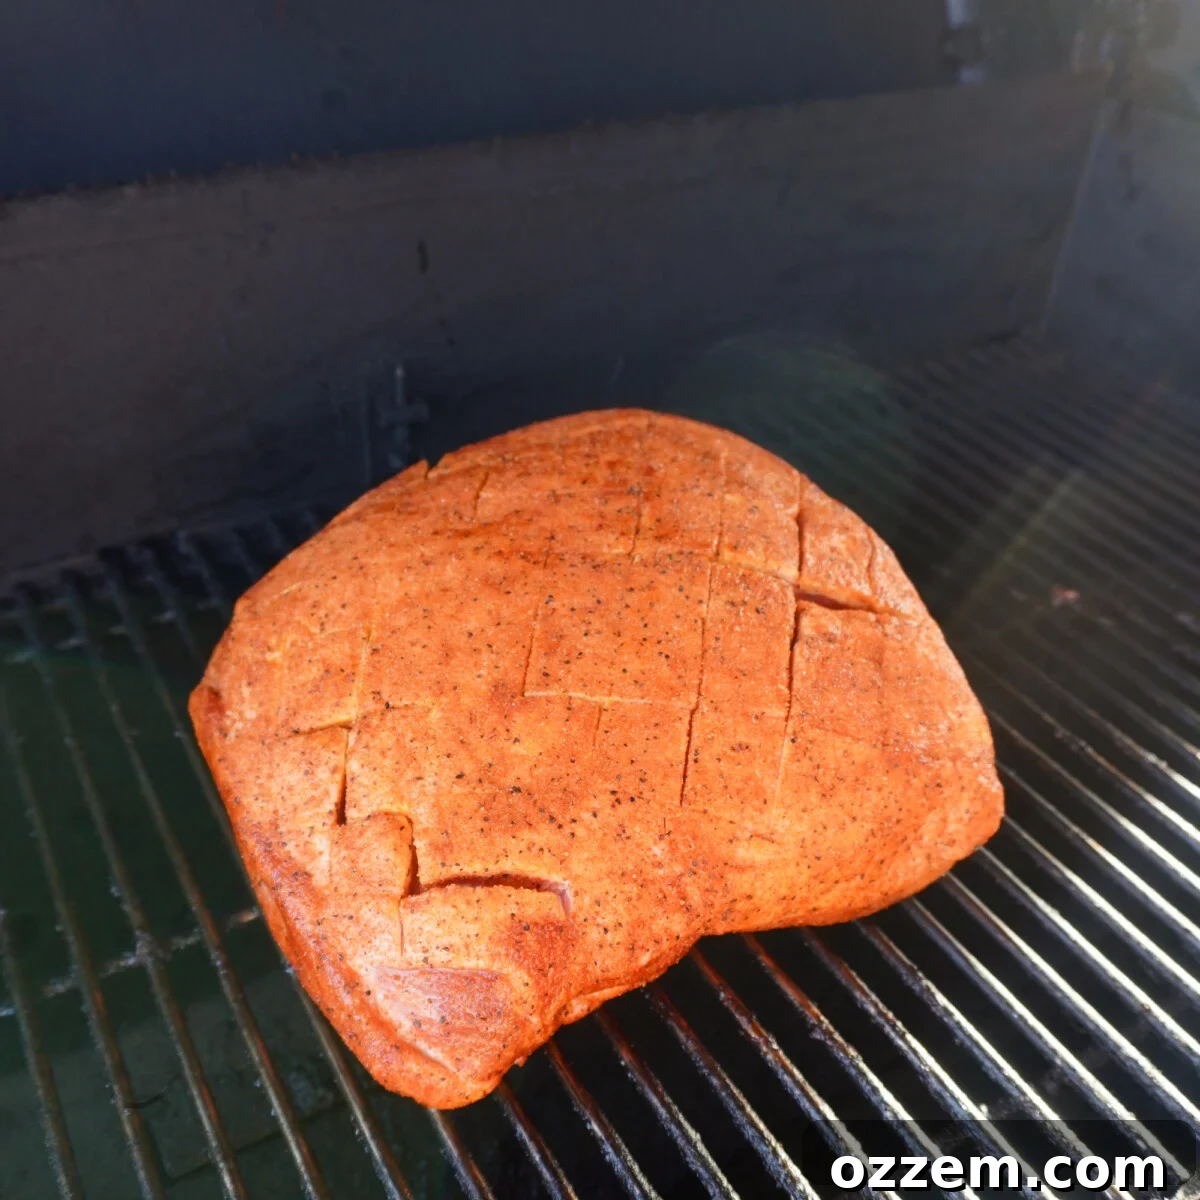
Begin by preheating your grill or smoker to a consistent 250 degrees Fahrenheit. It’s crucial to set it up for indirect heat, ensuring the pork cooks gently without direct exposure to flames. I personally achieve fantastic results using my Weber Searwood Pellet Grill for this cook, but any smoker or grill capable of maintaining a stable low temperature will work perfectly. Add your preferred wood chips or chunks for smoke—hickory, apple, or cherry wood are excellent choices that impart a wonderful flavor to pork.
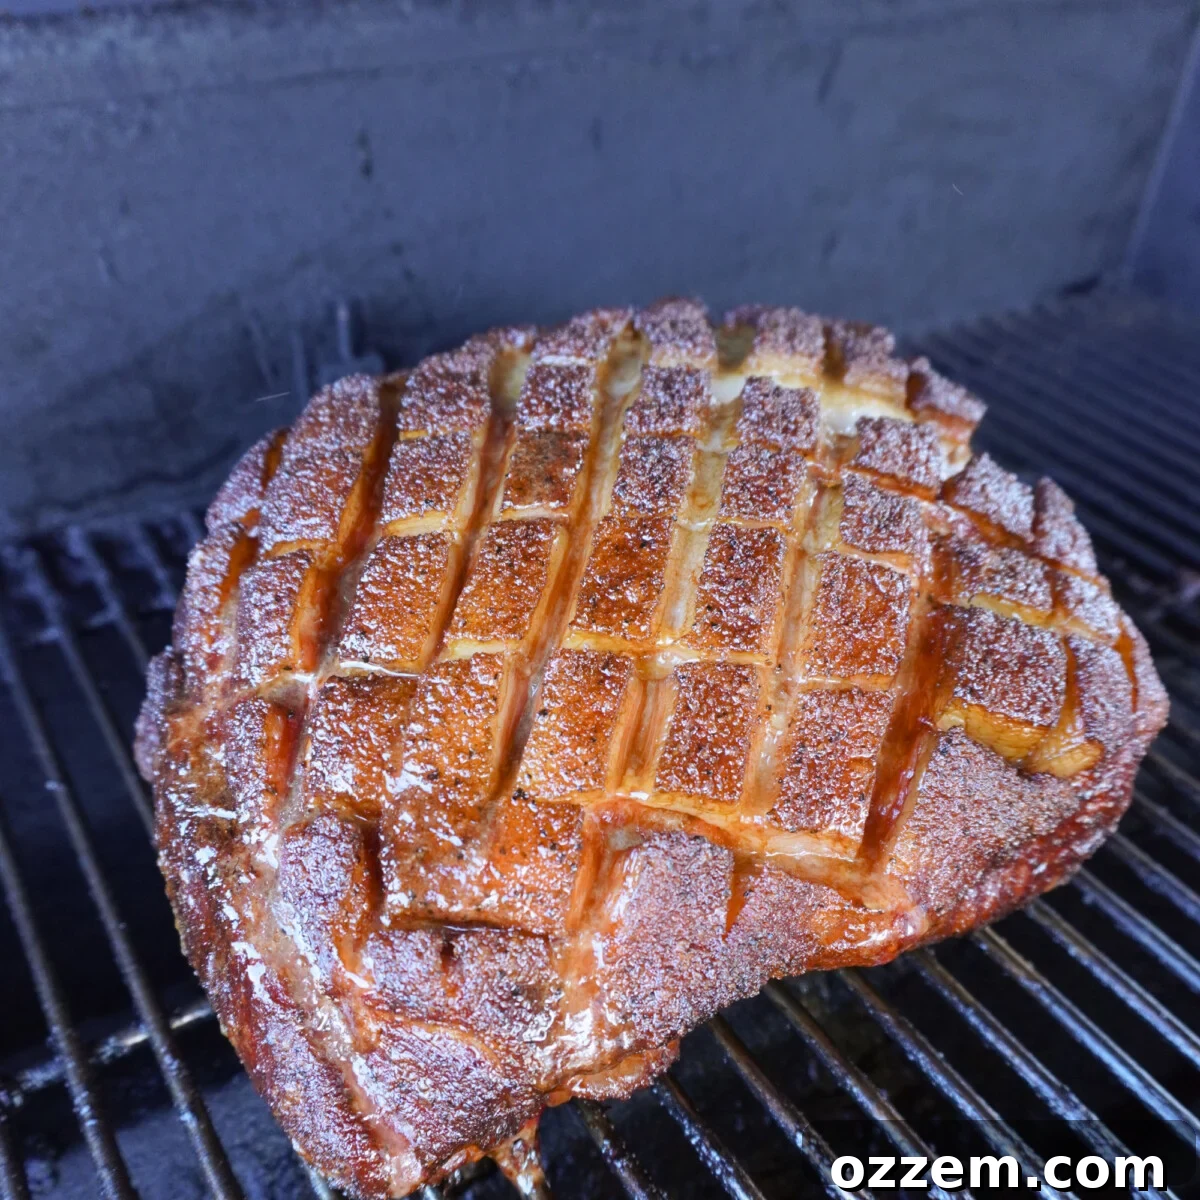
Once your smoker is at temperature and producing clean smoke, carefully place the seasoned pork shoulder directly onto the grates, fat cap side up. Now, for the critical part of this step: for the first 4 hours, resist the urge to peek or open the lid. Let the grill do its magic undisturbed. Every time you open the lid, heat escapes, and your cooking time will be extended. Patience here is paramount for establishing a good smoky flavor and a solid bark.
After the initial 4 hours, you can start to periodically check the bark development. Look for a deep mahogany color and a firm, crusty texture. If the bark appears to be drying out too much, pour a little apple cider vinegar into a spray bottle and lightly spritz the pork every hour or so. This helps to keep the surface moist and prevents the bark from becoming too tough or burnt. Importantly, spritzing primarily impacts moisture and bark development; it won’t significantly alter the core flavor of the meat itself.
During this low and slow phase, the pork shoulder will eventually hit a “stall,” where its internal temperature plateaus for several hours. This is a normal part of the smoking process, caused by evaporative cooling as moisture escapes the meat. Don’t be alarmed; simply keep the temperature consistent and let it work through the stall. Depending on the size of your shoulder, you should estimate approximately 1.5 hours per pound for the entire cooking process, making the total smoking time for a 7-10lb shoulder typically between 7-9 hours. By the end of this initial smoking phase, the internal temperature of your pork should read approximately 170-175 degrees Fahrenheit.
Step 2 – Wrapping for Unbelievable Tenderness
The next crucial step in our cooking process is designed to achieve that coveted, fall-off-the-bone tenderness while locking in moisture and infusing even more flavor. This technique, often called “the Texas Crutch,” involves wrapping the pork for the final stage of its cook.
Once your smoked pork shoulder reaches an internal temperature of approximately 170 degrees Fahrenheit, it’s time to transfer it from the grill. Carefully move the pork into a sturdy aluminum pan or onto a large, heavy-duty sheet of aluminum foil. This is where we’ll create a steamy, flavorful environment to finish the cook.
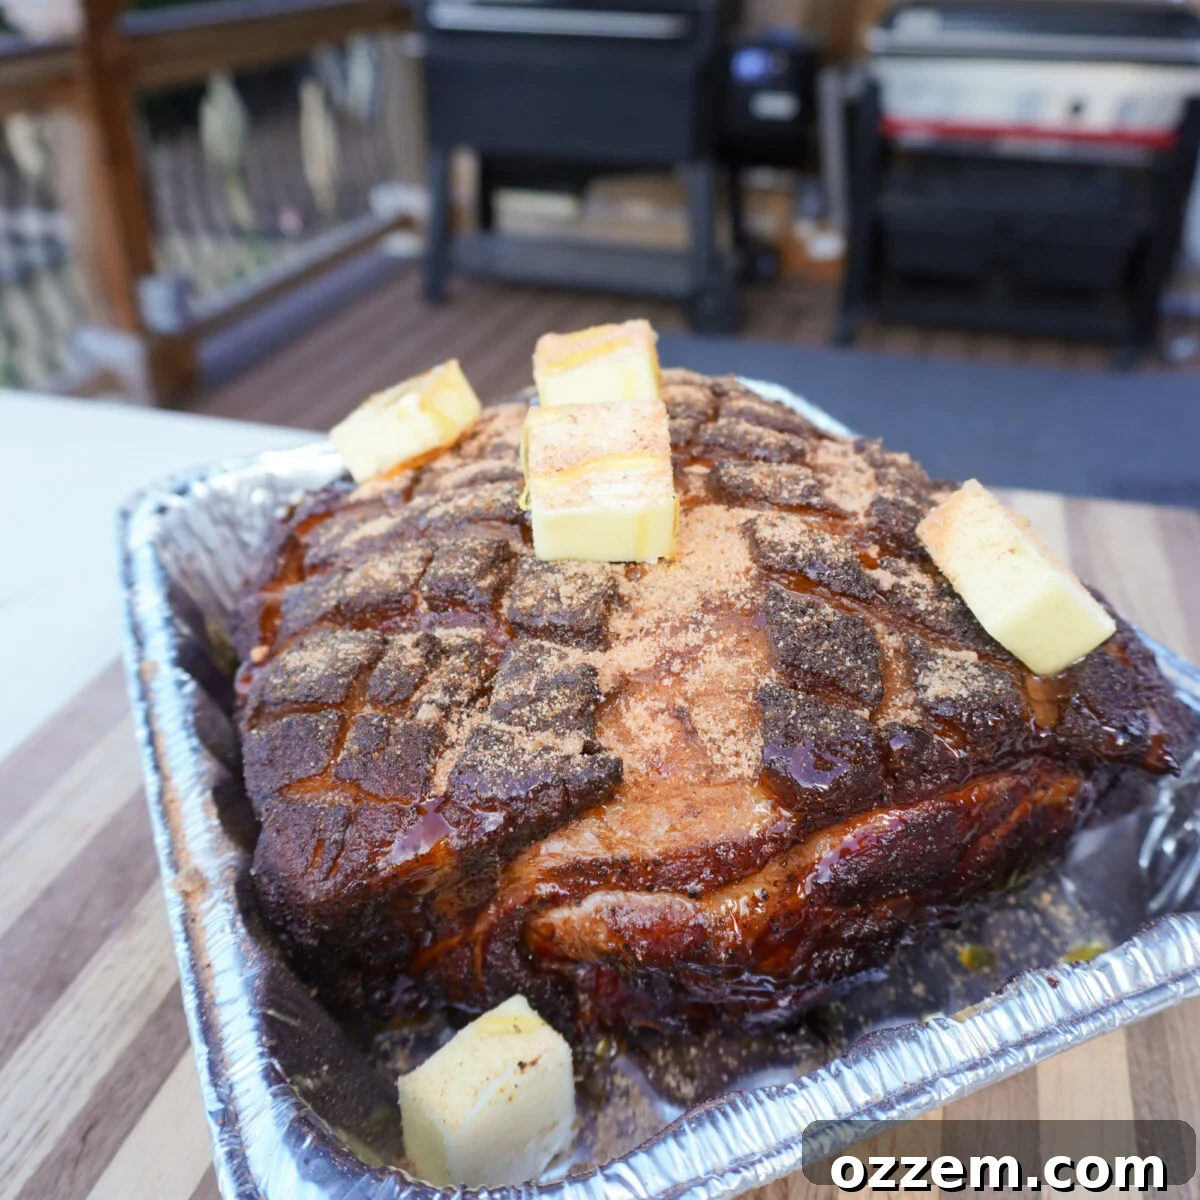
Now, to enhance both moisture and flavor, add a few key ingredients around the pork in the pan or on the foil. Sprinkle a generous amount of brown sugar, drizzle honey, add several cubes of unsalted butter, and a dash of a sweet BBQ rub like Dad’s Sweet BBQ Rub. These ingredients will melt down, mingle with the rendered pork juices, and create a rich, sweet liquid bath that steams the pork, making it incredibly tender and flavorful. And if you’re feeling particularly adventurous and festive, you might even consider trying my unique Smoked Pulled Pork in a Pumpkin recipe!
Seal the entire pan with another large sheet of foil, or carefully wrap the foil around the pork to create a tightly sealed packet. The tight seal is critical; it traps all the steam and moisture inside, allowing the butter and sugars to penetrate deeply into the meat, infusing it with those amazing classic BBQ flavors and accelerating the breakdown of tough connective tissues.
Increase your grill or smoker temperature to 275 degrees Fahrenheit, then place the wrapped pork back on for another 2-3 hours. The higher temperature in this phase helps push the internal temperature towards the desired final range. Continue cooking until the internal temperature of the pork shoulder reaches approximately 200 degrees Fahrenheit. This higher temperature is crucial for the collagen to fully break down into gelatin, which is what creates that signature tenderness.
Recipe Tip: Finishing in the Oven
At this stage of the cook, the pork will no longer absorb significant smoke flavor, as its surface has already developed a good bark. This means it’s perfectly acceptable, and often convenient, to finish the wrapped pork in a conventional oven set to 275°F. This can free up your smoker for other dishes or allow for easier temperature management.
Once the pork approaches 200°F, it’s time to test for tenderness. Carefully unwrap a corner of the foil and insert your thermometer probe or a fork into the thickest part of the meat. If it glides into the pork easily, with minimal resistance, feeling like a “hot knife through butter,” then your pulled pork is done. If you encounter resistance, re-wrap the pork tightly and continue cooking for another 30 minutes, then test again. Repeat this process until you achieve that desired fork-tender consistency. Tenderness is paramount; this is the stage where the magic happens, ensuring your pork is effortlessly shreddable.
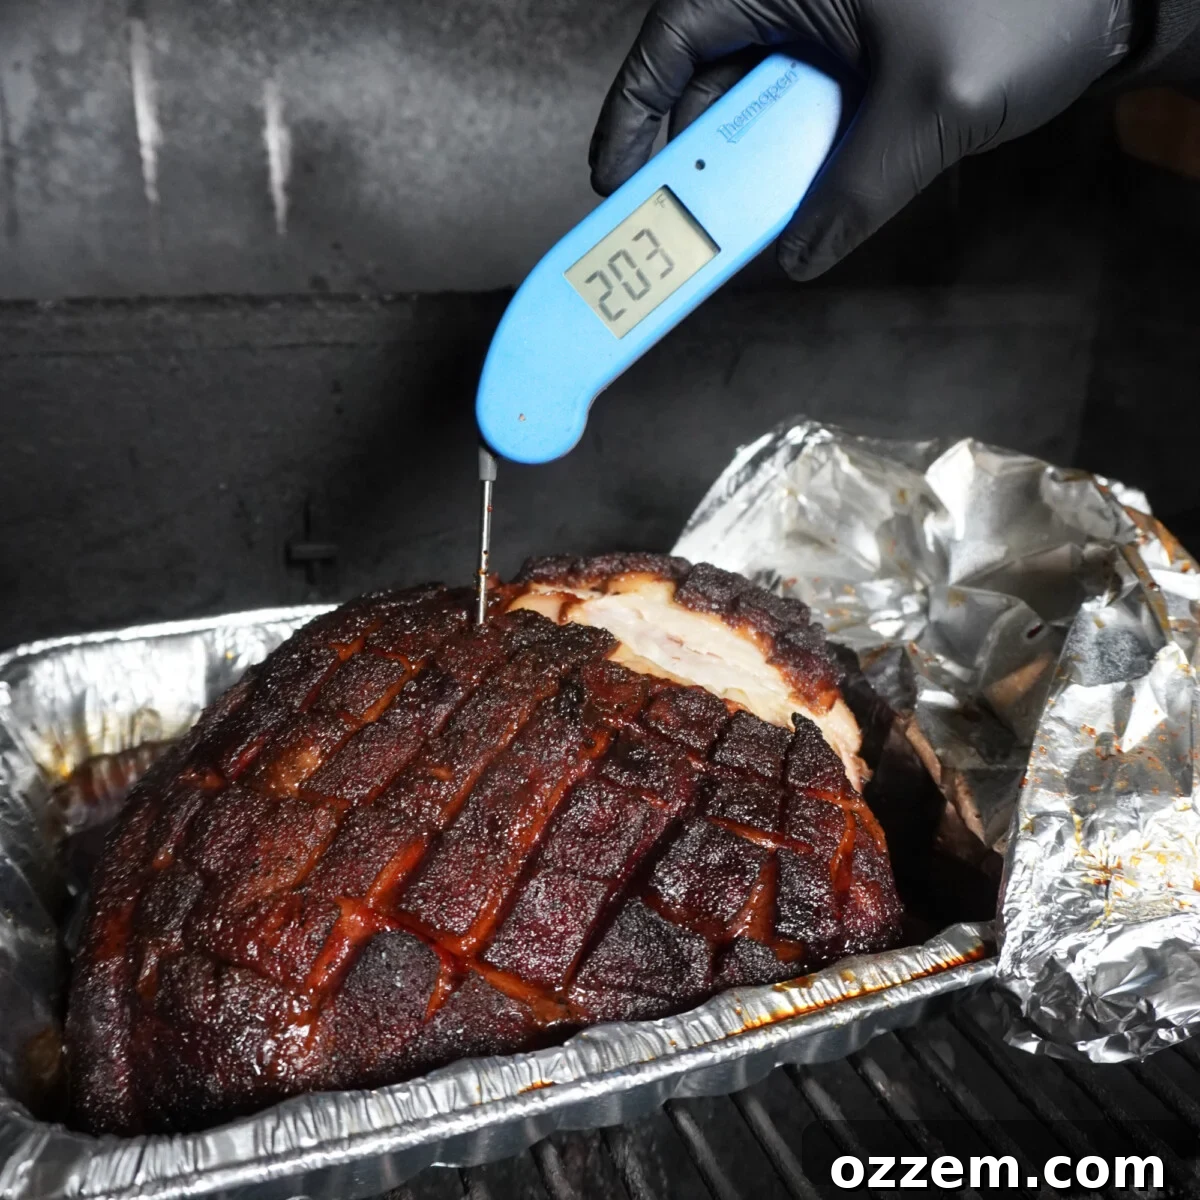
The final internal temperature for a perfectly tender classic pulled pork can vary slightly, typically ranging anywhere from 200 to 205 degrees Fahrenheit. This range is your target, but remember that probe tenderness is the ultimate indicator, not just the temperature number. This is a common point where mistakes are made: removing the pork too soon because of impatience can result in tough, chewy meat that resists shredding. Be patient, trust the probe test, and you will be rewarded with incredible results.
The Critical Resting Phase: Don’t Skip It!
You’ve achieved probe tenderness, the pork is looking magnificent, and the aroma is driving everyone wild. But there’s one last, absolutely crucial step before you can dive in: the rest. This stage is just as important as any cooking phase, so do not skip it!
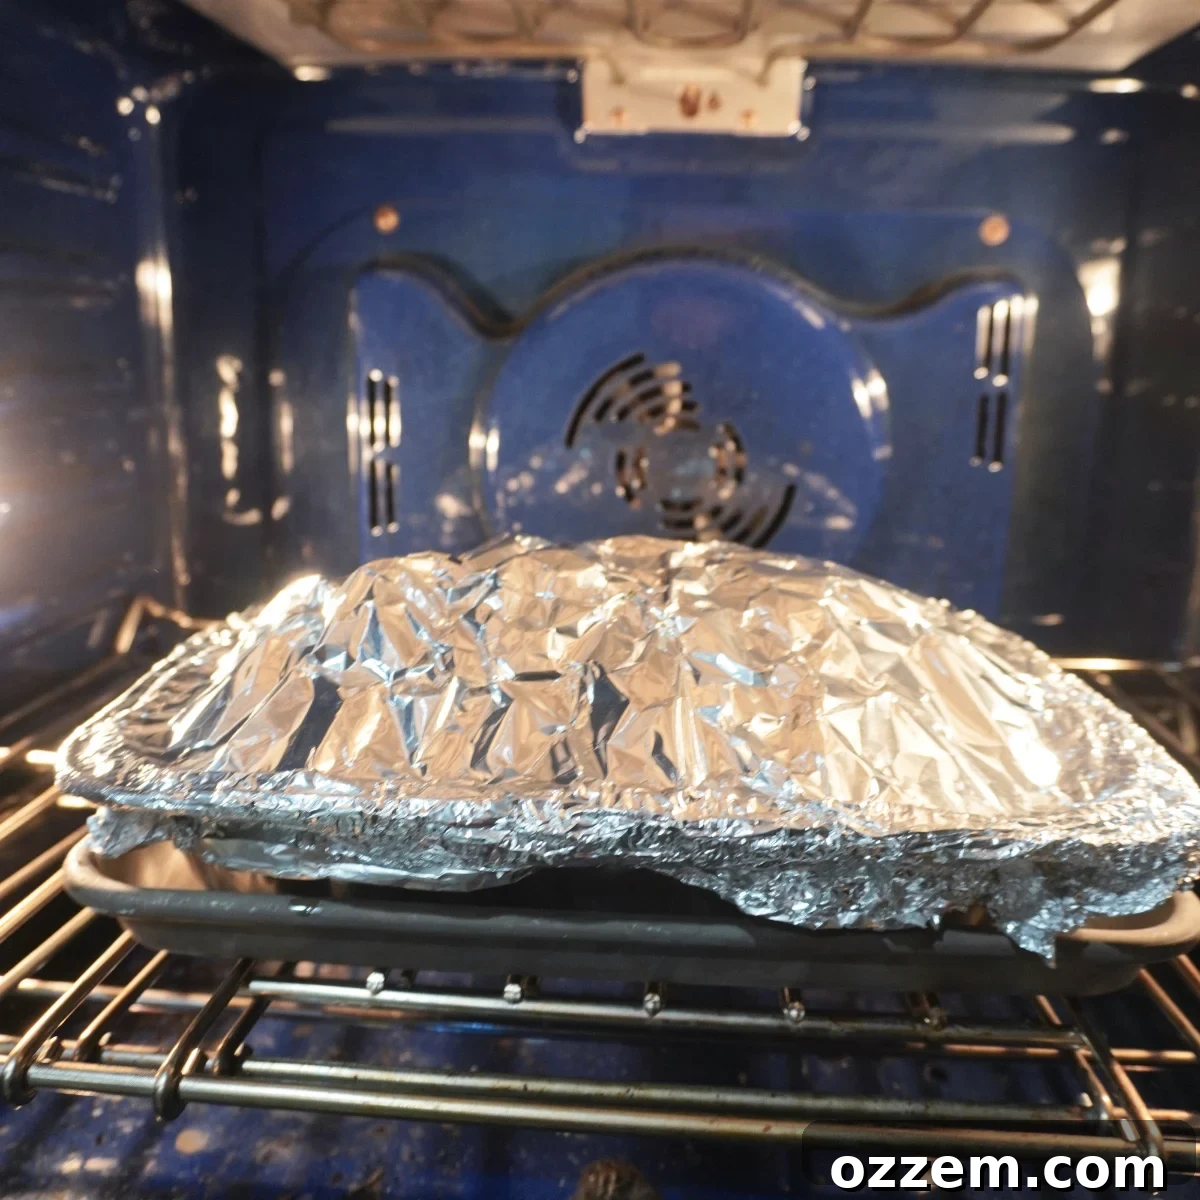
Once the pork reaches that perfect fork-tender stage, immediately move the still-wrapped pork (in its aluminum pan or foil packet) into an insulated cooler or a turned-off oven. The goal is to keep it warm without actively cooking it further. Allow it to rest for at least 1 hour, though 2-3 hours is often ideal for larger cuts. Remember, this is a very large, dense piece of meat that has been cooking at high temperatures for 7-9 hours (or more). During cooking, the meat fibers contract, pushing the juices towards the center. Resting allows these juices to redistribute evenly throughout the meat, rehydrating the muscle fibers. This results in an incredibly moist and succulent final product. Cutting into it too soon will cause all those precious juices to run out, leaving you with dry pulled pork.
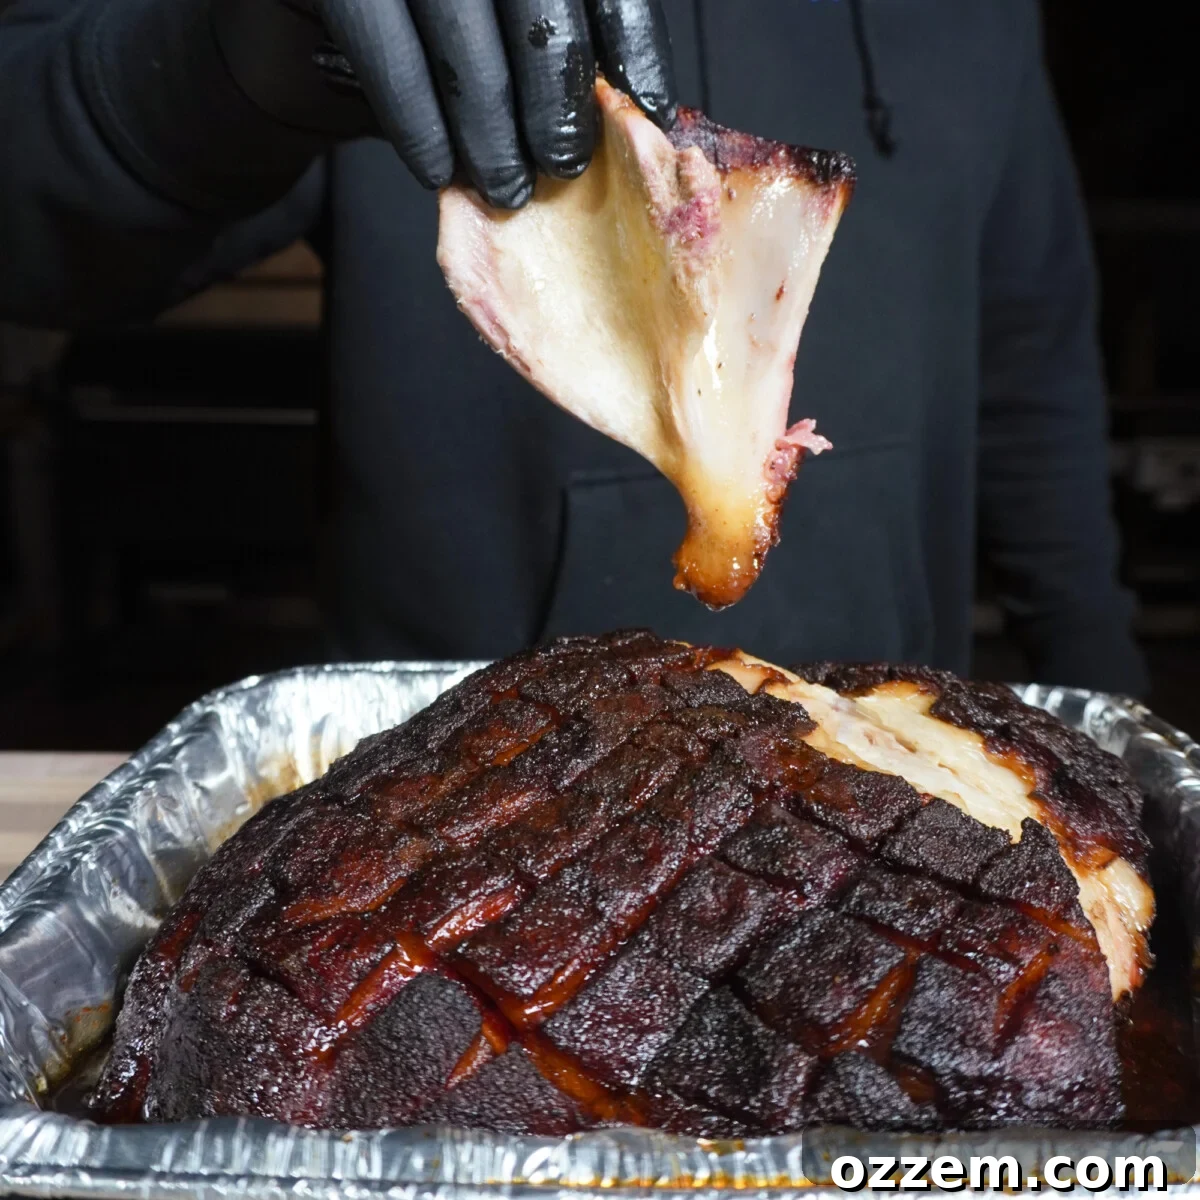
When the resting period is complete, it’s time for the moment of truth. Begin by removing the bone. If your pork shoulder was perfectly cooked, the bone should slide out effortlessly and cleanly, with virtually no resistance. This is a satisfying indicator of success!
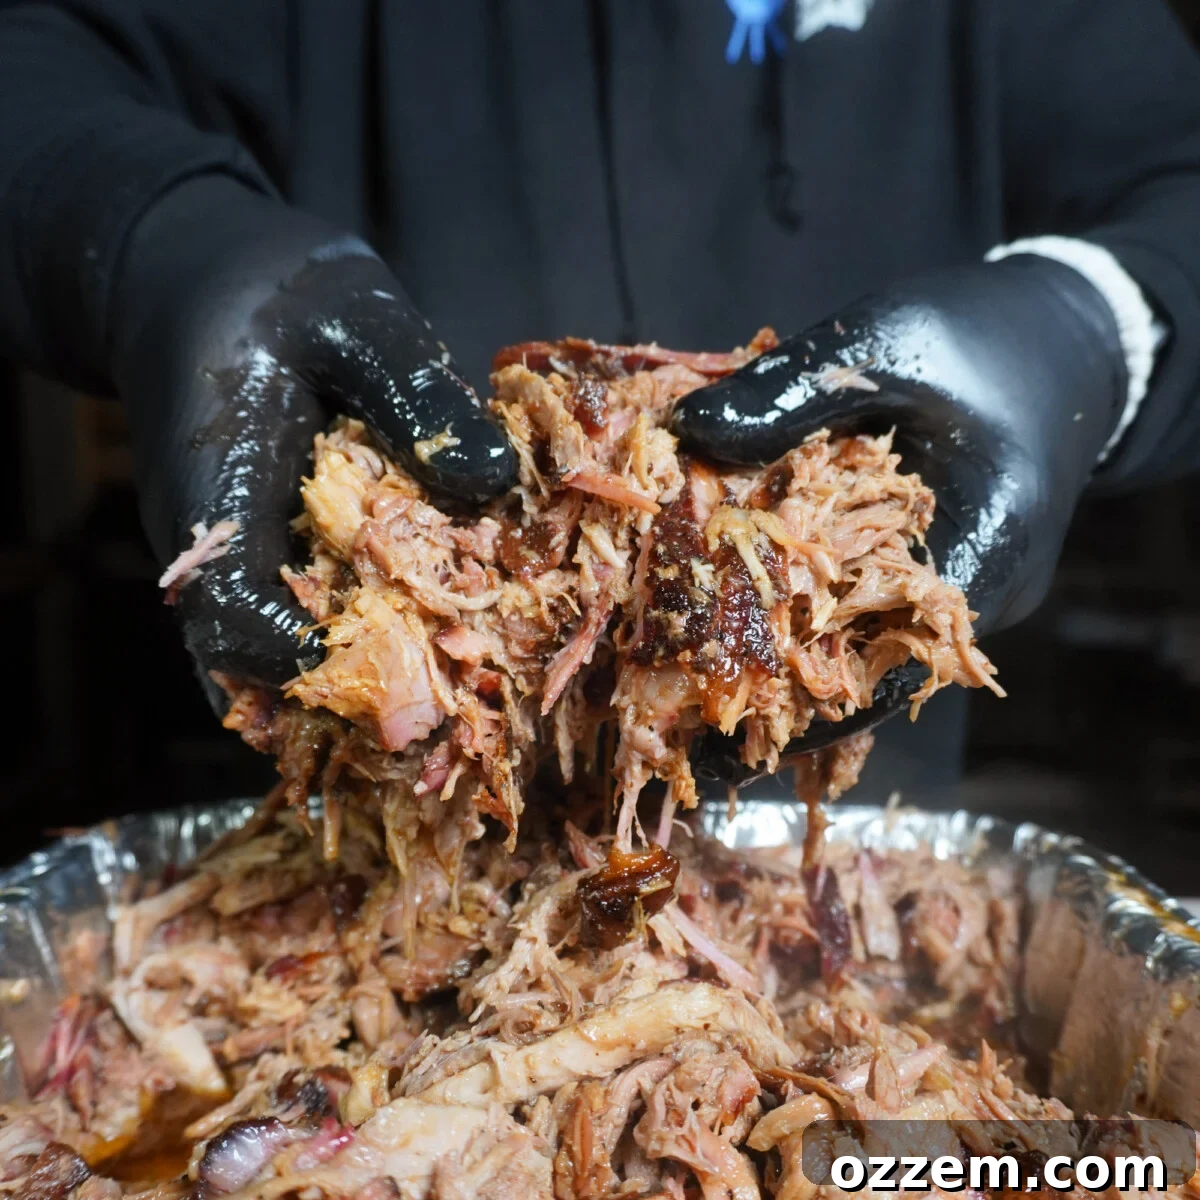
Keep the smoked classic pulled pork in its aluminum pan, as it will contain a treasure trove of rendered juices. Using heat-resistant gloves (I find glove liners under nitrile gloves offer excellent heat protection), begin to shred the meat. It should pull apart with remarkable ease. As you shred, make sure to mix the pulled pork with all the rich rendered juices collected in the pan. These flavorful juices are essential; they add incredible moisture and an extra layer of savory depth to the finished dish, ensuring every bite is moist and delicious.
Serving Suggestions for Classic Pulled Pork
With your beautifully tender and flavorful classic pulled pork ready, the possibilities for serving are endless! The most iconic way to enjoy it is piled high on a soft brioche bun, perhaps topped with a crisp coleslaw and a generous dollop of your favorite sweet and tangy BBQ sauce. But don’t stop there!
Pulled pork makes for fantastic tacos or burritos, especially with fresh toppings like salsa, avocado, and pickled onions. It’s also an incredible topping for nachos, baked potatoes, or mac and cheese. For a hearty meal, serve it alongside classic barbecue sides such as baked beans, corn on the cob, or potato salad. Leftovers, if you have any, are equally versatile and reheat wonderfully for quick weeknight meals. Enjoy the fruits of your labor!
Frequently Asked Questions About Pulled Pork
While not strictly mandatory, a bone-in pork shoulder is highly recommended. It typically cooks more evenly than boneless cuts and provides an extra layer of flavor from the bone marrow. Boneless cuts, due to their irregular shape after bone removal, can sometimes have areas that cook faster and dry out. If you can only find boneless, it will still make great pulled pork, but adjust your cooking time slightly and rely more heavily on probe tenderness.
Both butcher paper and aluminum foil are effective for wrapping during the “stall” phase. I personally prefer using foil, especially when using an aluminum pan to hold the pork. Foil creates a tighter seal, which helps to retain maximum moisture and steam, ensuring the pork stays exceptionally juicy and tender. Butcher paper, on the other hand, is more breathable, allowing some steam to escape, which can lead to a slightly crispier bark while still breaking down connective tissue. The choice often comes down to personal preference for bark texture versus ultimate moisture retention.
For classic pulled pork, certain woods truly shine. Hickory is a traditional choice, offering a strong, savory smoke flavor that pairs perfectly with pork. Apple wood provides a milder, slightly sweet, and fruity smoke, while cherry wood offers a beautiful mahogany color to the bark and a mild, sweet flavor. Oak is also a versatile option, delivering a medium smoke flavor. You can experiment with combining different woods for a unique profile.
Absolutely! While a smoker provides that distinct smoky flavor, you can achieve incredibly tender pulled pork in both an oven and a slow cooker. For the oven, you’d typically cook a seasoned pork shoulder in a covered Dutch oven or roasting pan at a low temperature (around 275-300°F) for several hours until fork-tender. In a slow cooker, you can place the seasoned pork with a bit of liquid (like apple cider vinegar or chicken broth) and cook on low for 6-8 hours or high for 3-4 hours, or until it easily shreds. You can add a liquid smoke product for a hint of smoky flavor if desired.
Store any leftover pulled pork in an airtight container in the refrigerator for up to 3-4 days. For longer storage, you can freeze it for up to 3 months. To reheat, gently warm it in a pan on the stovetop with a little extra BBQ sauce or broth to maintain moisture, or microwave in short bursts. Thaw frozen pulled pork in the refrigerator overnight before reheating.
Explore More Delicious Smoked Pork Recipes:
Pork
Dr. Pepper Pulled Pork
Pork
Classic Pulled Pork
Pork
Cuban Sandwich
Pork
Pulled Pork Nachos
If you tried this Classic Pulled Pork or any other recipe on my blog, please leave a 🌟 star rating and let me know how it went in the 📝 comments. I love hearing from you!
Classic Pulled Pork
Ingredients
- 8 Lbs Bone-in pork shoulder
- 2 tbsp Yellow mustard
- 6 tbsp All-purpose rub
- 1/2 cup Apple cider vinegar
- 1/2 stick Unsalted butter
- 1/2 cup Brown sugar
- 1/4 cup Honey
- 2 tbsp Sweet BBQ rub
Instructions
-
Remove the pork shoulder from its packaging and pat it thoroughly dry with paper towels.
-
Trim the fat cap to about 1/4″ thickness. Score the fat cap in a checkered pattern, cutting only through the fat.
-
Generously coat the entire pork shoulder with yellow mustard, then apply the all-purpose rub liberally to all sides, patting it down gently.
-
Set up your grill or smoker for indirect heat and preheat to 250 degrees Fahrenheit. Place the seasoned pork shoulder directly on the grates, fat cap up.
-
For the first 4 hours, leave the pork undisturbed. After that, begin spritzing the pork every hour with apple cider vinegar to keep it moist and promote bark development.
-
Continue smoking until the internal temperature of the pork reaches 170-175 degrees Fahrenheit.
-
Transfer the pork shoulder from the grill into an aluminum pan or onto a large, heavy-duty foil sheet. Add brown sugar, honey, cubed unsalted butter, and the sweet BBQ rub around the pork.
-
Seal the pan tightly with aluminum foil (or wrap the foil tightly around the pork). Increase the grill or oven temperature to 275 degrees Fahrenheit.
-
Place the wrapped pork back on the grill (or into the oven) and continue cooking for another 2-3 hours, or until the internal temperature reaches approximately 200-205 degrees Fahrenheit.
-
Crucially, check for “probe tenderness.” The probe should slide into the meat like butter. If not, re-wrap and continue cooking, checking every 30 minutes until tender.
-
Once tender, remove the wrapped pork from the grill and let it rest for a minimum of 1 hour (ideally 2-3 hours) in an insulated cooler or a turned-off oven.
-
Remove the bone (it should pull out cleanly). Using heat-resistant gloves, shred the meat directly in the pan, mixing it with all the delicious rendered juices. Serve hot and enjoy!
Notes
- Try to purchase a bone-in pork shoulder; it helps cook more evenly and adds flavor.
- If you’re not a fan of mustard, use hot sauce or Worcestershire sauce as a binding agent for the rub.
- For the first 4 hours, resist peeking inside the smoker. Let the magic happen. After that, monitor the bark and spritz if it starts to dry out.
- During the wrapping stage, no more smoke will penetrate the meat, so finishing the cook in your oven is a perfectly acceptable option.
- Tenderness is key! This is what makes the pork shreddable. The final temperature on a classic pulled pork can range anywhere from 200 to 205 degrees Fahrenheit, but always rely on the probe test. If your thermometer probe doesn’t slide into the meat smoothly, it’s not done. Continue cooking patiently. Removing the pork too soon is a common mistake that results in dry and tough meat.
Nutrition
Carbohydrates: 25g |
Protein: 33g |
Fat: 17g |
Saturated Fat: 7g |
Polyunsaturated Fat: 1g |
Monounsaturated Fat: 7g |
Trans Fat: 0.2g |
Cholesterol: 123mg |
Sodium: 164mg |
Potassium: 604mg |
Fiber: 0.2g |
Sugar: 25g |
Vitamin A: 153IU |
Vitamin C: 1mg |
Calcium: 37mg |
Iron: 2mg
Like this recipe? Rate and comment below!
Check out the Recipes Pagefor other tasty ideas!