
Mastering Charcoal Grilling: Your Guide to Easy Lighting, Perfect Flavor, and Precise Temperature Control
There’s a universally acknowledged truth among grilling enthusiasts: nothing quite compares to the rich, smoky flavor achieved through charcoal grilling. While some might shy away, associating it with complexity, the reality is that mastering charcoal is remarkably straightforward. Once you understand the simple steps to lighting your coals and managing your grill, you’ll consistently produce unbelievably delicious results that elevate any meal. The process of getting your coals ready takes just about 15 minutes – a small investment of time that yields a monumental return in authentic barbecue taste.
Indeed, lighting charcoal is genuinely easy, though it’s certainly not as simple as merely pressing a button on a gas grill. However, the slightly longer preparation time is a small price to pay for a flavor profile that gas grills simply cannot replicate. The distinctive char and deep smoky notes infused into your food are a signature of charcoal cooking, making it the preferred method for many culinary adventurers.
Typically, you’ll need about 15 minutes for your coals to ignite and begin to ash over, followed by a few more minutes for the grill itself to reach your desired cooking temperature. Among the various methods for starting charcoal, the two most popular and efficient are the electric starter and the chimney starter. While both have their merits, many seasoned grillers, myself included, strongly prefer the chimney starter for its speed, efficiency, and ability to heat coals uniformly, ensuring a consistent cook from the outset.
Choosing Your Charcoal Starter: Methods for Quick Ignition
Understanding the different tools available to light your charcoal is the first step towards a successful grilling experience. Each starter type offers unique advantages and considerations.
The Dependable Chimney Starter
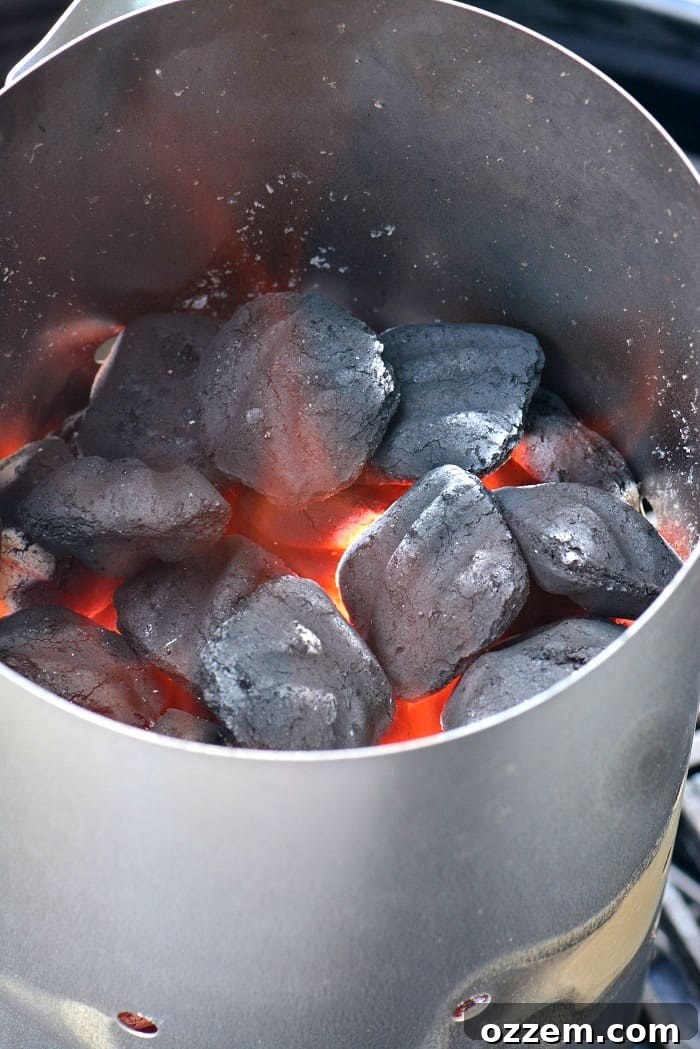
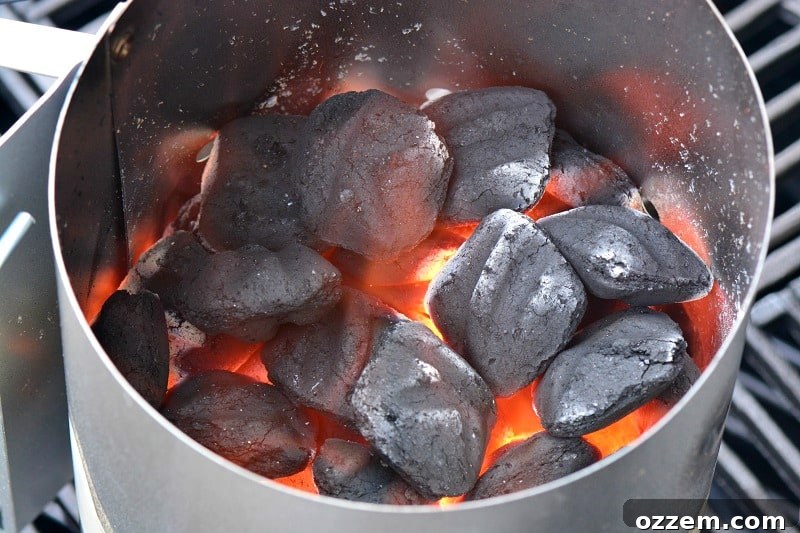
The chimney starter is a brilliant, straightforward device designed to harness natural convection for rapid and even coal ignition. It typically consists of two main sections: a lower chamber where you place a combustible material like newspaper or natural fire starters, and an upper chamber specifically for your charcoal. The magic happens once the material in the bottom is lit. As it burns, it draws in ambient air and oxygen from below, creating a powerful updraft. This hot air rises efficiently through the charcoal in the upper chamber, igniting it quickly and thoroughly from the bottom up. Within approximately 15 minutes, your coals will be glowing orange, covered in a light layer of ash, and perfectly ready to be spread into your grill. This method is highly favored because it eliminates the need for lighter fluid, resulting in a cleaner burn and purer charcoal flavor, free from chemical aftertastes.
The Convenient Electric Charcoal Starter
An electric coal starter features a heating coil that you place directly within a pile of charcoal in your grill. To use it, simply arrange your briquettes or lump charcoal into a mound where they will eventually cook, then insert the electric starter deep into the pile. Plug it in, and the coil will quickly heat, igniting the surrounding coals. Once a good portion of the coals are lit and beginning to ash, you can safely remove the starter. While undeniably convenient as it requires no open flame to start, the primary drawback of electric starters is that they only directly ignite the coals they touch. This often necessitates stirring and mixing the lit coals with unlit ones to ensure an even burn across your entire charcoal bed. This extra step can add a little more effort and time compared to a chimney starter, and of course, it requires an accessible power outlet near your grilling area.
The Innovative Looftlighter
For those seeking a high-tech solution, the “Looftlighter” stands out as an intriguing option. This gadget is essentially a powerful electric heat gun designed specifically for charcoal. You simply hold its heated tip directly against the coals arranged at the bottom of your grill. As sparks begin to fly and the coals ignite, you pull the Looftlighter back slightly, allowing the concentrated hot air to circulate and rapidly spread the ignition throughout the charcoal pile. A significant advantage of the Looftlighter is its speed and cleanliness – it ignites coals in minutes without any chemicals or open flames, producing a clean burn almost instantly. However, as I personally have not extensively used this particular tool, I cannot offer detailed personal pros and cons beyond its reported efficiency and eco-friendliness, though its higher price point compared to traditional methods is often a consideration for many grillers.
Step-by-Step Guide: Lighting Coals with a Chimney Starter
Using a chimney starter is a foolproof method that consistently delivers perfectly lit coals. Here’s how to do it:
What You’ll Need:
- A sturdy chimney starter
- Your preferred type of charcoal (briquetts or lump charcoal)
- 4-6 sheets of old newspaper (black and white sections work best) or a few natural fire starter cubes
- A long-reach lighter or kitchen torch for safety
- Heat-resistant grilling gloves (essential for handling hot equipment)
The Process:
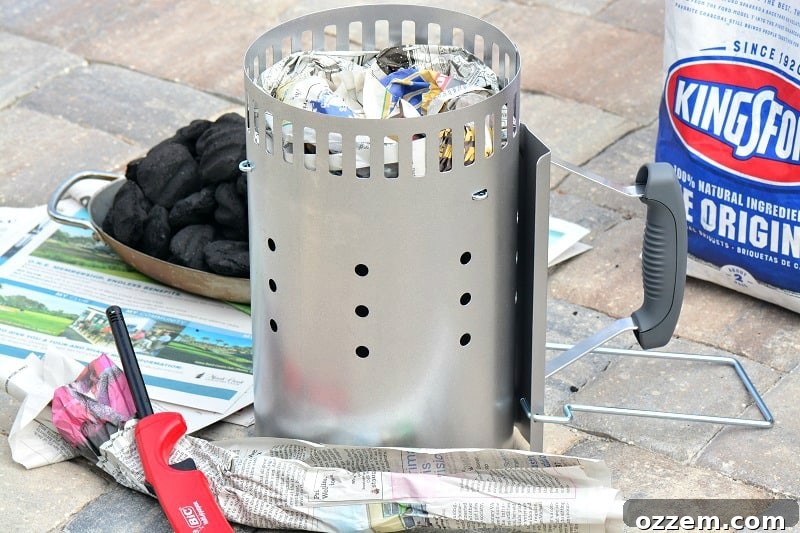
Step 1: Prepare Your Kindling. Take 4 to 6 pages of newspaper. Open them up completely, then roll them lengthwise into loose tubes. As you roll, crumple them slightly, ensuring they aren’t too tightly packed. The goal is to create enough surface area for good airflow and sustained burning. If using fire starter cubes, you’ll typically need 1-2 cubes depending on their size and your chimney starter’s design.
Step 2: Load the Bottom Chamber. Turn your chimney starter upside down. Carefully fit the rolled and crumpled newspaper into a circle along the inner edge of the bottom chamber. Ensure there’s a small gap in the center and between the paper and the chimney wall for optimal air circulation. If using fire starters, place them directly in the center of the bottom chamber. Once loaded, turn the chimney starter right-side up.
Step 3: Position the Starter. Place the chimney starter directly onto the charcoal grate of your grill, where your coals will eventually reside. Depending on your grill’s design, you may need to remove the main cooking grate entirely, or simply lift half of it to make space. The key is to ensure the chimney starter is stable and has direct contact with the grill’s bottom for proper airflow.
Step 4: Add the Charcoal. Now, fill the top chamber of the chimney starter with your desired amount of charcoal. For most standard grilling sessions, filling it to the top is a good starting point. Ensure the charcoal is packed loosely enough to allow air to flow through it but still dense enough to catch fire efficiently.
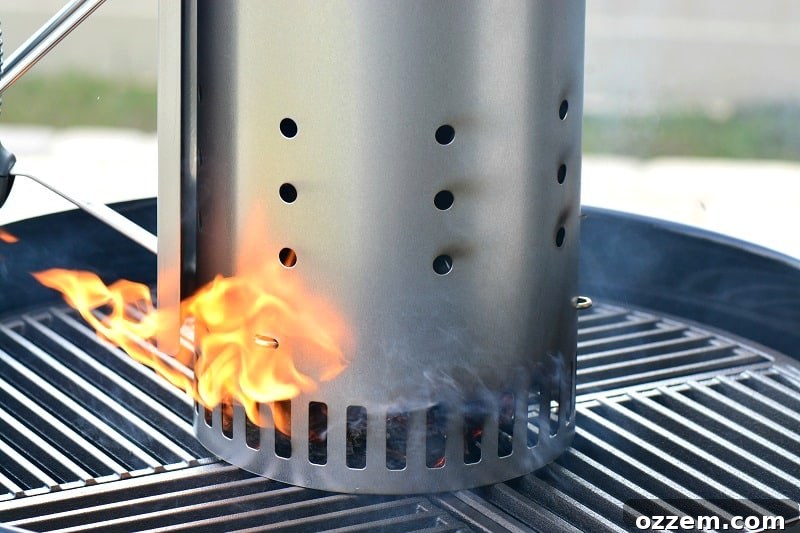
Step 5: Ignite the Kindling. Using your long-reach lighter or kitchen torch, carefully ignite the newspaper or fire starters underneath the chimney. Reach through the air vents or holes at the bottom of the chimney starter to light the kindling in several spots. Once ignited, let the chimney do its work. You’ll soon see smoke, then small flames, and eventually, the coals themselves will start to glow.
Step 6: Monitor and Prepare to Pour. Patiently wait as the coals ignite. You’ll know they are ready when you see the top layer of coals covered in a light grey ash and, often, small flames flickering over the top. This typically takes about 10-15 minutes. Before handling the chimney, put on your heat-resistant grilling gloves – both the chimney and your grill grates will be extremely hot! Be cautious and handle with care.
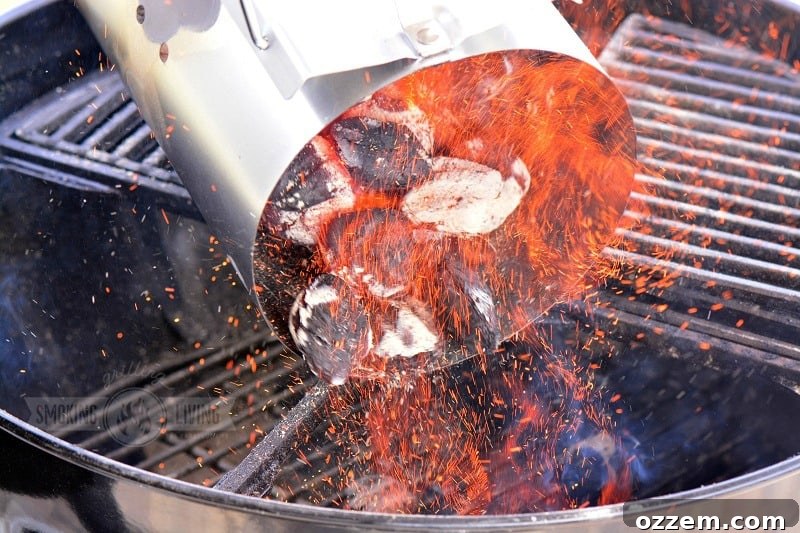
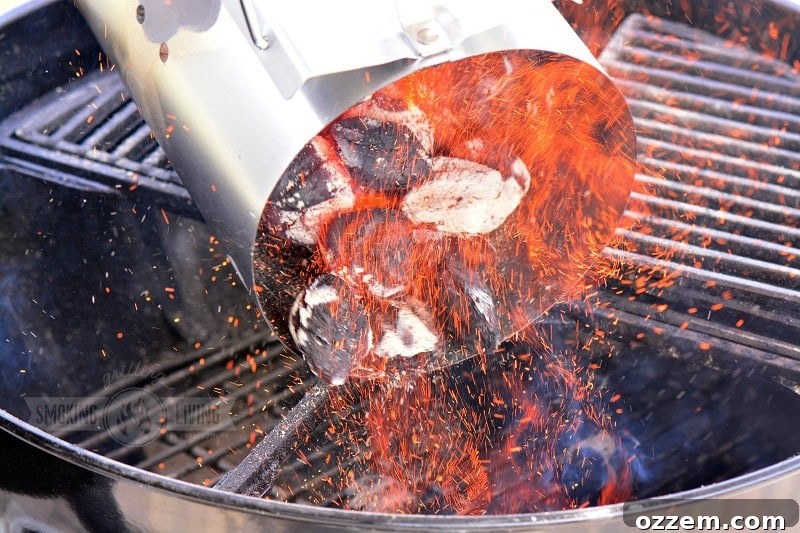
Step 7: Transfer the Coals. Carefully pick up the hot chimney starter by its handle (always wear gloves!) and pour the glowing coals directly into the coal chamber of your grill. Initially, they will form a pile. Allow them a few more minutes to fully ash over, which indicates consistent heat. Then, using long-handled tongs or a coal rake, spread them out according to your cooking needs. You can create a single, even layer for uniform direct heat, or arrange them to establish a two-temperature zone – a highly recommended technique we’ll discuss next.

Mastering Temperature Control: The Art of Charcoal Grilling
One of the most powerful advantages of charcoal grilling, and often the most intimidating aspect for beginners, is the ability to precisely control your cooking temperature. Unlike gas grills with fixed dial settings, charcoal offers a dynamic range of heat that, once mastered, opens up a world of culinary possibilities. Understanding how your charcoal grill works is key to achieving consistent and delicious results.
The Science of Airflow and Heat
At its core, a charcoal grill operates on the principle of controlled airflow. Oxygen is drawn into the grill through adjustable vents located at the bottom or sides. This oxygen fuels the burning coals. As the coals combust, they emit radiant heat, which directly cooks food placed over them, and also heats the air inside the grill. When the lid is closed, this hot air circulates, cooking the food from all sides (indirect heat), similar to an oven. Excess hot air and smoke then exit through adjustable vents or a chimney located on the lid or at the top of the grill.
Vent Control: Your Primary Temperature Dial
It’s crucial to remember a fundamental rule: the more oxygen your coals receive, the hotter and faster they will burn. Conversely, restricting oxygen will lower the temperature. Therefore, your grill’s vents are your primary tool for temperature control:
- Opening the bottom (intake) vents wide allows a maximum amount of oxygen to reach the coals, resulting in a hotter, more intense fire. Simultaneously, opening the top (exhaust) vent wide allows hot air to escape freely, creating more draw and further stoking the coals. Use this setting for searing or quick high-heat cooking.
- Partially closing the vents will restrict airflow, causing the coals to burn cooler and slower. This is ideal for maintaining medium temperatures for general grilling.
- Almost completely closing both vents starves the coals of oxygen, significantly reducing the temperature and extending burn time. This setting is useful for low-and-slow cooking or maintaining a very gentle heat.
Controlling the grill’s temperature with vents can initially feel tricky, requiring a bit of experimentation and practice. A good starting strategy is to experiment by closing and opening one vent at a time – typically adjusting the bottom vents for overall heat and the top vent for regulating airflow and smoke exhaust – until you develop a feel for your specific grill’s responsiveness. Always give the grill a few minutes to react after each adjustment before making further changes.
Building a Two-Zone Fire: The Versatile Technique
Beyond vent control, one of the most effective and versatile techniques for managing heat is building a two-zone fire. This is widely considered best practice for charcoal grilling because it provides distinct cooking areas, allowing for greater flexibility and control over various foods.
To create a two-zone fire, simply arrange all your lit coals on one half of the grill’s charcoal grate. This setup creates:
- A “Hot Zone” (Direct Heat): This is the area directly above the concentrated coals. Here, you’ll get intense, searing heat perfect for achieving beautiful grill marks, caramelizing surfaces, and cooking thinner cuts of meat quickly. Foods cooked here are directly exposed to the radiant heat of the coals.
- A “Cool Zone” (Indirect Heat): This is the area on the other half of the grill, where there are no coals directly underneath. The heat in this zone comes from the circulating hot air within the grill, similar to an oven. This area is ideal for finishing foods after searing, slow-cooking thicker items, warming delicate foods, or cooking items that would burn over direct heat (like whole chickens or roasts).
Using a two-zone fire allows you to sear food for incredible flavor and crust in the hot zone, then move it to the cooler zone to cook through gently without burning, ensuring perfectly cooked and juicy results every time. This technique is invaluable for anything from steaks and burgers to poultry and vegetables.
Grill Maintenance: Cleaning Up and Safely Shutting Down
After enjoying your perfectly grilled meal, remember that a proper cleanup and shutdown routine is crucial for extending the life of your grill and ensuring it’s ready for your next culinary adventure. Don’t let the deliciousness distract you from these important final steps.
Immediate Grill Cleaning
The best time to clean your grill grates is immediately after you’ve removed the food, while the grates are still hot. Food residue is much easier to scrape off when it’s warm and pliable. Use a good quality grill brush (wire or bristle-free, depending on your preference and grate material) to vigorously scrub away any leftover food particles or cooked-on debris from the grates. This prevents stubborn buildup that becomes much harder to remove once cooled, ensuring a cleaner cooking surface for your next session.
Managing Remaining Coals: Reuse or Dispose
When it comes to the remaining coals, you have a couple of strategic options:
- Suffocating for Future Use: If your coals still have a significant amount of burning time left, you can effectively “turn them off” and save them for your next grilling session. To do this, simply close all the air vents (both top and bottom) and securely close the grill lid. A well-designed charcoal grill will create an oxygen-deprived environment, suffocating the flames and stopping the coals from burning. Once completely cool, these partially used coals can be reused; just add a fresh layer of new coals on top for your next cook. This is an economical and efficient way to maximize your charcoal investment.
- Disposing of Spent Coals: If the coals have mostly burned out and only have a little burn time left, or if you simply prefer to start fresh each time, allow them to cool completely within the grill. Close the vents and the lid, and let the grill sit undisturbed.
Safe Ash Disposal
This is perhaps the most critical step for safety. It is imperative to remember that coals can retain significant heat for an extended period, often up to 24 hours, even after they appear to be extinguished. Attempting to dispose of them too soon can pose a serious fire hazard. Always wait until the coals and ash are completely cold to the touch – ideally 24 to 48 hours after grilling, especially if you’re unsure of their status. To properly dispose of the ash and any leftover coal pieces:
- Once completely cold, scoop out the ash and any small unburnt coal fragments from the bottom of your grill.
- Wrap the ash securely in heavy-duty aluminum foil. This adds an extra layer of protection and keeps the fine ash contained.
- Place the foil-wrapped ash into a non-combustible outdoor trash bin. Never put hot or potentially warm ash into plastic bins, paper bags, or near any flammable materials. Concrete or metal bins are ideal.
- Ensure your ash bin is placed in a safe location, away from buildings or anything that could catch fire.
Following these cleaning and shutdown procedures not only keeps your grill in pristine condition but also ensures a safe and responsible grilling practice, allowing you to enjoy the unparalleled taste of charcoal barbecue for years to come.
Deepen Your Grilling Knowledge with More Expert Tips
Ready to explore even more facets of charcoal grilling? Dive into these related articles to further enhance your skills and understanding:
Explore Different Types of Charcoal Grills
Understand the Various Types of Coals for Grilling
Discover the Must-Have Tools for Every Grilling Enthusiast