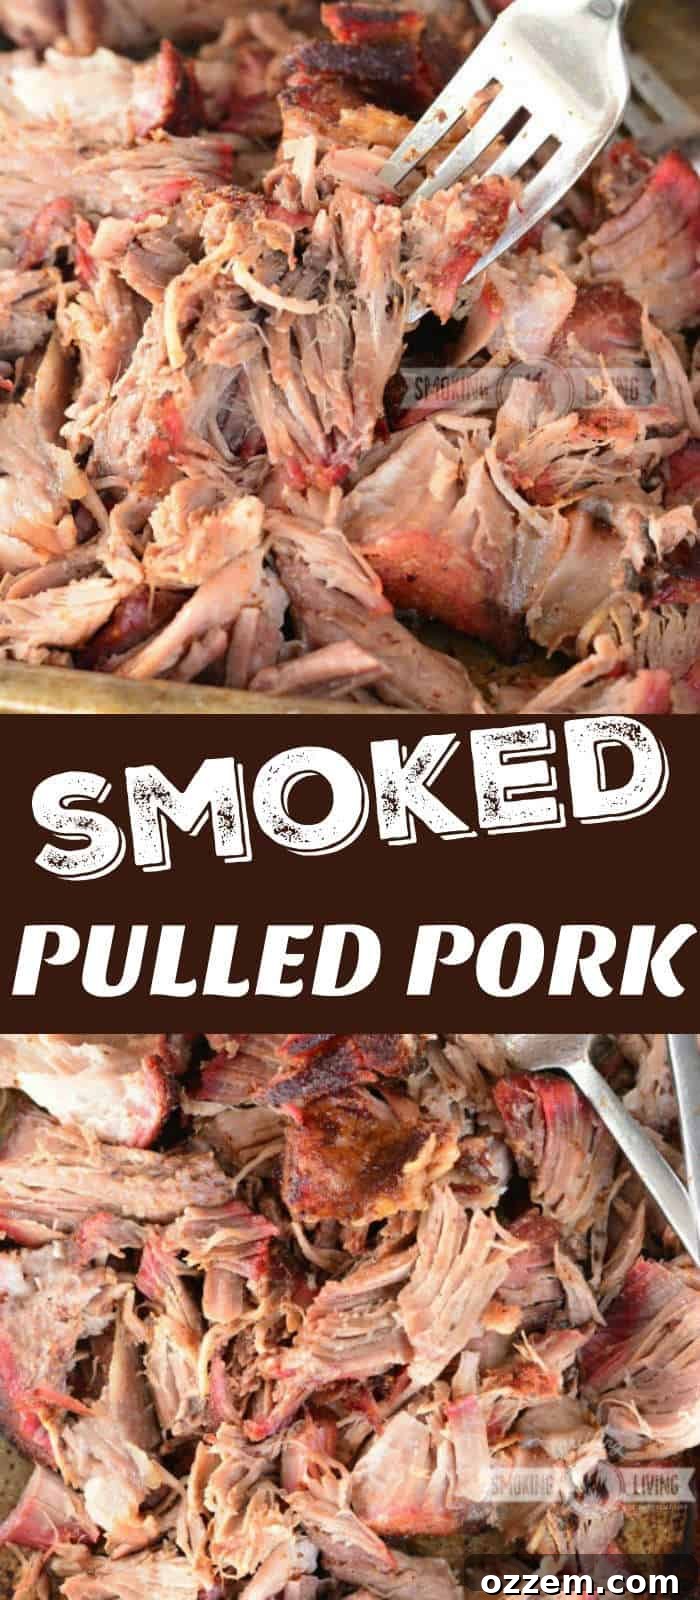
Unleash the ultimate flavor with this incredibly tender, exquisitely flavorful, and surprisingly easy smoked pork shoulder. Prepare to delight everyone with this mouth-watering pulled pork, versatile enough for delicious sandwiches, savory tacos, hearty main dishes, and countless other creative culinary adventures. Discover the definitive method for crafting perfect pulled pork on your smoker, complete with expert tips for achieving the most tantalizing results every time.
Enhance your barbecue feast by adding some Smoked Mac and Cheese to your smoker during the final hour of cooking the pork for an unforgettable side dish.
Mastering the Art of Smoked Pork Shoulder: Your Ultimate Guide to Pulled Pork Perfection
There’s an undeniable magic that happens when meat meets smoke, transforming simple cuts into culinary masterpieces. For me, smoking remains the pinnacle method for preparing succulent meats on the barbecue. The “low and slow” approach to cooking imbues the meat with an unparalleled tenderness and juiciness, creating a sensory experience that tantalizes the taste buds. Beyond the texture, the deep, smoky flavor infused into every fiber of the meat is simply irresistible, elevating each bite to an extraordinary level.
Among the pantheon of smoked meats, pulled pork often reigns supreme. While brisket and ribs certainly hold a special place in the hearts of barbecue enthusiasts, smoked pork shoulder consistently emerges as a crowd favorite. Its universal appeal is evident at any gathering; guests simply can’t get enough of its melt-in-your-mouth texture and rich, savory flavor. The beauty of perfectly smoked pulled pork is its self-sufficiency – it’s so incredibly flavorful that it often requires no additional sauce, though a drizzle of your favorite barbecue sauce can certainly add another layer of complexity.
My journey to perfecting smoked pork shoulder has led me to a simple, yet profoundly effective, two-step seasoning process that consistently delivers exceptional results. This method is the secret weapon for infusing deep flavor and achieving that coveted tender texture. First, the pork is generously seasoned with coarse salt and allowed to rest for several hours, a crucial step for dry brining. Following this, just before it enters the smoker, a robust pork rub is applied, creating a magnificent bark and a complex flavor profile that penetrates the entire cut. This dual-phase seasoning has become my go-to technique, guaranteeing the best-tasting smoked pork shoulder every single time. It’s a surprisingly easy recipe, minimizing potential pitfalls and ensuring a successful outcome, even for those new to smoking. The most challenging aspect will likely be the patience required during the smoking process itself, but trust me, the reward is well worth the wait.
Pork Butt vs. Pork Shoulder: Understanding the Ideal Cut for Pulled Pork
Confusion often surrounds the terms “pork butt” and “pork shoulder,” largely because both cuts originate from the same general area of the pig – the shoulder. The name “pork butt” is particularly misleading, as it does not refer to the animal’s hindquarters but rather the upper portion of the foreleg. Essentially, both are shoulder cuts, but they represent distinct parts: the pork butt (also known as Boston butt) comes from the upper section of the shoulder, higher on the foreleg, while the picnic shoulder (or picnic roast) is the lower part, closer to the leg.
Both pork butt and picnic shoulder are characterized by their tough connective tissues and abundant marbling, making them ideal candidates for slow-cooking methods. Whether you’re using a slow cooker, an Instant Pot, or, as we’ll explore here, a smoker, these cuts benefit immensely from prolonged, gentle heat. This process breaks down the collagen, rendering the meat incredibly tender and succulent. Historically, the Boston butt earned its name from how butchers in colonial New England packed and shipped less prized cuts of pork into barrels called “butts.”
For crafting the ultimate pulled pork, the **Boston butt** is widely considered the superior choice. Its inherent characteristics lend themselves perfectly to this preparation. Unlike the picnic shoulder, which often has a thick fat cap and a less uniform distribution of intramuscular fat, the Boston butt features a more even marbling throughout the muscle. This internal fat melts slowly during the extended smoking process, basting the meat from within and contributing significantly to its tenderness and juiciness. Furthermore, the exterior fat on a Boston butt is typically thinner and more manageable, often requiring minimal trimming before cooking, simplifying your preparation process and allowing you to focus on developing that fantastic smoky flavor.
Essential Smoking Techniques and Considerations for Perfect Pork Shoulder
Achieving perfectly smoked pork shoulder requires attention to a few critical details. These quick notes will guide you through the technical aspects, ensuring your pulled pork turns out juicy, tender, and bursting with flavor.
Optimal Smoker Temperature
Maintaining a consistent smoker temperature is paramount for a “low and slow” cook. The ideal range for smoking pork shoulder is between **225°F and 250°F**. If you’re using a gas or electric smoker, setting it to a steady 225°F is generally recommended. Consistency in temperature ensures that the meat cooks gently, allowing connective tissues to break down without drying out the pork, and facilitates optimal smoke penetration.
How Long Does it Take to Smoke Pork Shoulder?
Smoking duration is often the most frequently asked question, but it’s crucial to understand that **time is merely a guideline; internal temperature is the true indicator of doneness**. For pulled pork, the goal is to cook the meat until it reaches an internal temperature of **203°F**. A general rule of thumb is approximately 90 minutes per pound. However, this can vary significantly due to factors like meat size, shape, fat content, smoker efficiency, and the notorious “stall.” Be prepared for the cook time to potentially extend by several hours beyond initial estimates.
The Best Wood for Smoking Pork
The choice of smoking wood profoundly impacts the final flavor profile of your pulled pork. For pork, I find that fruitwoods and mild hardwoods offer the most harmonious flavors. My personal favorites include **apple, cherry, and pecan**. Apple wood imparts a subtly sweet and fruity smoke, while cherry offers a slightly stronger, yet still sweet, aroma with a beautiful mahogany color on the bark. Pecan provides a rich, nutty, and slightly stronger smoke, falling somewhere between the fruitwoods and stronger woods like hickory. Experiment with these to find your preferred balance.
To Wrap or Not to Wrap: The Texas Crutch Explained
The decision to wrap the pork shoulder in foil (often referred to as the “Texas Crutch”) during smoking is a common debate among pitmasters. As I’ll elaborate further in the “Why Did My Pork Stall?” section, wrapping primarily serves to combat the stall. My extensive testing with both wrapped and unwrapped pork has shown that **the flavor is never compromised by wrapping**. While an unwrapped bark might be slightly crisper, a wrapped one still develops beautifully. My strong personal recommendation is to wrap your pork. This simple step can dramatically shorten cooking times by helping the meat power through the stall, saving you precious hours without sacrificing quality. It locks in moisture and speeds up the cooking process, leading to incredibly juicy results.
Determining When Pork Shoulder is Done
As emphasized, internal temperature is key. For perfectly pullable pork, the target internal temperature is **203°F**. At this temperature, the connective tissues have fully rendered, and the meat fibers easily separate with minimal effort, yielding that signature shreddable texture. If your intention is to slice the pork rather than pull it, aim for an internal temperature between 185°F and 195°F, at which point the meat is tender but still holds its shape for clean slices.

Crafting the Perfect Seasoning for Smoked Pork Shoulder
The foundation of truly exceptional smoked pork lies in its seasoning. My two-step approach ensures deep flavor penetration and a fantastic crust, setting your pork shoulder up for success long before it even touches the smoker. The initial application of salt acts as a dry brine, drawing moisture from the meat’s surface and then reabsorbing it, carrying the salt’s flavor deep into the muscle fibers, resulting in a more tender and juicy final product.
**The Two-Step Seasoning Process:**
- **The Initial Salt Rub:** Begin by generously rubbing the pork shoulder with coarse salt (such as Kosher salt or sea salt) a few hours before applying the full rub. This dry brining step is critical for enhancing flavor and moisture retention.
- **The Flavor-Packed Pork Rub:** Just before placing the pork on the smoker, apply a liberal coating of a well-balanced dry rub. This rub will form the bark, adding layers of savory, sweet, and smoky notes that are characteristic of great barbecue.
**My Signature Pork Seasoning Blend:**
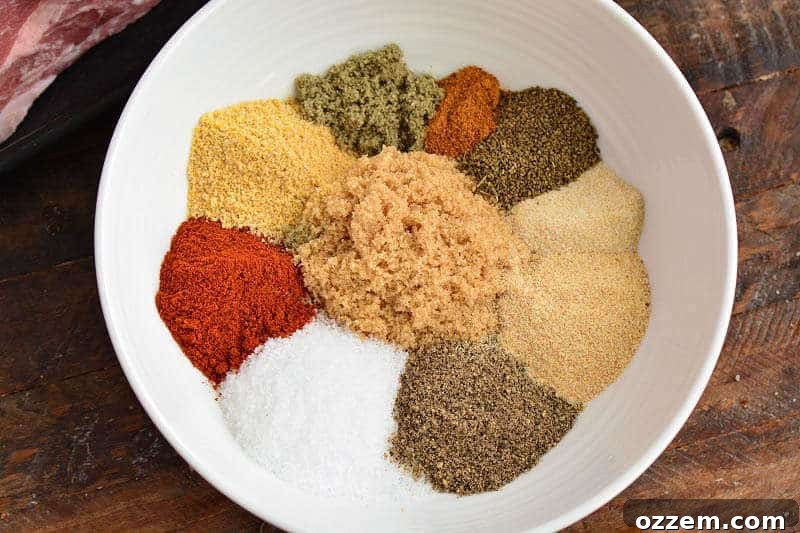
This carefully crafted blend balances sweetness, savoriness, and a touch of heat, perfect for a 5-6 pound pork shoulder. Adjust quantities as needed for different sizes of meat.
- **Brown Sugar:** Provides a crucial sweetness that caramelizes during smoking, forming a delicious bark and balancing other flavors.
- **Salt:** Reinforces the initial dry brine, ensuring the meat is seasoned throughout. (Even after the initial salt rub, a smaller amount in the rub is beneficial.)
- **Black Pepper:** Adds a classic peppery bite and depth.
- **Paprika:** Contributes a vibrant color and a mild, earthy sweetness. Smoked paprika can add an extra layer of smoky flavor.
- **Garlic Powder:** Essential for a foundational savory aroma.
- **Onion Powder:** Complements the garlic, adding another layer of aromatic savory flavor.
- **Ground Celery Seeds:** Offers a subtle, slightly earthy and peppery note that enhances the overall savoriness.
- **Ground Mustard:** Adds a tangy, sharp undertone that brightens the rub and pairs wonderfully with pork.
- **Rubbed Sage:** Imparts a warm, earthy, and slightly peppery flavor, a traditional companion to pork.
- **Cayenne Pepper:** Introduces a gentle heat that awakens the palate without overpowering the delicate smoky flavors. Adjust to your preference for spice.
Note on Seasoning Quantity: This recipe for the pork rub is formulated for a 5-6 pound cut of pork. If you’re working with a smaller piece of meat, it’s wise to set aside any extra seasoning *before* applying it to the pork. Store this leftover rub in an airtight jar, and it will be ready for your next smoking adventure, minimizing waste and ensuring you always have your custom blend on hand.
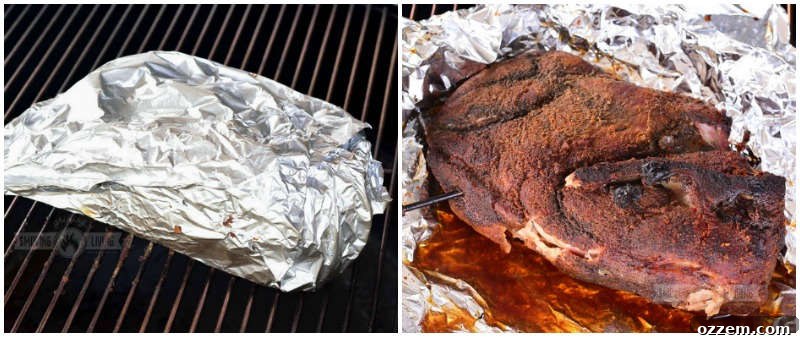
Step-by-Step Guide: How to Smoke a Perfect Pork Shoulder
Smoking a pork shoulder to perfection is a rewarding culinary journey. Follow these detailed steps to achieve incredibly tender, flavorful pulled pork that will impress everyone.
**Phase 1: Seasoning and Preparation**
- The Initial Salt Brine: Begin by thoroughly rubbing your pork shoulder with coarse salt on all sides. Place the seasoned pork in a sheet pan or a roasting dish, ensuring it’s wrapped air-tight (plastic wrap works well, or a vacuum seal bag). Refrigerate the pork for a minimum of 4-6 hours. For convenience, I often perform this step the night before if I plan to start smoking early the next morning, allowing the salt to work its magic overnight.
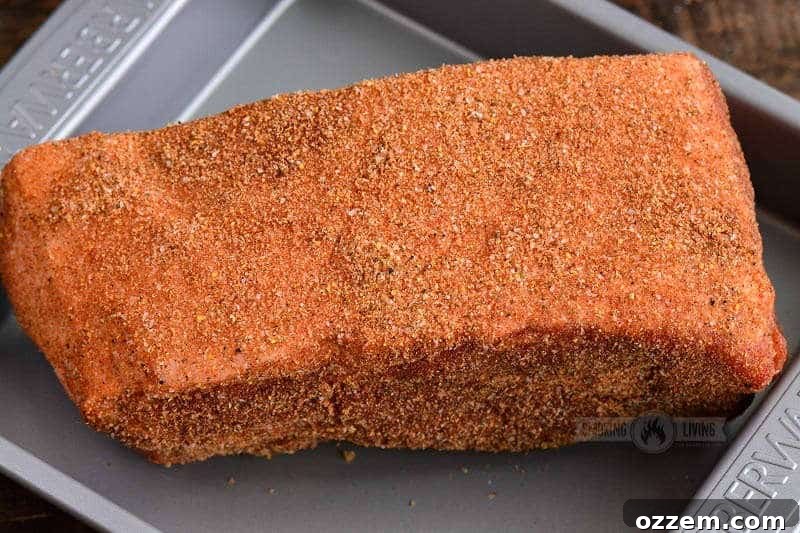
- Apply the Dry Rub: When you’re ready to cook, remove the pork from the refrigerator. In a bowl, combine all the ingredients for your pork seasoning blend (brown sugar, salt, black pepper, paprika, garlic powder, onion powder, ground mustard, ground celery seed, ground sage, and cayenne pepper). Mix them well. Liberally rub this mixture all over the pork shoulder, ensuring every surface is coated evenly.
**Phase 2: The Smoking Process**
- Probe Insertion: Carefully insert a digital thermometer probe into the thickest part of the meat, aiming for the center. Ensure the probe is not touching any bone, as this can give an inaccurate temperature reading. This probe will be your eyes inside the smoker, providing real-time temperature monitoring.
- Preheat and Load the Smoker: Preheat your smoker to a consistent temperature of 225°F. Once the smoker is stable, carefully place the seasoned pork shoulder directly onto the grates. Close the lid promptly to maintain the internal temperature of the smoker. Resist the urge to frequently open the lid, as each time you do, heat and smoke escape, prolonging the cooking process.
- Monitor and Anticipate the Stall: Continuously monitor the internal temperature of the pork via your digital thermometer. You will observe a steady increase in temperature, followed by a plateau – this is known as “the stall.” The stall typically occurs when the meat reaches an internal temperature of around 150°-165°F. You’ll know the meat is in the stall if its temperature stops increasing or even slightly drops for 30-45 minutes or longer.
- The Texas Crutch (Wrapping): Once you identify the stall, it’s time to wrap the pork. Quickly remove the pork shoulder from the smoker, closing the smoker lid immediately to minimize heat loss. Wrap the pork tightly in heavy-duty aluminum foil. It’s crucial to keep the thermometer probe inserted and intact within the foil wrap. Place the wrapped pork back onto the smoker grates. Continue smoking until the internal temperature of the pork reaches the desired 203°F.
**Phase 3: Rest and Pull**
- The Essential Rest: When the pork reaches 203°F, carefully remove it from the smoker. Place the foil-wrapped pork on a cutting board or sheet pan and let it rest for at least one hour. This resting period is critical; it allows the muscle fibers to relax and reabsorb the flavorful juices, resulting in an incredibly moist and tender product. Do NOT skip this step!
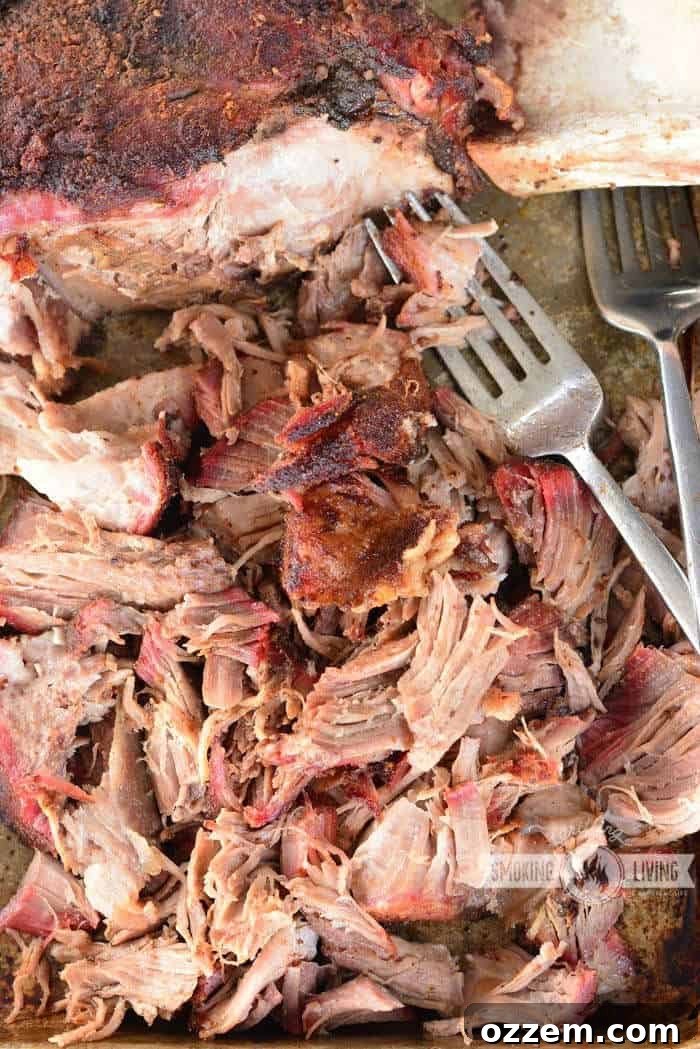
- Pulling the Pork: After resting, remove the foil. Using two forks, begin to pull the meat apart. It should shred easily. Discard the bone (which should slide out cleanly) and any large pieces of excess fat, unless you prefer to keep some fat for added richness and moisture.
- Juice Reincorporation: Gather any flavorful meat juices that have collected inside the foil. Pour these precious juices back over the pulled pork. Gently mix everything together. These reincorporated juices will further enhance the pork’s flavor and significantly boost its moisture content, making for a truly unforgettable pulled pork experience.
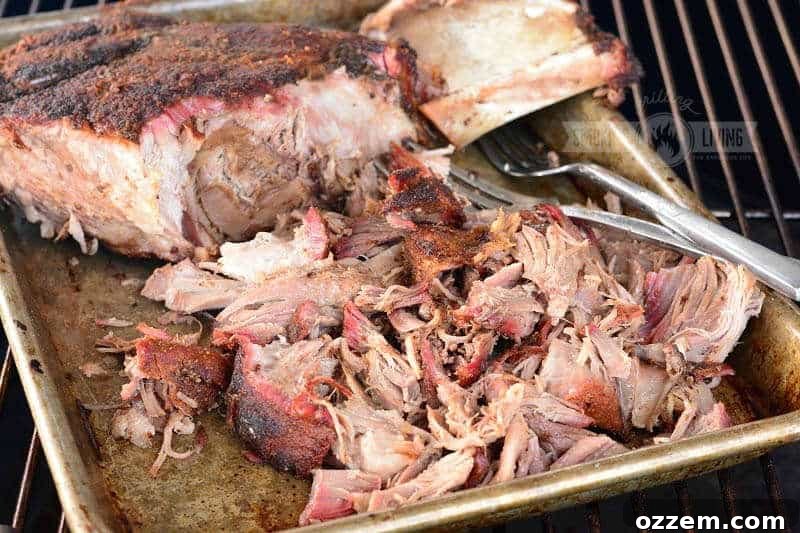
Deciphering “The Stall”: Why Your Smoked Pork Shoulder Plateaus
Ah, “the stall”! This phenomenon is arguably the most notorious, and sometimes frustrating, aspect of slow-smoking large cuts of meat like brisket and pork shoulder. It’s an almost guaranteed event you will encounter, so being prepared for it is key to a stress-free smoking experience. The exact temperature at which the stall occurs and its duration can vary significantly with each piece of meat, highlighting the unique nature of every cook.
You can generally anticipate the stall to set in when your pork shoulder’s internal temperature reaches somewhere between **150°F and 170°F**. You’ll recognize it when your digital thermometer shows that the internal temperature has stopped rising, or is increasing at an incredibly slow pace, often for several hours. This extended plateau can test your patience, but rest assured, it’s not a sign of failure on your part. It’s a natural scientific process at play.
It’s perfectly normal to second-guess your thermometer, perhaps even to give it a frustrated tap! Even seasoned pitmasters, fully aware of the stall, can feel a moment of doubt. So, take a deep breath. You haven’t done anything wrong, and there’s a simple, effective solution to overcome it, leading you to that mind-blowingly delicious pulled pork.
For a long time, the exact cause of the stall was a subject of much debate in the barbecue community. However, scientific understanding now confirms that **the stall is primarily caused by evaporative cooling**. As the meat heats up, moisture (water) within the meat begins to evaporate from the surface. This evaporation process requires energy (heat) and creates a cooling effect, much like sweat cooling our skin. This cooling effect counteracts the heat being applied by the smoker, preventing the internal temperature of the meat from rising until most of the surface moisture has evaporated. If you’re keen to delve deeper into the fascinating science behind this phenomenon, I highly recommend checking out this insightful article. (It’s perfect reading material for those long hours during your next pork shoulder smoke!)
The most effective and widely adopted strategy to battle the stall is straightforward: **wrap the meat in foil**. This technique, affectionately known as the “Texas Crutch,” traps the evaporating moisture, preventing it from cooling the meat and allowing the internal temperature to rise more rapidly. When wrapping, ensure the foil is sealed tightly, and importantly, keep your thermometer probe in place so you can continue to monitor the temperature and guide your cook to perfection.
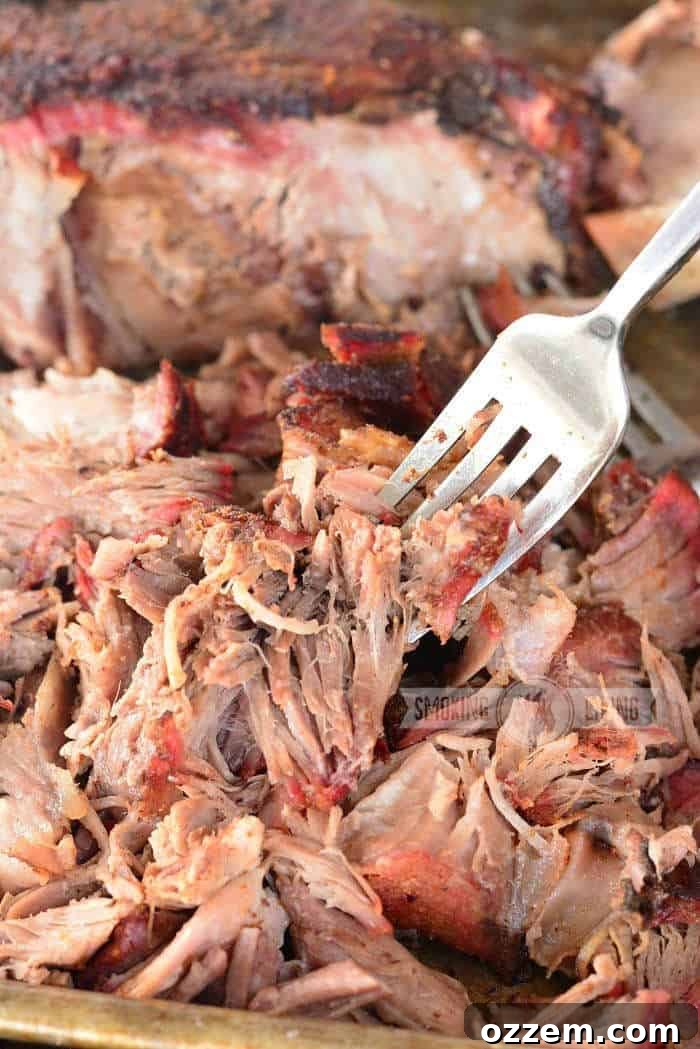
Creative Ways to Serve Your Delicious Pulled Pork
Once you’ve mastered the art of smoking pork shoulder, the culinary possibilities are virtually endless. Pulled pork is incredibly versatile, making it a fantastic ingredient for a wide array of dishes. Here are some wonderful ways to enjoy your homemade pulled pork:
- **Classic Sandwiches:** The most iconic way to serve pulled pork! Pile it high on a soft brioche bun or a sturdy hoagie roll, perhaps with a dollop of coleslaw, pickles, and a drizzle of your favorite BBQ sauce.
- **Main Dish with Sides:** Serve it as the star of your meal alongside classic barbecue sides like cornbread, baked beans, potato salad, or our smoked mac and cheese.
- **Tacos and Tostadas:** A fantastic option for a Tex-Mex twist. Load tortillas with pulled pork, your favorite salsa, avocado, pickled onions, and a squeeze of lime for a burst of fresh flavor.
- **Nachos Supreme:** Layer tortilla chips with pulled pork, melted cheese, jalapeños, sour cream, and guacamole for an unforgettable appetizer or game-day snack.
- **Loaded Baked Potatoes:** Stuff a fluffy baked potato with pulled pork, cheese, green onions, and a dollop of sour cream for a hearty and satisfying meal.
- **Breakfast Burritos or with Eggs:** Who says pulled pork is only for lunch and dinner? Incorporate it into breakfast burritos or serve it alongside scrambled eggs for a savory morning treat.
- **Flautas or Taquitos:** Roll seasoned pulled pork into small corn tortillas, fry until crispy, and serve with dipping sauces for a fun, handheld snack.
- **Quesadillas:** Layer pulled pork and cheese between two tortillas, grill until golden brown, and cut into wedges.
- **Pizza Topping:** Get creative and use pulled pork as a unique and delicious topping for your homemade pizzas, perhaps with a BBQ sauce base and red onions.
- **Chili or Stew:** Add leftover pulled pork to your favorite chili recipe or a hearty stew for an extra layer of smoky flavor and texture.
Discover More Irresistible Smoked Recipes
If you’ve fallen in love with the art of smoking, there’s a whole world of delicious possibilities waiting for you. Here are some more easy and flavorful smoked recipes to expand your barbecue repertoire:
Smoked Chicken Drumsticks
Whole Smoked Chicken
Smoked Sausage
Traeger Smoked Beef Ribs
Smoked Pork Loin with Apples
Smoked Pork Belly Burnt Ends

If you’ve tried this incredible smoked pork shoulder recipe or any of my other dishes and shared them on Instagram, don’t forget to tag me @grillingsmokingliving and use the hashtag #grillingsmokingliving so I can see all your amazing culinary creations!
Connect with Grilling Smoking Living for More Recipes and Tips!
Stay updated with my latest grilling and smoking adventures by following me on social media. Never miss out on a new recipe or expert tip by clicking the links below!
PIN THIS RECIPE FOR LATER!

Smoked Pork Shoulder
Print Recipe
Pin Recipe
Ingredients
- 4-5 lb bone-in Boston butt
- 2-3 tbsp coarse salt or sea salt
Pork Seasoning:
- 1/4 cup brown sugar
- 2 tbsp paprika
- 1 tbsp coarse salt
- 1 tbsp black pepper
- 2 tbsp garlic powder
- 1 tbsp onion powder
- 1 tbsp ground mustard
- 1/2 tbsp ground celery seed
- 1/2 tbsp ground sage
- 1/2 tsp cayenne pepper less or more if you wish
Instructions
Seasoning Pork:
-
Rub pork with coarse salt all over, wrap it air-tight, place it in a sheet pan or a roasting dish, and refrigerate for 4-6 hours. (I often do this right before I go to sleep at night, if I plan to smoke pork first thing in the morning.)
-
Combine all the ingredients for pork rub in a bowl and mix well. Use a spoon to get seasoning out of the bowl to season pork.
-
When you’re ready to cook pork, take the pork out of the fridge and rub it with pork seasoning.
Smoking Pork:
-
Insert a digital thermometer probe towards the middle of the thickest part of meat. Make sure the probe is not touching the bone.
-
Preheat the smoker to 225° and place the meat on the smoker. Close the lid and do not open it unnecessarily.
-
Monitor the temperature of the pork through the thermometer probe. When you notice a stall, which is when the temperature of meat stops increasing, you will need to take the pork off and wrap it. (Stall usually happens around 150°-165°F)
-
Quickly take the pork off the smoker and close the lid so the temperature doesn’t go down. Wrap pork tightly in foil (with the thermometer probe intact) and place it back on the smoker.
Continue to smoke until the internal temperature reaches 203°F.
Rest:
-
Take it off the smoker and let it rest for about an hour. Take the foil off and use two forks to pull the meat apart. Discard the bone and excess fat (unless you want to keep the fat.)
-
Save the meat juices left inside the foil and pour it back into the pulled pork. Mix it all together. The juices will add flavor and a little moisture to the pork.
Notes
Nutrition